

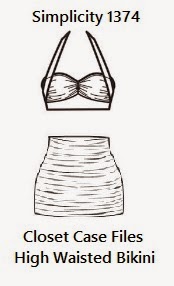
For my top I used Simplicity 1374, View B. I cut and sewed a straight size 16 with zero alterations... besides the addition of cups (more on those in a moment). It's a great little pattern that took me just over two hours to sew up. I picked up my swimwear elastic and cups from the local big box fabric store. I used 3/8" wide elastic for the edges-- if you happen to sew up this pattern, the back of the envelope says to use 1/4", it should read 3/8" since the seam allowances are 3/8". I stay away from regular elastics because they will deteriorate quicker in salt water and chlorine. But I must confess I will likely not actually swim in this bathing suit, it's a sitting on the beach under an umbrella one... so I whipped out some regular 1" wide elastic for the underbust because I didn't buy any swimwear stuff this size. Aww geeeez!


 |
| These are the rock hard cups I used, they aren't THAT bad |
This bikini top provides medium support between the wide underbust elastic and with the cups I've added. Read: I'm not jogging along the beach with this on, just sitting and sipping on an umbrella'd beverage. Bra cups give me more modesty as well. For the cups, I simply slid them between the main and lining fabrics before sewing the two parts together. I would normally zig zag sew them in place on the lining but these particular cups are freakishly firm and a sewing machine wouldn't approve sewing through them. You can see how I sewed in bra cups on another bathing suit right here a couple years back... those cups were soft and flexible making them easy to sew in.

Here are photos of both the inside and outside of my bikini top. I tried to make the cup easy to see. It's not uncommon to have cups not sewn in ready-to-wear bathing suits because they are often removable. Mine are permanently inside there, I'd absolutely lose them if I could take them out.

I wanted a tad more support for the top so I took the neck straps and sewed them in a criss-cross style. This helps hold the whole thing in position a little better, plus it just looks cute! Now let's talk about those high-waisted bikini bottoms. I prefer a bit more modesty on my lower half so the Closet Case Files Bombshell Bathing Suit is exactly what I need. I've made the full length swimsuit from that pattern two times already, so my pattern was cut and ready to rock for this ensemble. My waist is halfway between a 12 and 14 and my lower hip, rear, thigh region a 16. I lengthened it by 1 1/2" overall (the main fabric is lengthened by about 2 1/2" because it's ruched, the lining is 1 1/2" only.)


I sew a lot with 4-way stretch knits for activewear and sewing bras & lingerie. Whenever I need to baste I will use a medium to small zig zag stitch (above-left pic). Patterns often don't mention this and show a straight basting stitch. When I go to put on a close fitting garment like this, I will here popping stitches and the seams will be restricted with a straight basting stitch... zig zag basting solves that problem for me. The above -right pic shows both the inside and outside of my 3/8" elastic stitch on the finished edges. Notice on the inside (with the black lining showing) there are 3 lines of zig zags-- one is the basting, one is the initial zig zag stitch attaching the elastic and the last one is the final zig zag stitch. All you see is the one line of stitches on the correct side of the finished garment.
This is a great technique if you only have a regular sewing machine or don't feel like breaking out the serger. Otherwise I will often use my serger to attach the elastic followed by a either a zig zag stitch or a twin needle to finish. I like to disengage my serger blade, dropping it down in the lowest position, while attaching the elastic--- this will prevent the elastic from getting cut if I get too close.
If you're new to sewing knits or four-way stretch stuff like this, I cannot stress how wonderful a walking foot is when using a regular sewing machine. It's on my machine almost all the time, along with my ball point or stretch needles. It evens out the pressure placed on the fabric as it runs under through the machine, preventing nasty puckering and stretching.

Anyone else sewing up a bathing suit this season?! I want a sporty one with a rash guard and swim shorts for splashing in the blow-up kiddie pool in the yard with my son... and will likely get one made up in the coming weeks. Just need some warm days and sunshine now.
Happy Sewing!!
Love it!
ReplyDeleteThis is adorable. Great job, Kathy!
ReplyDeleteI really like the workmanship with this swimsuit Kathy!!!
ReplyDeleteYou look great in the suit! I love the high waist on this pattern-- not too much midriff showing. Modest yet stylish! Perfect for a fun day at the beach.
ReplyDeleteThis comment has been removed by the author.
ReplyDeleteHello Kathy. Great job on the suit!
ReplyDeleteI have the pattern too. How did you keep the fabric from puckering when you sewed the elastic the second time in between the cups on the outside of the top? I hope that makes sense to you.
Thanks!