Do you ever sew projects that are seasonally inappropriate? That's where I'm living today. There's literal snow on the ground, the winter winds are making our mild days icy and I reach for...linen?!
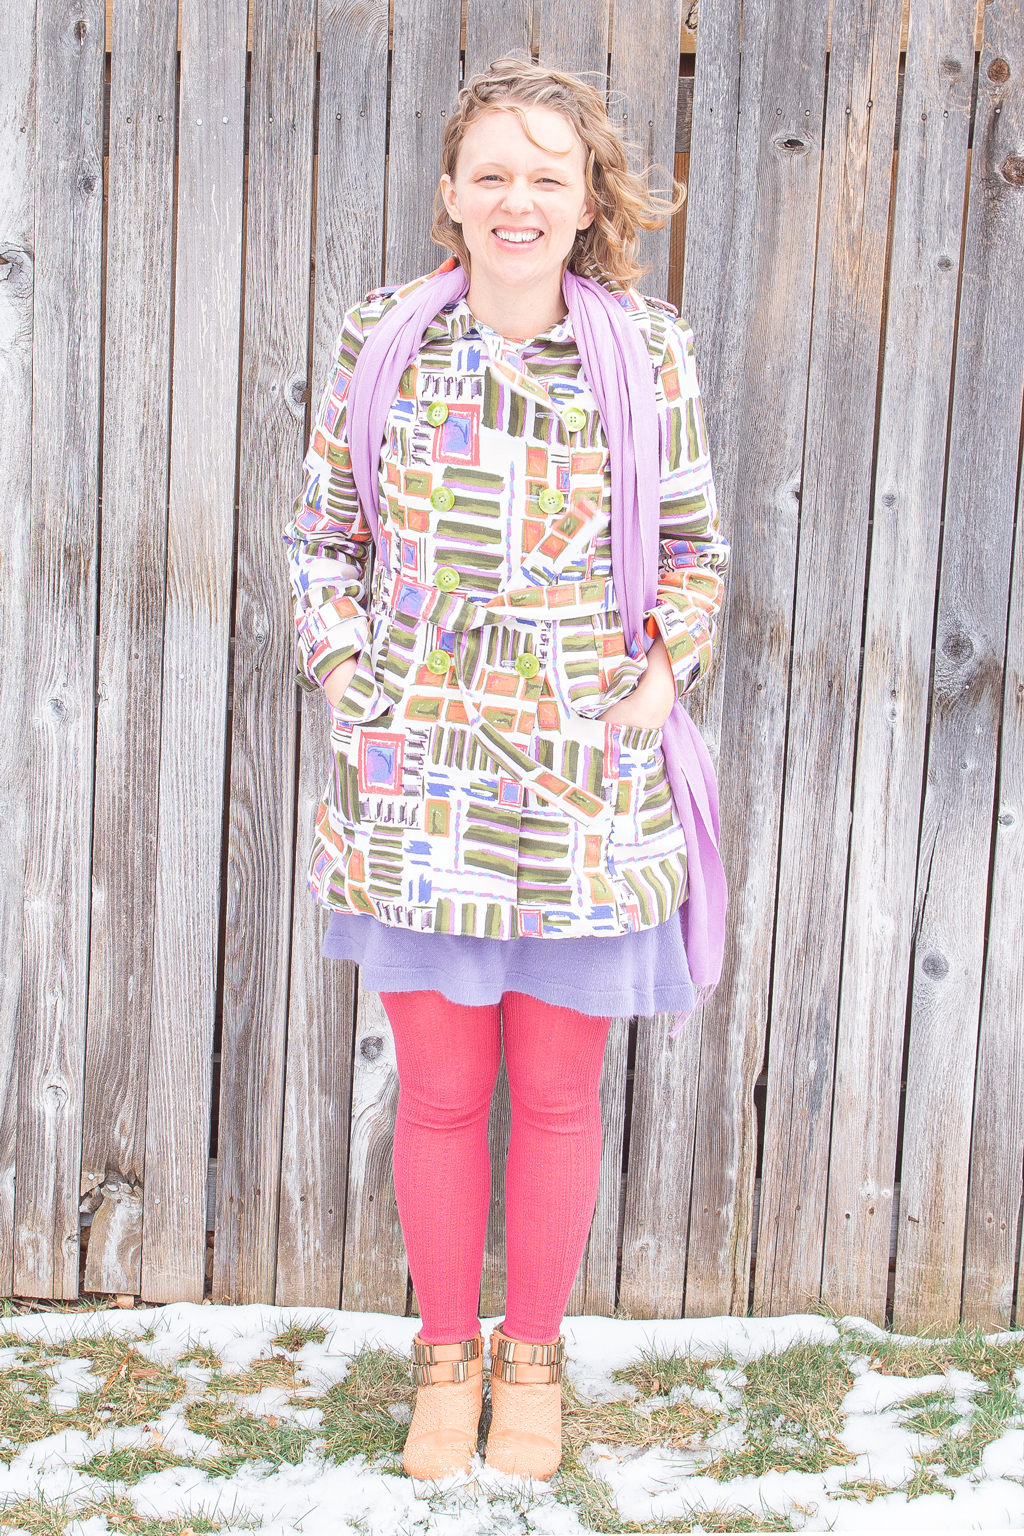
Seems crazy, but when I saw this linen/cotton print, I had visions of a happy trench coat snow be danged.
I'm quite a fan of making jackets in general (like my favorite silk jacket here), and trench coats have a special place in my heart. As I was planning this one, I went through my closet and realized this would be trench coat #5--all different styles, all widely different fabrics from a sheer embroidered organza to a linen appliqued trench coat to one made from crazy patchwork upcycled denim. But trench coat I can't quit you with all your lovely buttons and luxurious lining.
So trench #5 it would be for this project!
So much interfacing
When this delicious linen arrived, I noticed it was a little lighter weight than other linen/cotton blends I've worked with. I think this fabric would be excellent for a cool shirtdress or a nice flowy skirt. It has a good drape to it that would be perfect for just such a thing. This print has so much personality in the best possible way.
As a general rule it's best to let fabric be what it wants to be, but sometimes you can cheat a little and win big time.
In this case, to make this fabric work for a trench coat, I knew interfacing would be the key. The interfacing would beef up the fabric for a good popping collar, cut down on some of the inevitable wrinkling that happens with linen and add a little extra warmth to boot. I gotta say I was totally shocked after finishing this whole project that I was pleasantly warm on a 45 degree day (until the winds started up!).
To start out, I fused all of the pieces with a lightweight tricot fusible. It's a great base for stabilizing everything and it's my go-to interfacing for most projects.
To bring the linen into jacket land, I added
Perfect Fuse Medium weft interfacing to the collar, belts, epaulets and facings as well as the center front pieces. The open weave and soft feel of this interfacing is perfect for the linen. It seemed lightweight when I pulled it out of the package, but it surprised me with how much structure it added.
The one piece of advice I'll say with this interfacing is to be sure to use a press cloth. There were a couple times I didn't have my iron completely covered with my press cloth, and I ended up with fuzzy remnants of the interfacing gooing up the whole thing. Busting out the iron cleaner now...
To finish off the interfacing, I also added bias cut wigan. It's a sew-in tape and it adds a lot of stability for hems. This stuff is great in coats for helping you get a crisp hem that hangs well. This was my first time bagging a lining with wigan in the hems, and I don't think I'll ever not use it for jackets and coats. These hems are so delightfully snappy crisp.
Pattern
For this trench I used Ottobre 2-2014-20. It's the same pattern I used for my sheer embroidered organza trench, and the details are lovely. The deep pockets and double breasted style make for a cozy coat, and the gigantic proper collar I swear the best defense against biting winds.
The one thing I'll say about this pattern is that the directions are not that great. Ottobre usually does well as far as directions go, but a trench coat has too many steps for their brief but clear style of pattern directions. If you want to try this pattern and you've not had a lot of experience sewing jackets, I would definitely recommend a good reference book like
Tailoring the Classic Guide to Sewing the Perfect Jacket for getting through all the tricky bits.
Switching up the pockets
Cutting this coat was tight in the layout, and I knew there was no chance of being able to match the fabric for the kind of "where's the pockets" perfectly matched patch pockets I like to sew.
But coats without pockets are sad indeed. Instead, I opted for welt pockets with flaps. Inside the pockets I was even able to use up the last remnants of some cotton that I shibori dyed. I had so little of that fabric, that I faced the backside of the welt with a strip of the outer fabric. That bit of purple makes me happy even though nobody will ever see it! I'm even more happy that I got to use up literally every last scrap of that fabric. When you dye your own fabric, having put in the effort, it becomes more precious.
I'm still debating if I want to add buttons to the flaps. I have 4 of the smaller size of these fabulous vintage buttons I found on Etsy.
Shoulder pads and lining
Digging into my lining stash, I found 2 colors that I really liked: a lilac and an orange. Seeing as I like colorblocking, I decided to use both.
Between the front facing and the lining, I added in a little bit of piping with a poly cotton.
My favorite inside detail are the shoulder pads I made. Traditional shoulder pads don't work well for me. I have relatively square shoulders from my life as a violinist, so I can usually skip shoulder pads entirely. Yet, they do add a nice smoothness that is quite nice.
For a minimal but still there shoulder pad, I made my own shoulder pads from fusible fleece. I've been doing this for years with a free pattern that used to be available (alas no more) from Brian Sews.
Basically you stack up little half-ovals of fusible fleece of various sizes over a tailor's ham and press them into shape. You can either turn the bottom layer over so the fusible side is up, or you can fuse it straight to a piece of lining as I did here. Add a quick layer of lining over the top, and serge the edges, and you have some perfectly matched shoulder pads. Again it's a nobody will see it but I'm glad I know it's there kind of detail.
Though this was a chunk of a project, I'm so delighted with the final project. This is just the kind of coat I know I'm going to love during Sprinter--that weird season in Colorado that's ever moving between Spring and Winter where we might have mild temps with insane winds followed by snow the next day.
This is a bittersweet post for me as it will be my last. It's been a joy and an honor to be part of the Fabricista team, and I sincerely thank all of you who have stuck with me the past couple years. From my family to yours, I hope you have a very blessed and Merry Christmas, and here's to hoping that 2021 will bring some joy to all of us. Be sure to check out Elizabeth Made This for all that I'm up to in helping you get creative with your sewing.




I'll miss you, Elizabeth ! Your posts were some of my favorites and I love your style !
ReplyDeleteThanks so much! It's been a privilege to be here!
Delete