
Made by a Fabricista: Happy Fri-YAY Clothes!

Just like the rest of the world, I love Fridays! I get to wear more casual clothing to work and I daydream about what I am going to sew! For this month's post, I wanted to make a casual Friday outfit. I didn't want just any jeans but some sort of dressier ones--does that make sense? I also wanted a breezy top that was somewhat dressy as well but in some super awesome fabric.

So here is my outfit:


I choose to use the StyleArc Katherine Pant.  The legs are what drew me to the pattern--not skinny but also not too wide and those slant pockets are cute.  I knew they were just what I wanted to go with this amazing denim.  

See Fabric Mart's Denims HERE


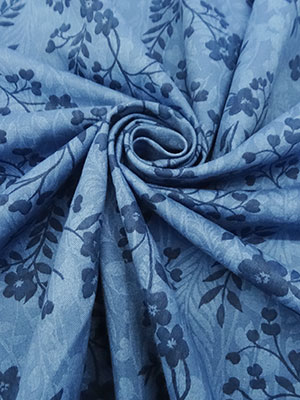
This denim is the perfect weight for these pants and actually, it would work equally well for a shirt dress, jacket, or a structured top.  I love that it is printed and the floral design is right up my alley!

Katherine Pant - Straight leg tailored pant with seam detail

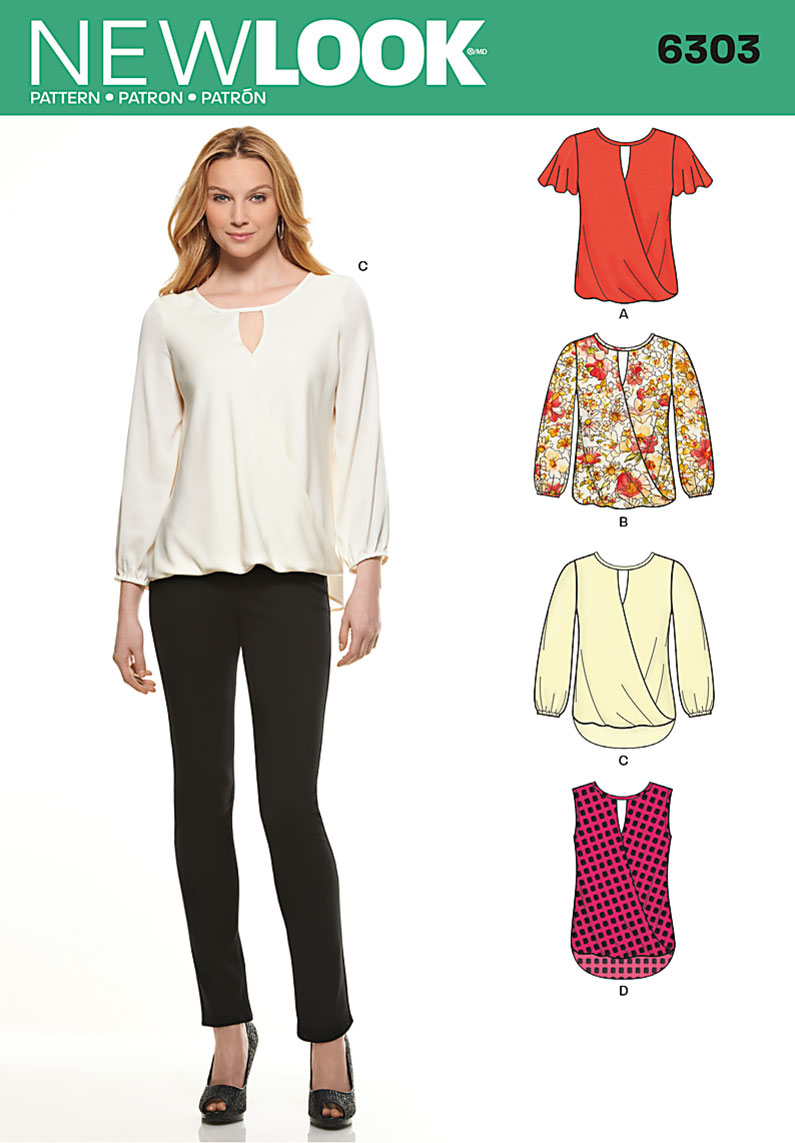
For my top, I used a New Look Pattern that I've tried before and love.  It is easy to put together and I thought the texture of the fabric with the draping would be very nice and I am happy with the result.   


I've always had issues with upper back leg bagginess.  After quite an extensive search, I found a link that talks about reducing that by equally lowering the bottom of the back crotch and also at the waistline.  You redraw the crotch to compensate for the lower seam line and then stretch the crotch seam to fit the front leg.  


You can kind of see what I did above.  Sorry I didn't take a before photo!  Stretching the inseams so that matched wasn't difficult at all.  


I think this technique worked well but when I use it again, I am going to try a 1/4" rather than a 1/2" adjustment.  I may have gone slightly overboard with the 1/2"!


For the top, I used a favorite New Look pattern.  I love the sort of twisted front and the split 
neckline.  

Image result for Images New Look 6303

I made view C.  


This fabric is from Halston.  Do you shop the designer fabrics?  This fabric is just so pretty and fun to work with.  


I used a single-layer for the sleeves, and a double layer for the front and back.  


I matched up the 'plaid' lines on the layers so it didn't blur the design.  


See the wonderful texture in the fabric?  


I enjoyed creating this outfit and now need the weather to warm up so I can celebrate a casual Friday in my new outfit!

Thanks so much for reading!
Sue from Ilove2sew!


Comments

  1. Very nice Sue! I recognized the shirt pattern immediately. Great job!

    ReplyDelete
  2. Beautiful job, and your makes look lovely on you. Especially nice is how you have chosen fabrics that compliment your pattern choices.

    ReplyDelete
  3. Love the outfit. Esp. the denim. Where did you find the info on removing the baggies in the bag leg? I have that problem too. Please share.

    ReplyDelete
  4. I too would like to know where you found the guidelines for removing bagginess in the leg. I rarely am able to find a commercial pant that fits properly in the legs; I am also short. I can handle the adjustments for being short, but it only adds to the improper fit throughout the leg.

    ReplyDelete
    Replies
    1. I found that tutorial at Closet Case files. It is very helpful. Click on the jeans fitting and I believe it is tutorial #5. I hope it works for you ladies!
      Sue

      Delete

Post a Comment

Thanks for leaving a comment! All comments are reviewed before posting to help us eliminate spam. Your comment will be posted within 24 hours.

Popular Posts You Might Like

Week 4: Jeansmaking- What They Made

This is it, the final round! And we certainly did not go easy on our three remaining contestants this time. This round they had to make their own pair of well fitting jeans. I think they all did an absolutely outstanding job! Take a look what these ladies accomplished & be sure to vote for your favorite! (Link at bottom of post.) And, don't forget to show us your me-made jeans on Facebook or Instagram. Details at the bottom of this post. Danesha from  Classyfied Life So first I must say that this entire challenge has been just that...a challenge! Two weeks ago there was hurricane Irma and I was blessed enough to not lose power and then I went out into the aftermath to capture some photos of my submission. Then two weeks ago I had a big trip planned so I had to do EVERYTHING  in two days . Then the BIGGEST challenge of all...THIS week! I got the challenge and I was super excited to have an extra few days and then before I could even get started I ended up in the eme

Made By A Fabricista: A great tee shirt pattern – or three!

Hi fellow sewists! It’s Andrea  @happy.things.here and I’m here today to talk tee shirts!  I love a good tee pattern…or two…or four. Despite having more than enough of them in my pattern collection, I’m always up for trying a new one. And I also have my favorites and tried and trues (TNTs). I love the versatility of a good tee pattern – dress it up with fancy fabrics to make a work wardrobe piece, use a high quality solid to add some basics, or anything in between. Today I’m sharing three patterns I’ve used multiple times and with many different kinds of fabrics - all a little different and all great beginner patterns too. First up is the newest addition to my pattern collection – the Upland tee and crop top by Rivet Patterns. They are a newer designer who I recently discovered when this tee pattern caught my eye. I love that it has multiple bodice options including a classic design tee and also a crop version with different separate and uniquely shaped bodice pieces. I first made the

Made By A Fabricista: Dreamy Florals | A DIY Dress Inspired by Son de Flor's Spring Collection

Hi everyone!  When I saw this floral print linen/cotton blend make it’s way onto the to-be-described table I knew I had to make a dress from it.  I’d been staring dreamily at all the dresses from the brand Son de Flor who had just put out their spring collection and thought, maybe I can throw together something inspired by them!  I grabbed three yards of that floral shirting and a yard of SWC5682w to line the bodice with.  I used Simplicity’s S8946 for its simple bodice block.  This pattern has a gathered rectangle for the skirt, but I’m a sucker for a circle skirt so that’s where I decided to start.  I folded the fabric twice and cut out the longest circle the fabric would allow.  Then got to work on the bodice, sewing up the darts and attaching everything. Now, I don’t love installing zippers.  I ha d a lot of trouble getting them to sit right, and no matter how much mental gymnastics I do when first pinning one side is always put in the wrong way.  So while I did have to unpick and