
Made by Fabricista: Floral Scuba Knit Jalie Adele Dress

Hi, all!  I hope your summer has been good so far, and that if you are sweltering in the heat (most of us, right?), that you are cooling off somewhere!

I decided that for July I would make a fun frock that could go with me multiple places.  I wanted it to be loose enough to be comfortable, but not so unfitted that it was unflattering, and I desired a piece that was unique in construction as I really enjoy the sweet details that sewing your own clothing can afford you.


I knew right away this scuba knit from Fabric Mart would be my perfect fabric (sold out, but check this scuba knit out, or possibly this green dotted shirting, which is technically closer to the kind of fabric Jalie actually wants people to use when making this pattern).

When I received the fabric, I was immediately in love, as its pretty florals combined with a nice weight of fabric are utterly perfect for my lifestyle.  I do think it is a touch warm for days like we have had here in the United States, but not so warm that it is unwearable in summer generally.  In fact, I know that I can also wear it in winter with a long sleeve tee and tights underneath.

The fabric reminds me a whole lot of one of my most favorite dresses I have ever made, another scuba knit (also purchased from Fabric Mart!).  That one has the same weight and feel, and with its resiliency (no snags or fading), it looks the same today as it did when I first made it.

Picking the pattern was a little harder than picking the fabric.  All I knew was that I wanted pockets and a dress with a fuller skirt for ease in the heat.  I initially wanted to make McCalls 7712, which is your basic shift style dress with pockets built into the princess seams, and extra ruffles here and there for extra flair.  I would have made view B as the ruffles were a bit too ruffly for me and this fabric, and nearly started cutting...

But then Fabric Mart received a whole huge shipment of new Jalie patterns and I literally swooned over the Adele top (now sold out, but maybe they will get more?).  Of course the only issue was that it was a top and not a dress, but since it showed a view that was a tunic with pockets, I figured all I needed to do was lengthen the tunic to dress length and I'd be set.  (And I was set--but one small exception will need to be made to perfect the fit even more for the next time I make this dress.  I drew the hemline eleven inches longer than the tunic length, but in doing so I widened the front too much so that the pockets now draw to the back a bit and don't feel as comfy as pockets normally do.  So I'll add width in the back as I love the skirt's fit, and take off some of the swing from the front, so the pockets will be more forward.)

I made this dress in a size T at the bust, U at the waist, and graded out to a Y at the hips so I could get the excess ease I desired (I normally grade out to a V or W).  That grade was tough to draw out, as I wanted at Y before the pockets started, and while it worked, it is more swingy that I believe Jalie intended this pattern to be.  (And one reason I think the self belt works so well with it!)

Speaking of the belt...it is attached at the back and either can be drawn up to the front and used as a front belt, or drawn to the back and be a back tie.  Above you can see the dress with it drawn to the back.  It looks like the dress has a natural curve at the waistline, but it is all the effect from the belt.  (The first two photos in the post are with the belt drawn forward, btw.)

You can see the self-belt best here in the side shot.  It also shows just how cool the ruffled sleeves are!  I can see why they recommend lighter weight wovens, but I do like how they look in the scuba knit, too.  I would think heavier weight wovens would be too stiff, and I shudder at how tough it would be to sew these sleeves in a sheerer jersey knit, but something stable and knitted seems to work just fine!

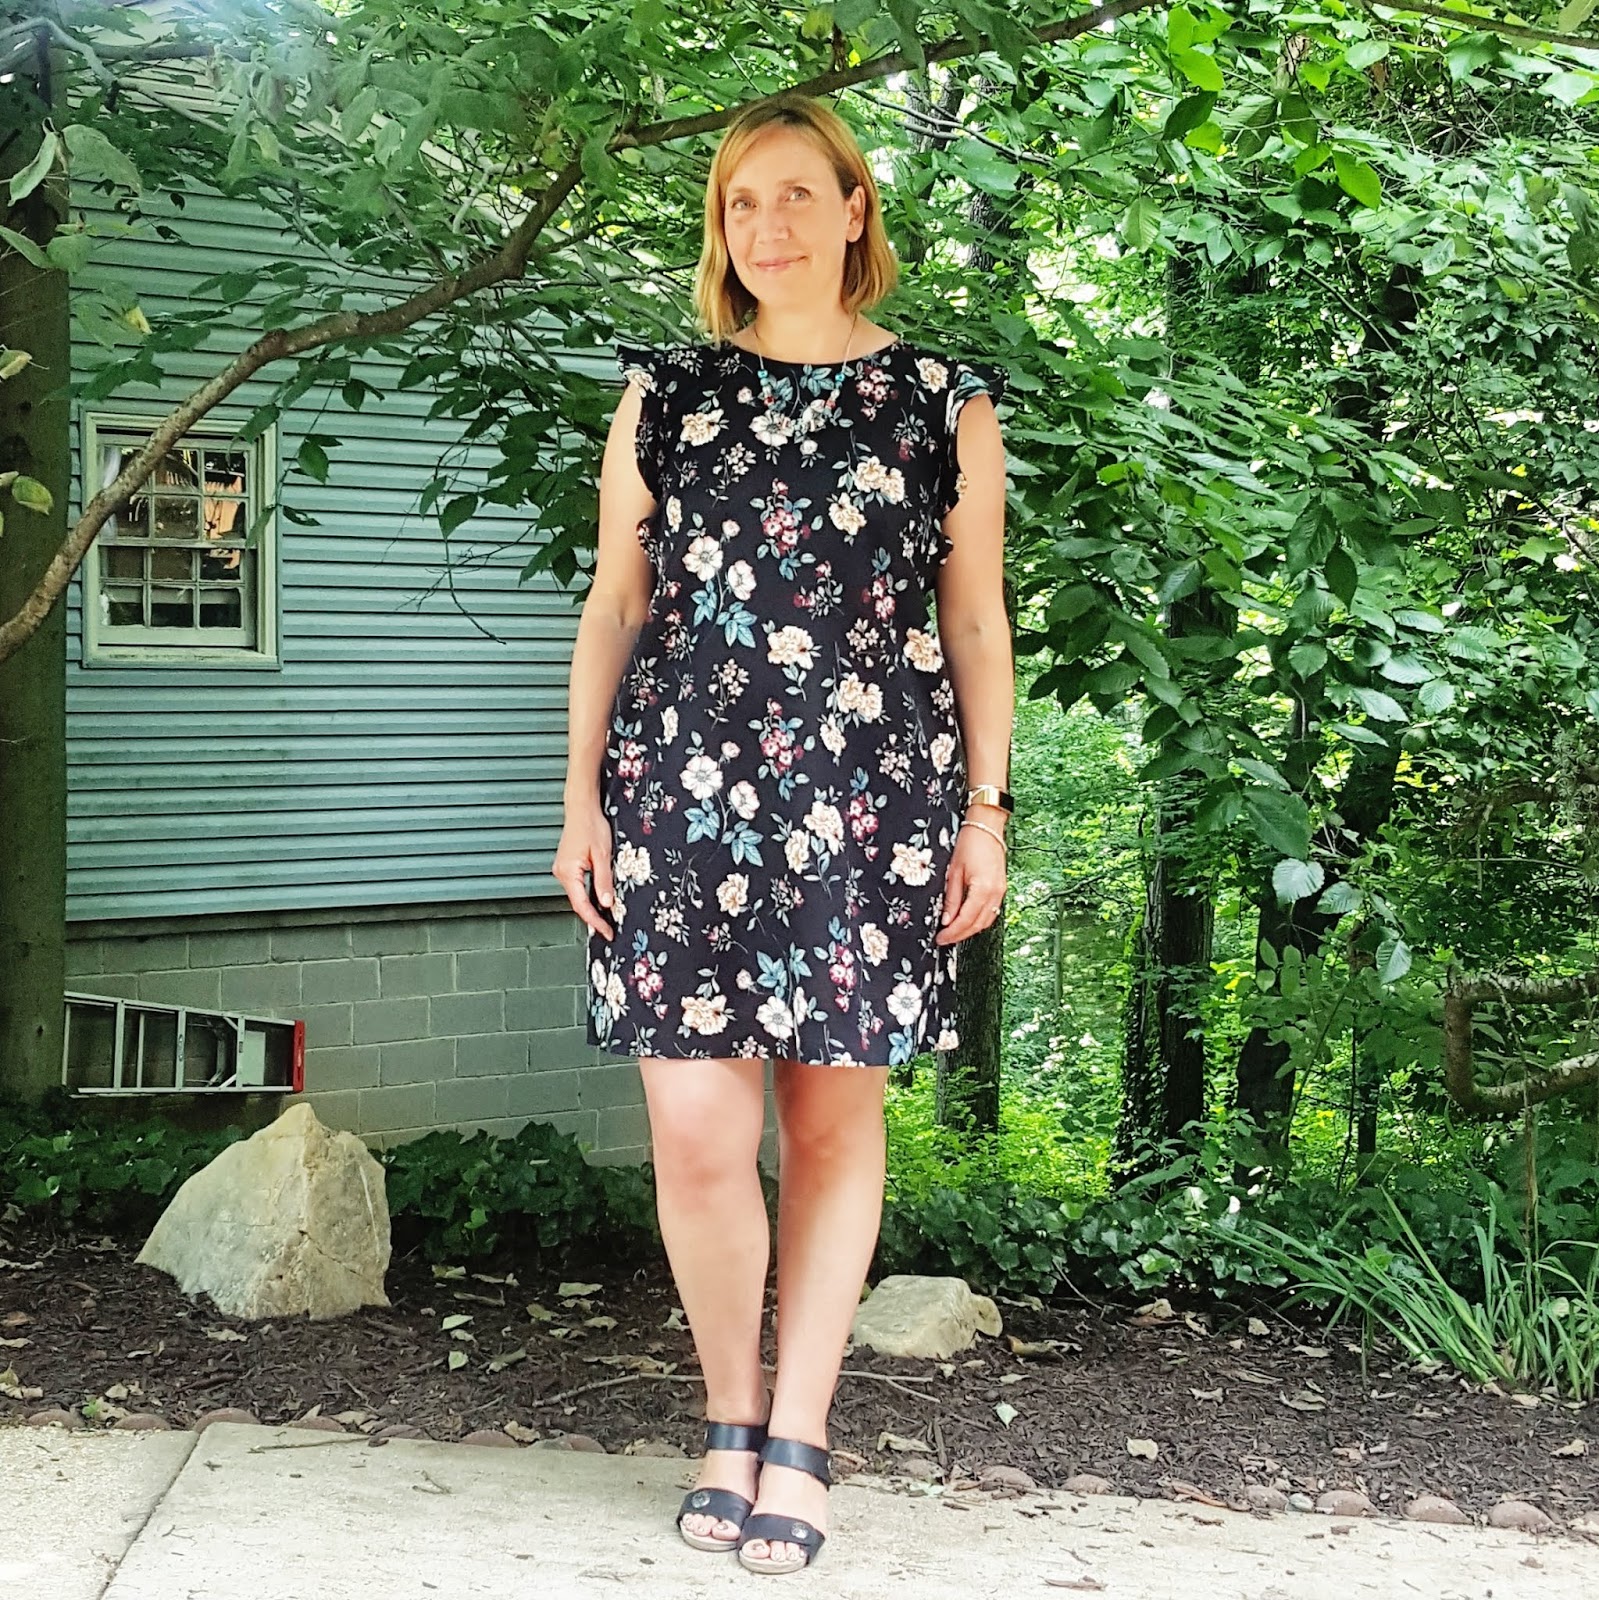
You do need the ease of wear in this pattern as it is a pullover dress.  I guess you could throw in a zip in the back center panel, but I chose not to in this fabric as it stretches just enough to get over with no issues.

It's hard to tell but the side panel is fairly wide and it holds the pockets, which are basted on before the panel is attached to the front and back pieces.  The best thing about this pattern is how difficult the dress looks like it would be to make versus how easy it actually is!  I spent more time pattern grading, cutting, and pinning than I actually did sewing.  Definitely want to see if I can make another one before the summer is done!

Here is a closer view of the side panel.  At the bottom you see the pocket and how it is part of the seam construction for both the front and the back.

Above it you see how the belt (tied to the back) is also part of the seam construction, but only for the back seam.

Towards the top you can see how the ruffle is laid into the seam construction, again with the side panel do a lot of the work.  The side panel is the MVP of this dress (top).

I had a tough time at first understitching the ruffle seam because the fabric and my foot didn't like each other.  I started with a walking foot (which usually helps) but found that when I switched to a jeans foot (bernina people, #8), that worked so much better in stitch length and consistency.  It waved back and forth a bit with the walking foot, so some of the underseam stitching on the ruffle is wonky.  Nothing obnoxious, but still irksome!

Usually I HATE my back view, but because I made sure there was plenty of ease in the skirt, a nipped in waist (thank you belt), and a wide shoulder line (ruffles!), I actually like my back view.  WOO!  For all you pear shapes, think about this pattern as a possibility.  Even if all you do is make the top or tunic, you still get the awesome ruffle line at the shoulder which evens out the frame.  :-)

Here is a final close-up shot so you can better see the fabric and the ruffle detail.  The ruffle inset is topstitched down to keep the seamline from flopping out so it becomes visible, but it could be a really cool decorative touch in a lighter solid fabric where you see it (a contrasting thread could be pretty!).  The neckline is a bias binding (NOT my favorite, ugh), but this one went in pretty easily and topstitched down easily enough, as well.  I do think I will draft a facing if I do this dress in a woven, though.  I really hate fiddling with bias bindings if I can do a proper facing instead.

Hope to see others of you try this pattern! I adore all the versions I've seen, and think it works for so many women (and looks beyond cute on little girls!).

Talk to you in a month!

Dina, My Superfluities.

Comments

  1. Lovely dress! Glad to read your review of this pattern. Lovely fabric as well.

    ReplyDelete
  2. Really cute dress. This pattern looks good as a dress. I would never have known it was a top pattern if you hadn’t explained that you lengthened it. Love the ruffles and the belt. I have never thought to tie a belt either front or back. Always tie it the way the pattern dictates. Lovely on you and thanks for sharing.

    ReplyDelete

Post a Comment

Thanks for leaving a comment! All comments are reviewed before posting to help us eliminate spam. Your comment will be posted within 24 hours.

Popular Posts You Might Like

Help Our Buyers Shop!

  Comment on this post with what you are looking for right now and our buyers will seek it out!  I am craving wool gabardines and ponte knits in fun autumn colors. What about you?

Made By A Fabricista: Just Wear It Out!

Originally I wasn’t happy with my make this time around. I put it on fresh off the sewing machine and didn’t love how it fit. My elastic was slightly too narrow for what the pattern called for. I did end up putting a stitch to close up the v-neck on the top. I thought my sewing on the waistband looked sloppy and I looked kind of frumpy in the outfit. I was going to put the project down to fix later but decided to wear it out for some feedback from our web manager and one of the describers.  I ended up pleasantly surprised! The fabric is super comfortable and I felt really good wearing it. All the things I didn’t like kind of melted away wearing it out. The flaws were so small that only I noticed them. I think it’s important to remember that while striving for perfect seams and flawless construction is good, a handmade garment doesn’t have to be perfect to be wearable. This isn’t the first time I’ve softened on a garment after wearing, and it certainly won’t be the last! The 100% c...

Made By A Fabricista: The Sheer Volume Of It All!

This garment was inspired by a dress I saw in an ad, and when I went to purchase it (which I rarely do)…I realized that the dress didn’t come in my size. Ticked off and with $300 back in my pocket, I decided to draft it myself. The description listed the fabrication as a silk cotton voile, so I used that as a starting point to recreate the simple yet elegant silhouette.  My drafting experience is limited; I’ve only ever made garments that are pleated rectangles that fit into an elasticated waist. No darts, no complicated calculations, and definitely no sleeves. But I’d have that dress if it’s the last thing I do! I made a drawing, created a Pinterest board to document my inspiration, and narrowed down the features I really wanted to have: billowy bubble-hemmed bishop sleeves (say it three times fast!), a fitted and lined bodice, and a gathered tiered skirt. Finally, it was time to shop for fabric. I knew I wanted a silk blend of some kind, without breaking the bank. For weeks, I ke...