 |
| StyleArc Dotty Blouse made with a silk double georgette |
Hi everybody! I'm back this week on the blog with my first make in 2019: a silk georgette blouse! I just love to make my own silk tops and not have to pay big bucks for something similar in RTW, so I didn't hesitate a second when I saw this silk georgette on FM's new arrivals page not long ago - I knew it would be great paired with a pattern I love, the Dotty Blouse by StyleArc.
I was on tight schedule and this project had to be a quick one: December was hectic for me and I was a bit late for ordering, and on top of that with the Holidays the postal service takes longer than usual, so I received my fabric just a couple of days before my post was due. I don't know if you're like me, but I do have a couple of TNT patterns I have perfected over the years; isn't it great when you know you can just pull a pattern from your stash and whip up a project in a day or two?
 |
| Close up of the criss cross front drape |
 |
| I modified the sleeves and added sleeve tabs |
The fabric:
Silk has always been one of my favorite fabrics and Fabric Mart always has a great selection of silks, often from designer closeouts. This one is from designer Halston and is a double georgette (with lycra), which means it has more substance and is less sheer than regular georgette. I use my serrated Kai scissors 7240S to make the cutting easier.
As you can see from the pictures, this silk has a beautiful crepey texture and tremendous drape, which makes it perfect for a criss cross blouse like the Dotty.
As you can imagine it sold out quickly, but if you'd like inspiration for a similar project there is some beautiful georgette on this page.
 |
| This silk has great drape! |
 |
| Details of the back of the Dotty Blouse: soft gathers falling from the yoke and tiny rounded hem |
Probably due to artificial light, the colour appears more blue in the pictures than it is in real life. This silk is a beautiful emerald green - I thought a jewel tone would be great to illuminate the complexion when the skin is light deprived during the short days of January!
A quick word about the pattern:
If you are interested, the pattern I used is the Dotty Blouse by StyleArc. I made a size 6 and added 1/8'' to the side seams (the back is very straight) and modified the sleeves. I eliminated the cuffs and added a sleeve tab borrowed from another blouse. I like to wear my sleeves rolled, so I finished them with french seams since the seams show when worn this way.
 |
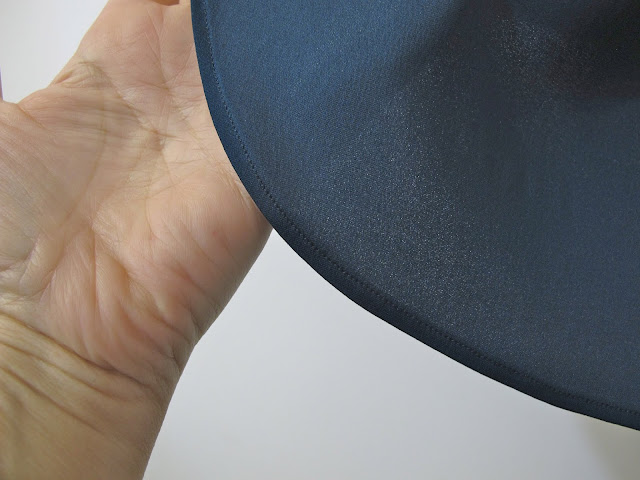
| This is the hem in the back of the blouse |
The thread I used to make this tiny hem is Gutermann Mara 150. A light thread like this one (Tex 20 , compared to Tex 30 for regular all purpose thread), combined with a fine sharp needle like a Microtex Schmetz needle size 70, allows you to make a no sweat narrow hem in a lightweight fabric like silk georgette. Why not make justice to such a beautiful fabric with the right tools?
 |
| My tools: a Schmetz Microtez needle size 70, Gutermann Mara thread 150, and Kai serrated scissors 7240S for cutting 'difficult' fabrics like chiffon, georgette, etc. |
I also serged the side seams using this thread - I converted my Huskylock 905 to a 2 thread stitch and finished the seams after having sewn them on the regular sewing machine. This way the seam stays weightless and the thread doesn't make an imprint when you press; a great way to get a beautiful, clean finish.


Beautiful workmanship and beautiful blouse!
ReplyDeleteThank you!
DeleteWonderful! I would like to learn what method you used for the narrow hem - they look incredibly perfect!
ReplyDeleteThanks! For the narrow hem, I just sew a straight stitch 1/8'' from the edge, then turn 2 times and topstitch at 1/8''. The light thread (Gutermann Mara 150) and the Microtex needle make all the difference.
DeleteWow, that is so beautiful! Your narrow hem is perfection! Thanks for the tips on the thread type, two thread serger setting, and needles that you used. I have made this pattern, but have a hard time getting it to not open up all the way to the belly button. Yours seems to be laying perfectly- did you do anything special to get it to do that?
ReplyDeleteThank you Ann! Of course this blouse needs either a cami underneath or a stud press to keep the front in place. I let it that way only for the pictures, I will wear mine with a cami! :-)
DeleteThat fabric is PERFECT for that pattern! It's beautiful and so well sewn!
ReplyDeleteThank you!
DeleteBeautiful!
ReplyDeleteThank you!
DeleteVirginie, this is just so gorgeous! So well executed!
ReplyDeleteThank you so much!
DeleteWow!!! This fabric has such gorgeous drape and you picked the perfect pattern for it. Everything is so clean and lovely! I have those same Kais for fabrics like this, and they are a gamechanger!!
ReplyDeleteThank you Elizabeth! Yes, isn't it a real pleasure to work with those Kais?
Delete