Hi Guys! Even though I live in South Florida, I am ready for Spring! We’ve had way too many cold fronts come through and I’m ready for our very short Spring season. We usually don’t have seasons in South Florida, It’s either summertime hot or too cold for us.
For my April post, I like to make my “birthday look” since my birthday is April 10th. Last year I made a pink dress using a Vogue pattern. For this year’s post I decided to go with something representative of the new season and make something floral, which I love. I decided to make Simplicity 8558. This is a Misses’ Separates pattern by Mimi G. The pattern contains sportswear separates featuring pull-on wide-leg pants and shorts with an unlined jacket and crop top. I made View C, which are the shorts and View D which is the jacket.
I decided not to make the crop top and styled the set with a white V-neck t-shirt. For the jacket I sewed a size 20 and didn’t make any modifications to it except not attach the buttons because I knew I would not be buttoning the jacket. For the pants I sewed a size 24 and I did make modifications to the front crotch rise.
For many years, I was always intimidated by making pants because I didn’t understand how to make fit adjustments. The few times that I attempted to sew pants; they would come out with extra fabric in the crotch because I needed to adjust for my short torso. After several failed attempts I gave up on making pants. I finally learned how to measure my crotch and adjust my crotch rise. It’s not as hard as I thought it was and now, I want to make all the pants. Below I’ll share how I did it. There are several ways to attain the same result, and this is how I was able to successfully adjust my crotch rise.
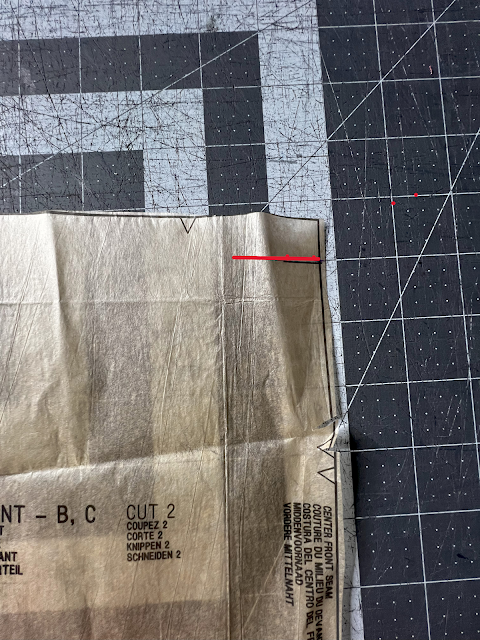
1. Mark the waist seam allowance on the pattern.
2. Decide what size you want to make based on the finished garment measurements and mark the seam allowance at the crotch.
3. Measure from your waist or where you want your pants to sit at and measure to your crotch line. This is where the seams meet when wearing pants.
4. Measure from the waist seam allowance to the crotch seam allowance markings made on the pattern. Decide what the difference is between the 2 and this is how much you will be adding or subtracting.
5. Draw a line across the pattern piece from the front pant pattern to the side seam of the size you will be making. Since this pattern has pockets, I drew my line below the pocket markings. Cut along that line to, not through the side seam. This will make a hinge.
6. Adjust the hinge pattern piece up or down by the amount you want to add or subtract. This is called the slash and spread method.
You have now adjusted your crotch rise. Make the same measurements for the back pattern piece. I removed 2 inches from the front crotch rise.
The other minor modification I made was the elastic size I used. The pattern calls to use 5/8” elastic, and I didn’t have any on hand. I ran over to my local Walmart because I knew Joann would probably not have any and it was late at night. When I got there, I found they didn’t even sell 5/8” elastic. I had a Tim Gunn moment, and I had to “Make it work” and purchased the closest size and grabbed the 1/2” elastic and went home to finish my pants. It worked out just fine. I really love the way my pants came out and how they fit.
The fabric I used for my make was this Persian Red/White 100% Rayon Silhouette Floral Print Crinkle Challis fabric. This fabric was perfection! The weight was perfect for my jacket and pants and the drape was also just right. This fabric is unfortunately sold out, but if I can get my hands on more of a Crinkle Challis, I will be getting more.
Until next time!
JOHANNA | @soveryjo


Happy Birthday! Your special day outfit is perfect!!! Hope you have a wonderful year ahead :)
ReplyDeleteLovely outfit !!!
ReplyDeletelovely outfit !
ReplyDeleteLove your pick of fabrics and giving me the thought of making it for myself.
ReplyDelete