
Made by a Fabricista: Thread Theory's Jedediah Pants


I sewed man pants!  This is officially my annual unselfish sewing, and it's for my husband. Ain't he lucky?!! I used Thread Theory's Jedediah Pants pattern for these. Last year I sewed him a really awesome pair of cargo shorts with a Green Pepper pattern that he wears all the time. The year before it was a button up shirt. What do men (generally) want in handmade clothes? I feel like it's to have the clothes look absolutely ready-to-wear, like they went to a department store and picked the garment up, not sewn by his (freakishly amazing) wife in their basement.  


These are 'slim fit' pants, something my husband generally isn't a fan of for himself. So after musling his actual size (halfway between 34 and 36), the fit was, of course, slim, The waist was a bit smaller then he liked, the calves were close fitting (I'd say his calves are average in size) and it was just small overall for his taste. So I just went up one whole size without a muslin and hoped for the best. It worked out quite well. They look so much like his RTW pants he wears already. I removed above three inches from the length, his inseam is a terribly average 32" when he buys clothing. I did just remove the length from the bottom as opposed to the "lengthen/shorten here" line on the tissue pattern.


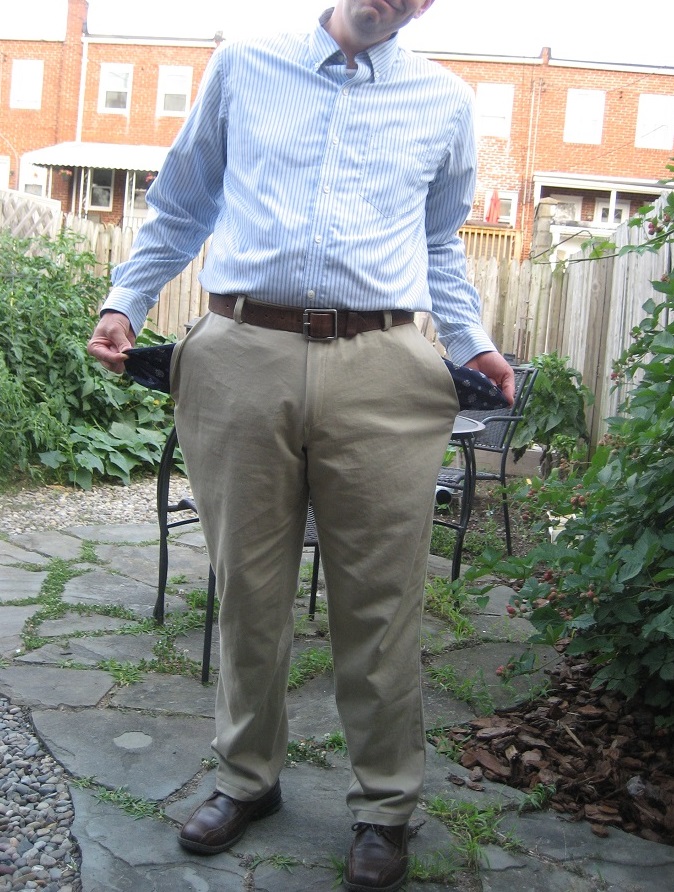
To be honest, I think the waist ended up a tad large for him but he wears belts anyhow. He has yet to wear them to work, so we'll see how they feel on a normal day of wear this week. I used a light beige cotton twill from Fabric Mart, which folks have bought all of it up already, but there are some great options for these pants in the Twill category. This cotton twill here looks basically identical to what I sewed with.


I got wild and crazy. I used a cotton shirting with some decorative print on it for the pocketing. That stuff was from one of those lovely bundles I ordered some weeks back from Fabric Mart when I last placed an order.

Overall, the directions are pretty good for this pattern.  The last time I sewed a zipper fly was a year ago with those cargo shorts I sewed for him. I wanted my hand held through the process, loads of visuals and a video. And oh my goodness, there is a whole blog post AND video on Thread Theory's blog on how to install/sew the zipper fly. You can see the entire sewalong here.


I find pants sewing a relatively easy process. It took about 6 hours total sewing this final product up, including sewing, ripping and re-sewing the waistband (I lined it up all wrong, ugh!) I really like the details like the reinforced stitching on the pocket corners, the flat fell seams for added strength and the overall RTW look they have. Success!! Man pants!!!

Happy Sewing!!
~Kathy
Kathy Sews

Comments

  1. They're cool! Have had this pattern ages but not plucked up courage more any man sewing yet! My hubby's not into the slim fit either but these look great. ��

    ReplyDelete
    Replies
    1. This comment has been removed by a blog administrator.

      Delete
  2. Kathy, these are awesome! I hope he wears them a LOT!

    ReplyDelete
    Replies
    1. Thanks! A he's actually worn them everyday this week... seriously. I think that calls for a 2nd pair.

      Delete
  3. You have done what I run from..but always wanted to do...sew for men...especially pants and tailored shirts. Kudos on an awesome job, my sewing sister.

    ReplyDelete

Post a Comment

Thanks for leaving a comment! All comments are reviewed before posting to help us eliminate spam. Your comment will be posted within 24 hours.

Popular Posts You Might Like

Week 4: Jeansmaking- What They Made

This is it, the final round! And we certainly did not go easy on our three remaining contestants this time. This round they had to make their own pair of well fitting jeans. I think they all did an absolutely outstanding job! Take a look what these ladies accomplished & be sure to vote for your favorite! (Link at bottom of post.) And, don't forget to show us your me-made jeans on Facebook or Instagram. Details at the bottom of this post. Danesha from  Classyfied Life So first I must say that this entire challenge has been just that...a challenge! Two weeks ago there was hurricane Irma and I was blessed enough to not lose power and then I went out into the aftermath to capture some photos of my submission. Then two weeks ago I had a big trip planned so I had to do EVERYTHING  in two days . Then the BIGGEST challenge of all...THIS week! I got the challenge and I was super excited to have an extra few days and then before I could even get started I ended up in the eme

Made By A Fabricista: A great tee shirt pattern – or three!

Hi fellow sewists! It’s Andrea  @happy.things.here and I’m here today to talk tee shirts!  I love a good tee pattern…or two…or four. Despite having more than enough of them in my pattern collection, I’m always up for trying a new one. And I also have my favorites and tried and trues (TNTs). I love the versatility of a good tee pattern – dress it up with fancy fabrics to make a work wardrobe piece, use a high quality solid to add some basics, or anything in between. Today I’m sharing three patterns I’ve used multiple times and with many different kinds of fabrics - all a little different and all great beginner patterns too. First up is the newest addition to my pattern collection – the Upland tee and crop top by Rivet Patterns. They are a newer designer who I recently discovered when this tee pattern caught my eye. I love that it has multiple bodice options including a classic design tee and also a crop version with different separate and uniquely shaped bodice pieces. I first made the

Made By A Fabricista: Dreamy Florals | A DIY Dress Inspired by Son de Flor's Spring Collection

Hi everyone!  When I saw this floral print linen/cotton blend make it’s way onto the to-be-described table I knew I had to make a dress from it.  I’d been staring dreamily at all the dresses from the brand Son de Flor who had just put out their spring collection and thought, maybe I can throw together something inspired by them!  I grabbed three yards of that floral shirting and a yard of SWC5682w to line the bodice with.  I used Simplicity’s S8946 for its simple bodice block.  This pattern has a gathered rectangle for the skirt, but I’m a sucker for a circle skirt so that’s where I decided to start.  I folded the fabric twice and cut out the longest circle the fabric would allow.  Then got to work on the bodice, sewing up the darts and attaching everything. Now, I don’t love installing zippers.  I ha d a lot of trouble getting them to sit right, and no matter how much mental gymnastics I do when first pinning one side is always put in the wrong way.  So while I did have to unpick and