All of my fellow Fabricistas have been looking toward starting their fall wardrobes. But this year, I’m riding my summer vibes right until their official end in mid-September, because I’m doing something a little different: going on a beach vacation after Labor Day! Now is as good a time as any to tackle my first swimsuit, and I have to say, it was a great experience. And of course, I’d need a cover-up too.
Fabric Mart had everything I needed to try my hand at a swim suit. I knew I wanted a bright, colorful patterned suit that was more likely to hide any construction flaws, so I picked this really fun nylon/lycra and it just screamed summer fun. Since I wasn’t sure which lining would work best, I ended up picking up the plain black swimsuit fabric to line with, since I read that you can line with swim fabric. It ended up being thicker than I imagined, but for me, I felt like this worked great because the recovery of the two fabrics together is excellent. The fabric is great quality. I even toyed with the idea of not lining the suit and just making two, but was (probably rightly) talked out of taking the chance by my sewing friends. I also used rubber swim elastic to provide a little more support around the top to prevent gaping. After taking it for a test swim for these pictures, I plan to redo the elastic to give more support because water rushing into the top is not ideal while swimming forward!
The pattern itself is the free Mood Sewciety Sherwood swimsuit, which is drafted for up to a 63” hip. This is officially the first Mood pattern I’ve ever completed. I tried sewing two last year--which remain UFOs--when I was a newer sewist, and I found that the instructions lacking and the fit of some patterns challenging. It’s understandable that they don’t invest in detailed instructions and pattern testers since it’s a free pattern, and they have dozens of them. Now that I’m a tad more experienced, I feel more confident filling in the blanks and making judgment calls about what would work best.
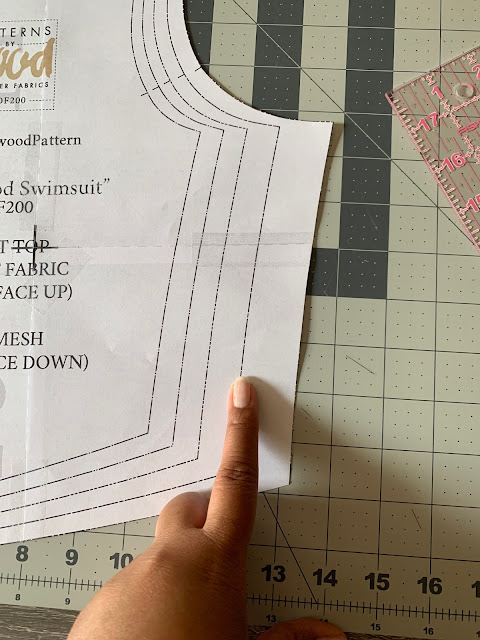
I measured into the size 16/18 according to Mood’s chart, but when I cut and stitched the outer layer together, the suit had no negative ease. It fit my body perfectly. Which I think, for swim, is not a great thing. The difference between the size I measured into and the next size down was substantial, so I first tried out stitching just the side seams of the 16/18 pieces at size 12/14, to see how it fit.
I really like the fit, so I trimmed the sides only down to 12/14 and kept the rest of the edges at 16/18 so I could have more coverage.
You’ll see that grommets are a part of the original suit. Grommets on clothing have never really appealed to me even before I learned to sew. So I had to make some adjustments to the pattern to accommodate this. I folded back the pattern at the notches where I would have folded the fabric back to create the grommets, added a seam allowance, and cut the fabric to that. It worked great. When I sized the sides down to 12/14, I followed the same process.
Overall, I’m really pleased with this first attempt at swim and look forward to taking it on vacation with me!
I also wanted to make a cover up and picked out some black lightweight linen, because I wanted a more sophisticated coverup that I might be able to wear to dinner too. The pattern is the Seamwork Kimmy, which is drafted for a person with up to a 58” hip. The construction of this pattern is incredibly easy, and features a dolman sleeve, elasticated waist and of course, pockets. After I made this black linen version, it quickly became a TNT (tried-and-true) pattern of mine! I’ve already made another dress and made a top from the bodice, and have another dress in mind. The Kimmy is designed to include drawstrings to bring the shoulders in, but that’s not really my style and I leave the dolman sleeve as is, which makes this pattern even less fussy.
The linen was really easy to work with. I prewashed in hot water and tumble dry to shrink it as much as possible, but don’t feel like it shrunk much, if at all. I chose to use this dress and linen as an opportunity to practice my French seaming and it turned out beautiful on the inside. It is blouse-weight, which I thought would work fine for something that I planned to wear to the beach or pool, and in the right light it is a tad bit see-through. But it has been perfect and oft-worn this summer and I can’t wait to take it on vacation with me!
Unfortunately Fabric Mart Fabrics sell out quickly!
You can find similar fabrics in the following categories: SWIMWEAR/ACTIVEWEAR & LINEN.


Great post! What a unique swimsuit design! I love it, and the coverup looks perfect for its purpose.
ReplyDeleteYour vacation pieces look fabulous and fun. Have a wonderful time..
ReplyDelete