
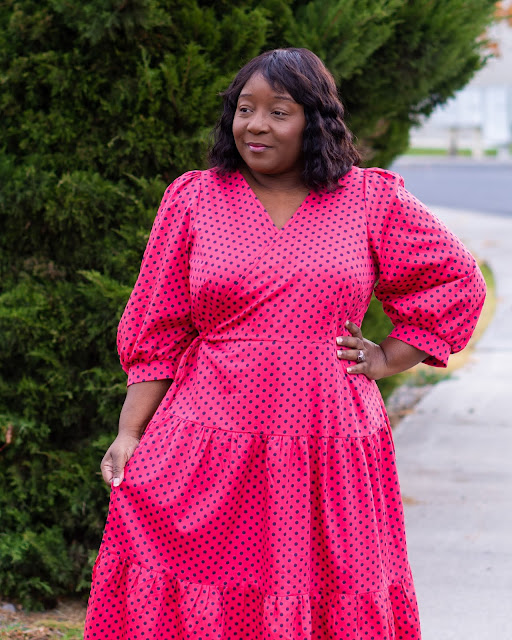
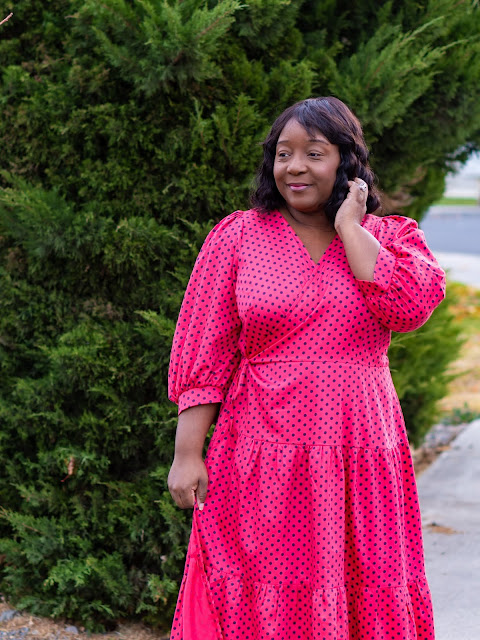
Hi all! Today I’m sharing my last blog post of the year as a Fabric Mart Fabricista, which features my first Holiday Dress of the season!

Fabric Selection
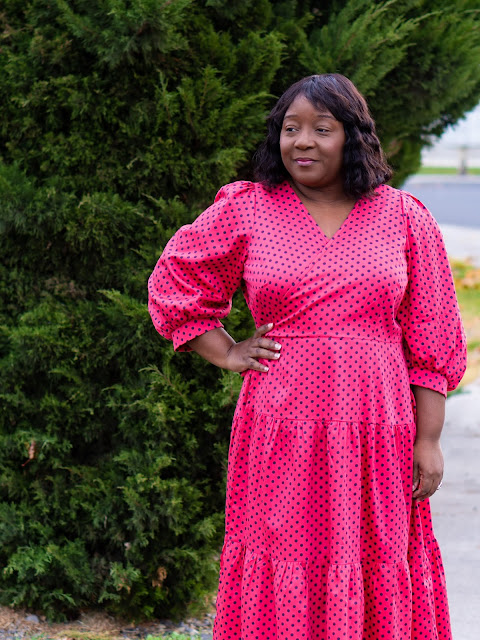
This Holiday Dress was made with Fabric Mart’s Strawberry and Navy 100% Cotton Polka Dot Sateen Shirting. That is a mouthful; however, the description of this fabric is spot on! This fabric have a smooth hand with a slightly stiff drape, and falls away from the body!

The best feature of this fabric, in my opinion, is the slight sheen and the light and dark contrast of the print. I’m a lover of polka dots, so working with this fabric was a treat! Although I found myself pressing the fabric quite often, it wasn’t burdensome because the wrinkles fell away at first contact with the iron.
Pattern Selection
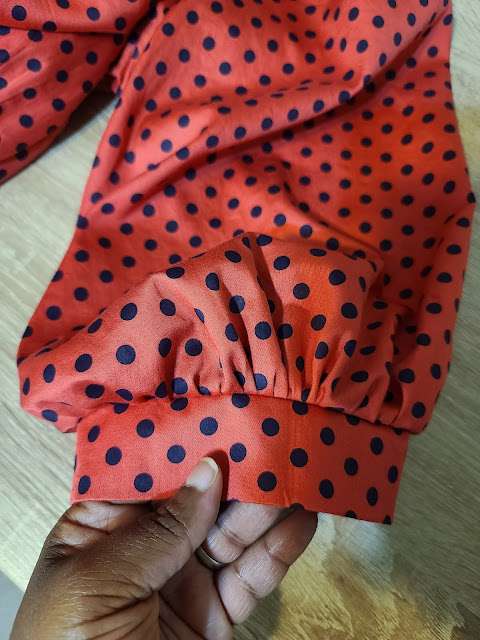
The Cashmerette Roseclair Dress pattern was a perfect choice for this fabric. Since the pattern calls for light-medium weight fabrics such as cotton, linen, rayon, and double gauze, I was certain this 100% cotton sateen would be a great fit. The pattern features a wrap dress with three skirt variations, and sleeve length options. I made View A, which includes an ankle-length three tiered skirt with bishop sleeves and cuffs.

I love the tiers and gathers of this view and how flattering it looks on all body types. It truly is a beautiful pattern. I found this to be an easy sew, but not a quick sew. The tiers are extremely long and take a bit of time to gather. I would suggest making View B before making View A, if you are not a patient sewer. View B features a knee-length full skirt and short sleeves, and the skirt pattern does not have tiers. This option would be more suitable for advanced beginners and people who do not like tiered or gathered skirts.
Alterations and Adjustment
To date, I’ve made approximately seven Cashmerette patterns, and I have enjoyed each of the patterns I’ve made. Mostly, I find that the measurements of the Cashmerette patterns are aligned with my body measurements. Therefore, I generally do not need to make very many alterations and adjustments. Although, for this pattern I made one adjustment and one alteration.
First, I made a 1/2” sloping shoulder adjustment. This is a common adjustment that I make to about 85% of the patterns I sew. So this was no surprise.

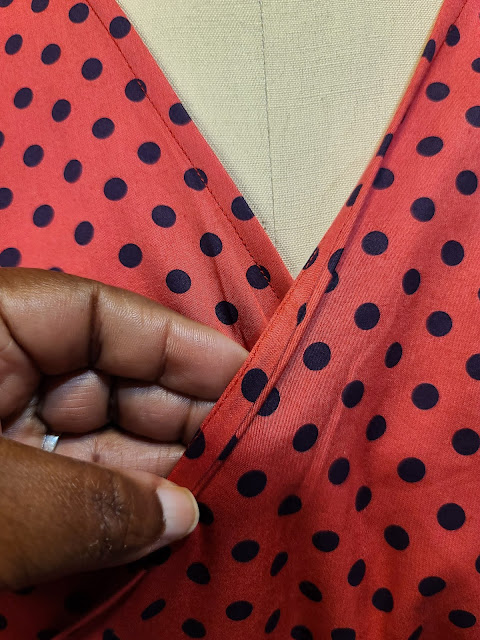
Second, I added 1” to the neckline of the pattern in order to raise it enough to cover my cleavage. Again, this alteration wasn’t a surprise because I usually make this adjustment to wrap tops and dresses. The pattern range in size, 0-16 and 12-32.
I made a size 16, which is Bust 44”, Waist 39”, Hip 54”. The pattern also includes cup sizes (C-H), and I selected the C cup.
In the future, I would most likely choose a size 14 to get a more fitted bodice. In addition, the pattern includes two tie pieces that are designed to finish the neckline and tie the wrap dress closed. The bias binding pattern for the neckline is a little to narrow, in my opinion. I would most definitely widen the neckline binding to get a wider bias tape, or buy a pre-made double fold binding tape in the future. This was the only drawback of the pattern for me, and with that said here are a few suggestions that may help you while sewing this pattern.

Suggestions
(1) Choose a fabric that is at least 57” wide, if you are planning to make View A. The middle and lower tier pieces are very long, and you will most likely have to cut each piece on a single layer of fabric.
(2) Use a gathering foot for your sewing machine. A gathering foot will cut down on the time it will take for you to add the basting stitches and gather the fabric.
(3) Widen the bias binding piece of the pattern, or consider using pre-made bias binding. The neck binding pattern is very narrow which made edge stitching nearly impossible. I opted for turning my binding inward and top stitching the neckline. So, the binding is on the inside of my garment.
(4) Make View B, the simple skirt option before deciding to make the three tiered skirt, if you are an advanced beginner or/and want to make a quick sew. View B is more simple in construction and will take less time.
Although I had to make a few simple adjustments to this pattern, I enjoyed making it and would definitely recommend this pattern. I’m pleased with my new Strawberry Navy Holiday Dress, and I plan to wear it to a Holiday party this year.
I hope you enjoyed my blog post today. Blessings and Happy Holidays!
TEAMEAKA | @crumpetsteaandsewing
Unfortunately Fabric Mart Fabrics sell out quickly!
You can find similar fabrics by shopping the following category: SHIRTING.
You can also shop our selection of Cashmerette Patterns HERE.
Very attractive and festive. Thanks for sharing.
ReplyDeleteYou're welcome!
DeleteYou're welcome! Thanks for reading the blog post!
DeleteYour dress is gorgeous and it fits to a tee! Great job!
ReplyDeleteThank you! 😊
DeleteThis dress looks fabulous on you. The fit is perfect for a wrap. And thanks so much for the extra tips for making up this pattern. Happy Holidays.
ReplyDeleteYou're welcome! Thank you for the wonderful compliments!
DeleteThis is great. I'm so glad I read this blog post.
ReplyDeleteBeautiful fit you look amazing!
ReplyDeleteYour dress is beautiful and looks wonderful on you. Thanks for the tips on the pattern. Great job on your blog. Always like your posts.
ReplyDeleteTruly lovely. Your fit and finish is superb.
ReplyDeleteLove the fabric and the dress. You look great in it!
ReplyDelete