
Those are quite the three words, eh?
Blue. Velvet. Jumpsuit.

This is the only jumpsuit I've ever owned as an adult, and as no surprise with that information, the first I've ever sewn for myself. Definitely not my usual speed sewing-wise, but I have been wanting to try my hand at sewing a jumpsuit for a while now, and was pretty intrigued by Papercut Patterns Sierra Jumpsuit.

I'd been hunting for a stretch velvet to play with all winter and I decided on this pretty Stormy Blue Hammered Stretch Velvet. It's definitely not your average textured/crushed velvet; it has a really fun pattern that's a little hard to photograph. Here's a closer shot.

It was definitely a gamble when it comes to marriage of pattern and fabric: the Sierra calls for a light to medium weight woven, but I crossed my fingers this light weight knit with only mechanical stretch would work out. This stretch velvet is pretty dang springy for no listed spandex content, so I was even more prepared for this to either be a super wonderful make or a super regrettable one. I'd say my wager worked out pretty well in my favor, eh?
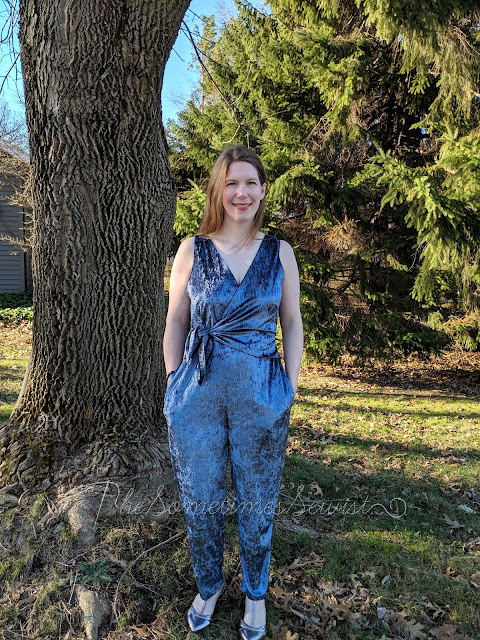
But, "It's Spring!" you say. Wisconsin has a funny way of doing Spring. On Monday we had a sunny high of 70 (!!) degrees, which was the warmest yet this year. On Wednesday the high was 35 and it snowed. I took these photos on Tuesday, which allowed me to go sleeveless. My personal benchmark for when Wisco delivers reliably pleasant weather is my mom's birthday, which is in late April.

This pattern was quite the roller coaster to execute. I went from neutral to raging pretty quickly when I realized my neck edge interfacings and the tie facing for the short end were all backwards. I recut all. Then I realized the whole bodice of the jumpsuit was opposite of the technical drawing. What the heck? There was almost TWO HOURS of pondering, seething, texting and muttering to myself about how this could happen before I finally found the reason in very small writing on the cutting layout page: they expect you to cut this with the main fabric wrong side up. I have honestly never seen this before, so take heed! I've only ever seen patterns cut on a single layer with the right side of the fabric facing up. I can't fathom why they would do it this way, other than making the minimal number of markings a little easier to apply.

This is not my first Papercut Pattern. I've also made their Coppelia cardigan (blogged here: 1 2) and Ooh La La Leggings (blogged here), but those were both symmetrical so there was no room for a possible cutting mistake like this.

Beyond this first issue, things were fairly smooth sailing. Though, I was a bit dismayed to have to hunt and hunt for the seam allowance (which was the same as the other patterns of theirs I've used, but I wasn't about to assume), which was only included in a block of text as an intro to the pattern, next to the directions. I wish it had been more prominent, perhaps called out in the materials or size chart sections or even within step 1 of the pattern directions.

Fabric-wise, I had some issues with the velvet rolling on pieces that were cut across the width, which was really only the long tie end and the front waistline seam. I tried pinning the waist, going without pins and finger pinning, and I could just not stop it from shifting until I got some wonder clips involved. It was a very short seam to sew, but it got me frustrated enough to fantasize about tossing the whole business in the garbage. If that's the only bit of frustration with a slippery piled fabric, I'd say that's a win!

I have to mention: I love the way the pockets are put in. They're in seam pockets but don't require precisely positioning each half of the pocket bag on the front and back pant pieces. The first pocket bag is inset onto the front leg and then the second bag is sewn on behind it. It's worth noting that if you cut the pocket bags from lining as directed, you WILL see lining on the outside of your garment. To make sure this didn't happen in my version, I cut one set of pocket bags from the garment fabric and one set from the lining.

I didn't make a muslin. I'd planned on it, but as often happens in my sewing life (and just...life) time became short and I went for a sew and pray. I'm fairly short waisted and only 5'4" so I figured this was bound to be long enough in the torso for me. And that gamble turned out in my favor as well. Despite the one back shot above (oops) this isn't really heading up my backside.

I cut a straight small and made very few pattern adjustments. I usually need a full bust adjustment in most patterns but did not this time (though I did lower my bust darts 1"), hoping the knit would stretch enough, and I'm pretty happy with how it turned out! Because I often need a bit more booty room, I slashed from the back crotch curve to the hip and spread 1/2" then, slashed further down in the crotch curve to the inseam, spreading again to true it up the curve.

If I were to make this again, I'd raise the armscye by 1/2" to 3/4" (likely by pinching out the fullness at the shoulder) to properly cover my bra and I'd omit the invisible zip if using a knit: I'm able to very easily get it off and on without using it. I'd probably still put the zipper in on my first woven make of this pattern just in case. Not too much to change!

Pretty jazzed about this shiny, pettable jumpsuit of mine. Here's to the rest of Spring and to the Summer sewing yet to come!
Blue. Velvet. Jumpsuit.

This is the only jumpsuit I've ever owned as an adult, and as no surprise with that information, the first I've ever sewn for myself. Definitely not my usual speed sewing-wise, but I have been wanting to try my hand at sewing a jumpsuit for a while now, and was pretty intrigued by Papercut Patterns Sierra Jumpsuit.

I'd been hunting for a stretch velvet to play with all winter and I decided on this pretty Stormy Blue Hammered Stretch Velvet. It's definitely not your average textured/crushed velvet; it has a really fun pattern that's a little hard to photograph. Here's a closer shot.

It was definitely a gamble when it comes to marriage of pattern and fabric: the Sierra calls for a light to medium weight woven, but I crossed my fingers this light weight knit with only mechanical stretch would work out. This stretch velvet is pretty dang springy for no listed spandex content, so I was even more prepared for this to either be a super wonderful make or a super regrettable one. I'd say my wager worked out pretty well in my favor, eh?


This pattern was quite the roller coaster to execute. I went from neutral to raging pretty quickly when I realized my neck edge interfacings and the tie facing for the short end were all backwards. I recut all. Then I realized the whole bodice of the jumpsuit was opposite of the technical drawing. What the heck? There was almost TWO HOURS of pondering, seething, texting and muttering to myself about how this could happen before I finally found the reason in very small writing on the cutting layout page: they expect you to cut this with the main fabric wrong side up. I have honestly never seen this before, so take heed! I've only ever seen patterns cut on a single layer with the right side of the fabric facing up. I can't fathom why they would do it this way, other than making the minimal number of markings a little easier to apply.

This is not my first Papercut Pattern. I've also made their Coppelia cardigan (blogged here: 1 2) and Ooh La La Leggings (blogged here), but those were both symmetrical so there was no room for a possible cutting mistake like this.

Beyond this first issue, things were fairly smooth sailing. Though, I was a bit dismayed to have to hunt and hunt for the seam allowance (which was the same as the other patterns of theirs I've used, but I wasn't about to assume), which was only included in a block of text as an intro to the pattern, next to the directions. I wish it had been more prominent, perhaps called out in the materials or size chart sections or even within step 1 of the pattern directions.

Fabric-wise, I had some issues with the velvet rolling on pieces that were cut across the width, which was really only the long tie end and the front waistline seam. I tried pinning the waist, going without pins and finger pinning, and I could just not stop it from shifting until I got some wonder clips involved. It was a very short seam to sew, but it got me frustrated enough to fantasize about tossing the whole business in the garbage. If that's the only bit of frustration with a slippery piled fabric, I'd say that's a win!

I have to mention: I love the way the pockets are put in. They're in seam pockets but don't require precisely positioning each half of the pocket bag on the front and back pant pieces. The first pocket bag is inset onto the front leg and then the second bag is sewn on behind it. It's worth noting that if you cut the pocket bags from lining as directed, you WILL see lining on the outside of your garment. To make sure this didn't happen in my version, I cut one set of pocket bags from the garment fabric and one set from the lining.


I cut a straight small and made very few pattern adjustments. I usually need a full bust adjustment in most patterns but did not this time (though I did lower my bust darts 1"), hoping the knit would stretch enough, and I'm pretty happy with how it turned out! Because I often need a bit more booty room, I slashed from the back crotch curve to the hip and spread 1/2" then, slashed further down in the crotch curve to the inseam, spreading again to true it up the curve.

If I were to make this again, I'd raise the armscye by 1/2" to 3/4" (likely by pinching out the fullness at the shoulder) to properly cover my bra and I'd omit the invisible zip if using a knit: I'm able to very easily get it off and on without using it. I'd probably still put the zipper in on my first woven make of this pattern just in case. Not too much to change!
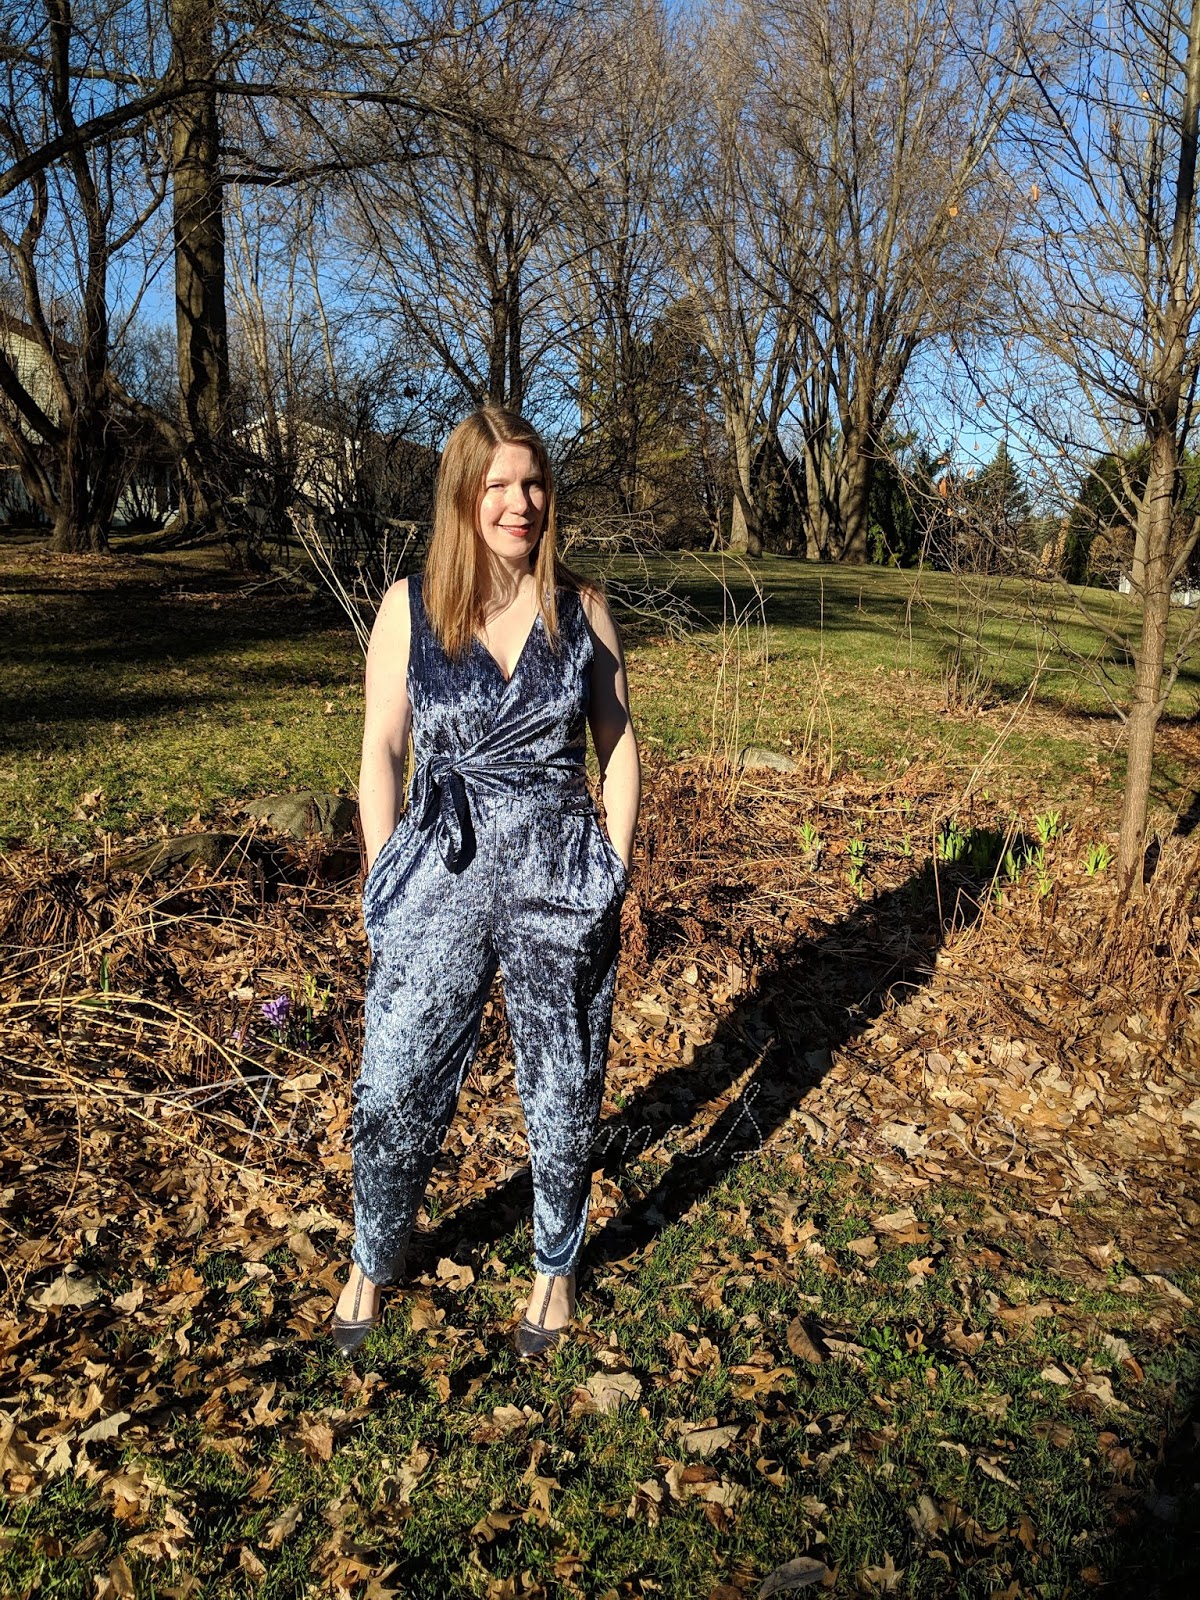
Pretty jazzed about this shiny, pettable jumpsuit of mine. Here's to the rest of Spring and to the Summer sewing yet to come!
Until next time, ladies and gents!
Jess
The Sometimes Sewist
The Sometimes Sewist
Did you see this with a regular machine or a server? It looks so beautiful! Great job!
ReplyDeleteMostly with my sewing machine, since I didn't want a lot of bulk in the faced areas, and had to contend with zipper installation. I did finish some edges and sew a couple of seams with the serger, though.
DeleteI meant "sew" not "see" 😁
ReplyDeleteNicely done! So brave with that velvet!! :)
ReplyDeleteThank you! There were only a couple of sweary times. Haha.
DeleteThat is such a cute jumpsuit on you. I would never have thought of making one out of stretch velvet, but it really looks great. Super job sewing it!
ReplyDeleteThank you! It was a bit of a sew-and-pray-it-works situation for sure!
Delete