
Made By A Fabricista: End of Summer Swimsuits

My kids have been in desperate need of new swimsuits this summer, but with a busy season of moving house and spending nearly a month in Australia, it left barely any sewing time! When I spotted a whole collection of Beach Riot swim fabric land at Fabric Mart, I knew it was just the motivation I needed to get new suits made!
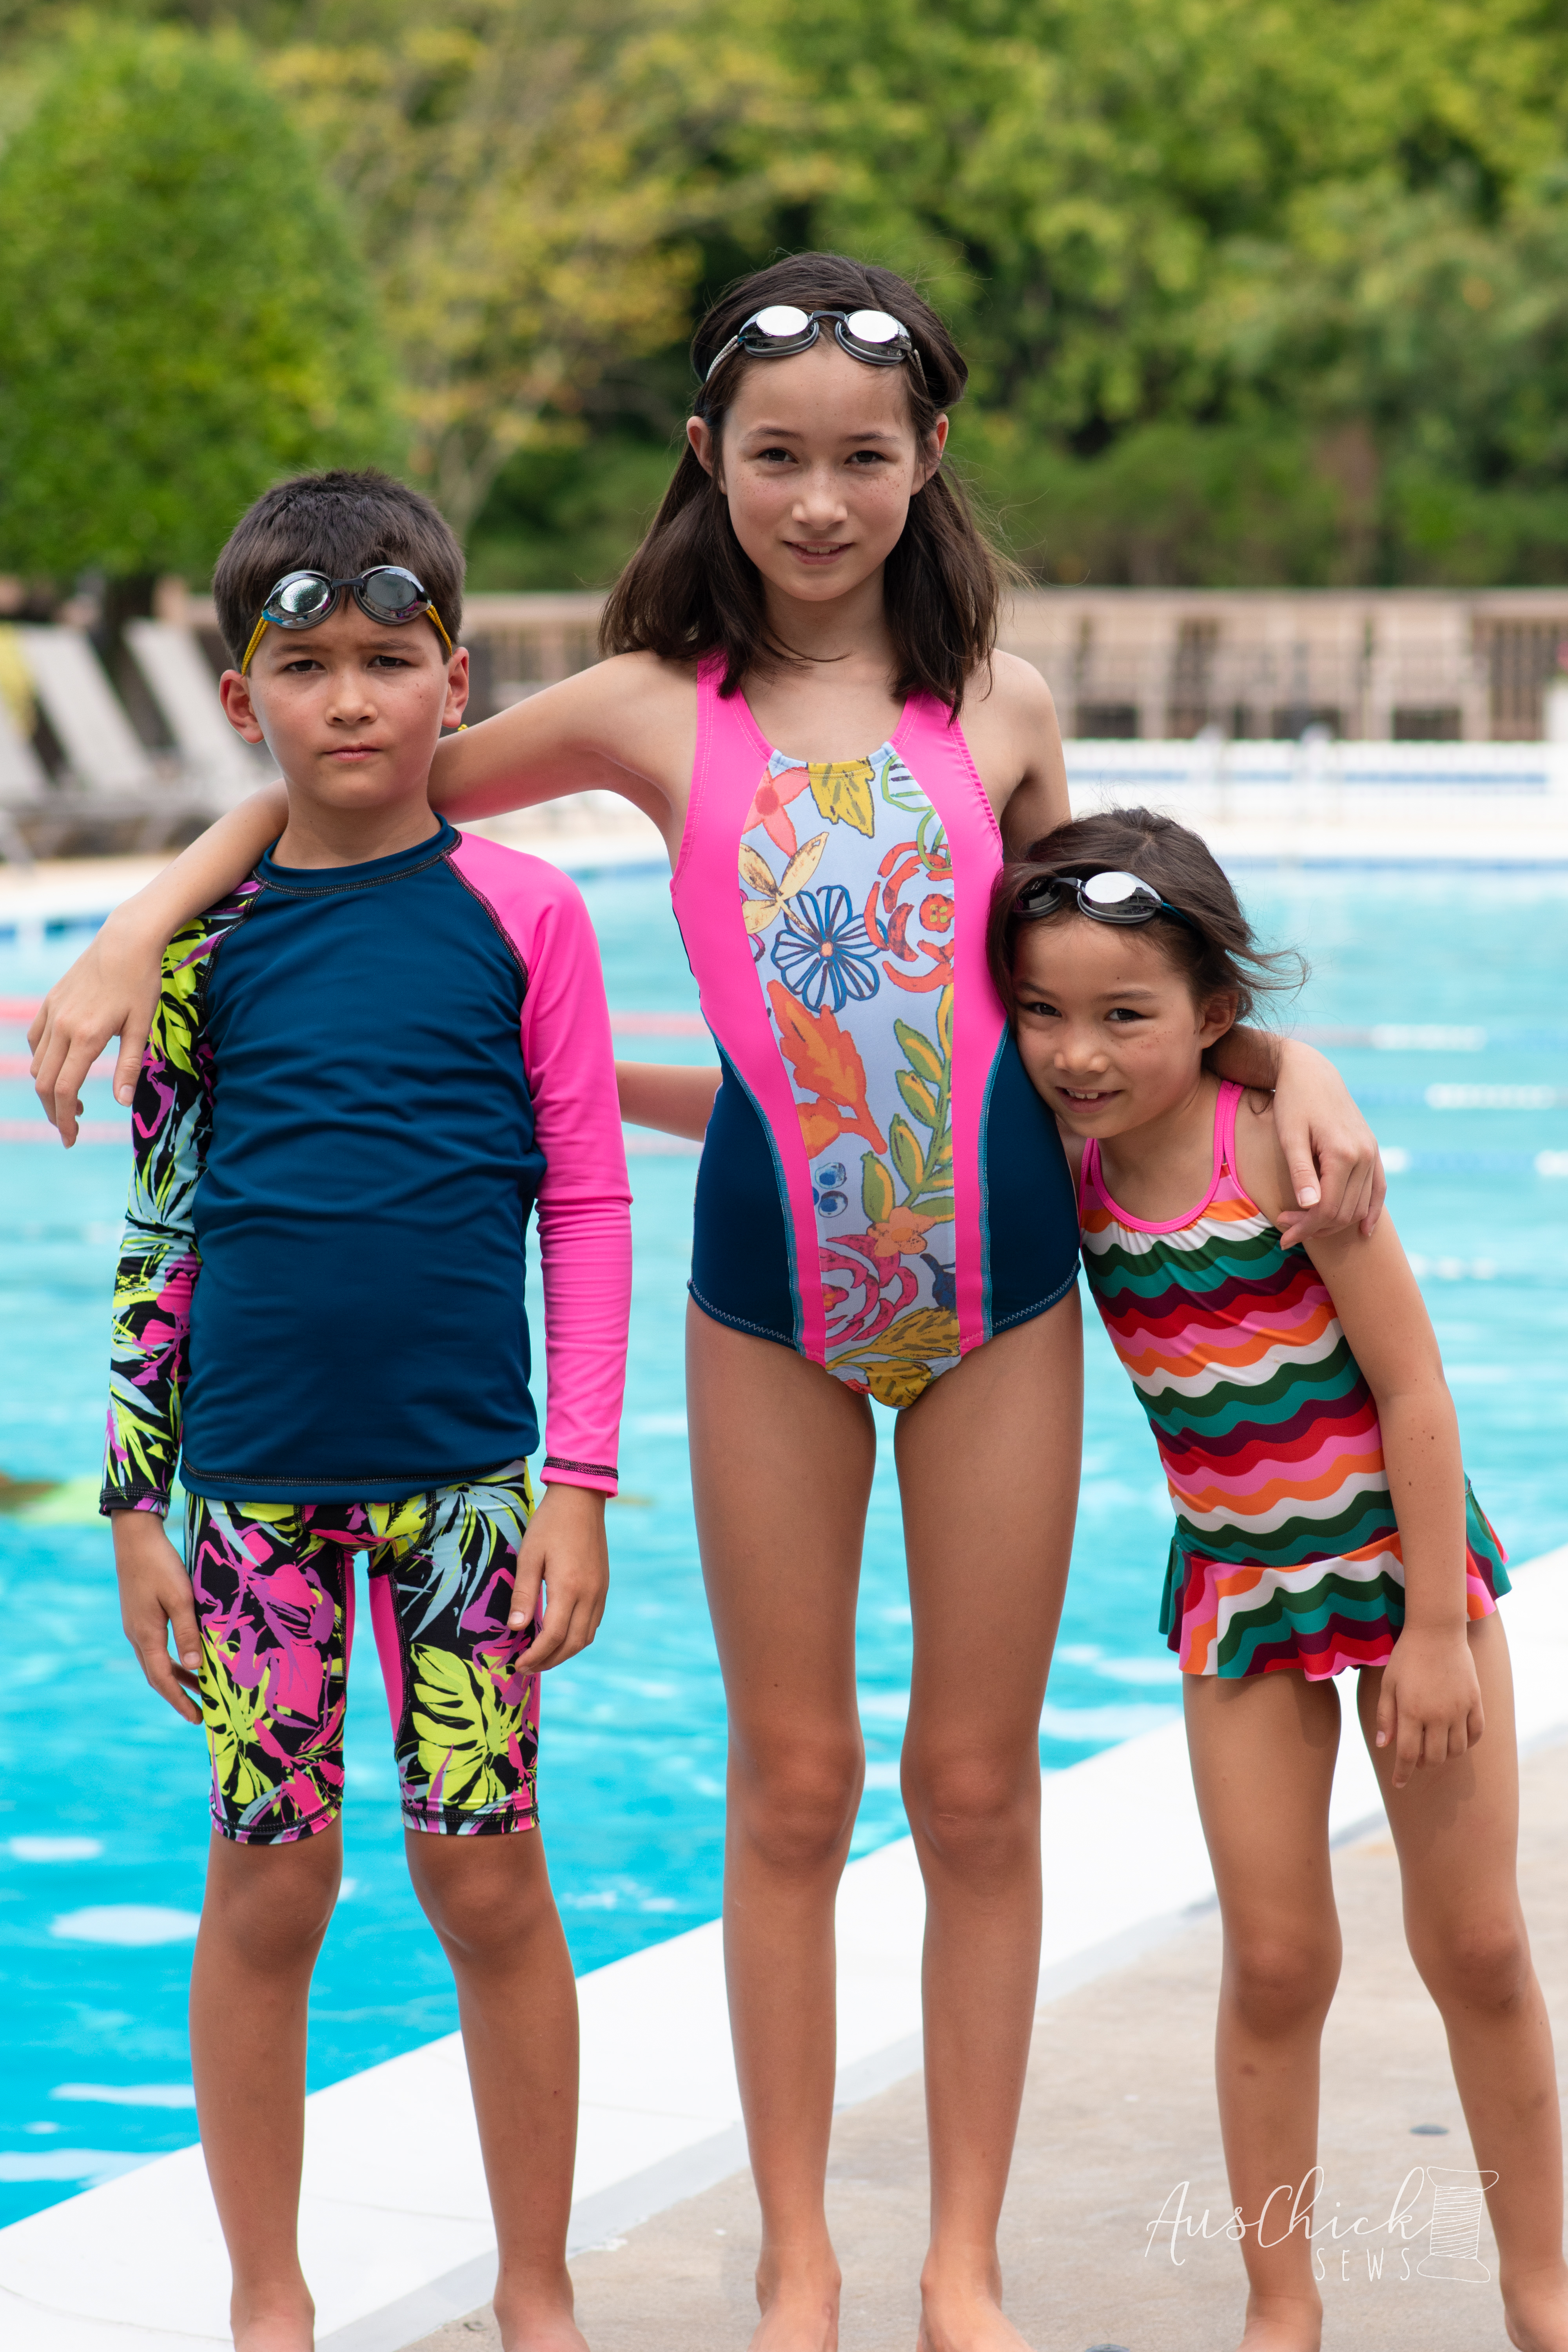
Last year my eldest was on swim team and I was floored at the cost of her suit - somewhere in the ballpark of $80! Using less than a yard of fabric and some elastic, swimsuits are incredibly cheap to make yourself!

I ultimately selected three prints and four solids (one being a beige color I intended to use as lining), with input from my children to get their preferred designs. I made an initial sketch in Photoshop to get a visual on what they would look like, and then made a few more changes once the fabric arrived.


The easiest suit to make was my son's - I used Jalie Gerald underwear and Nico raglan. This was my first time making Gerald and I loved how quickly they came together! The pattern has multiple lengths and a functional fly option. I used the swim length with a solid front. While I finished each seam using a reverse cover stitch with wooly nylon thread in the looper, you can also just use a zig zag on your regular sewing machine.


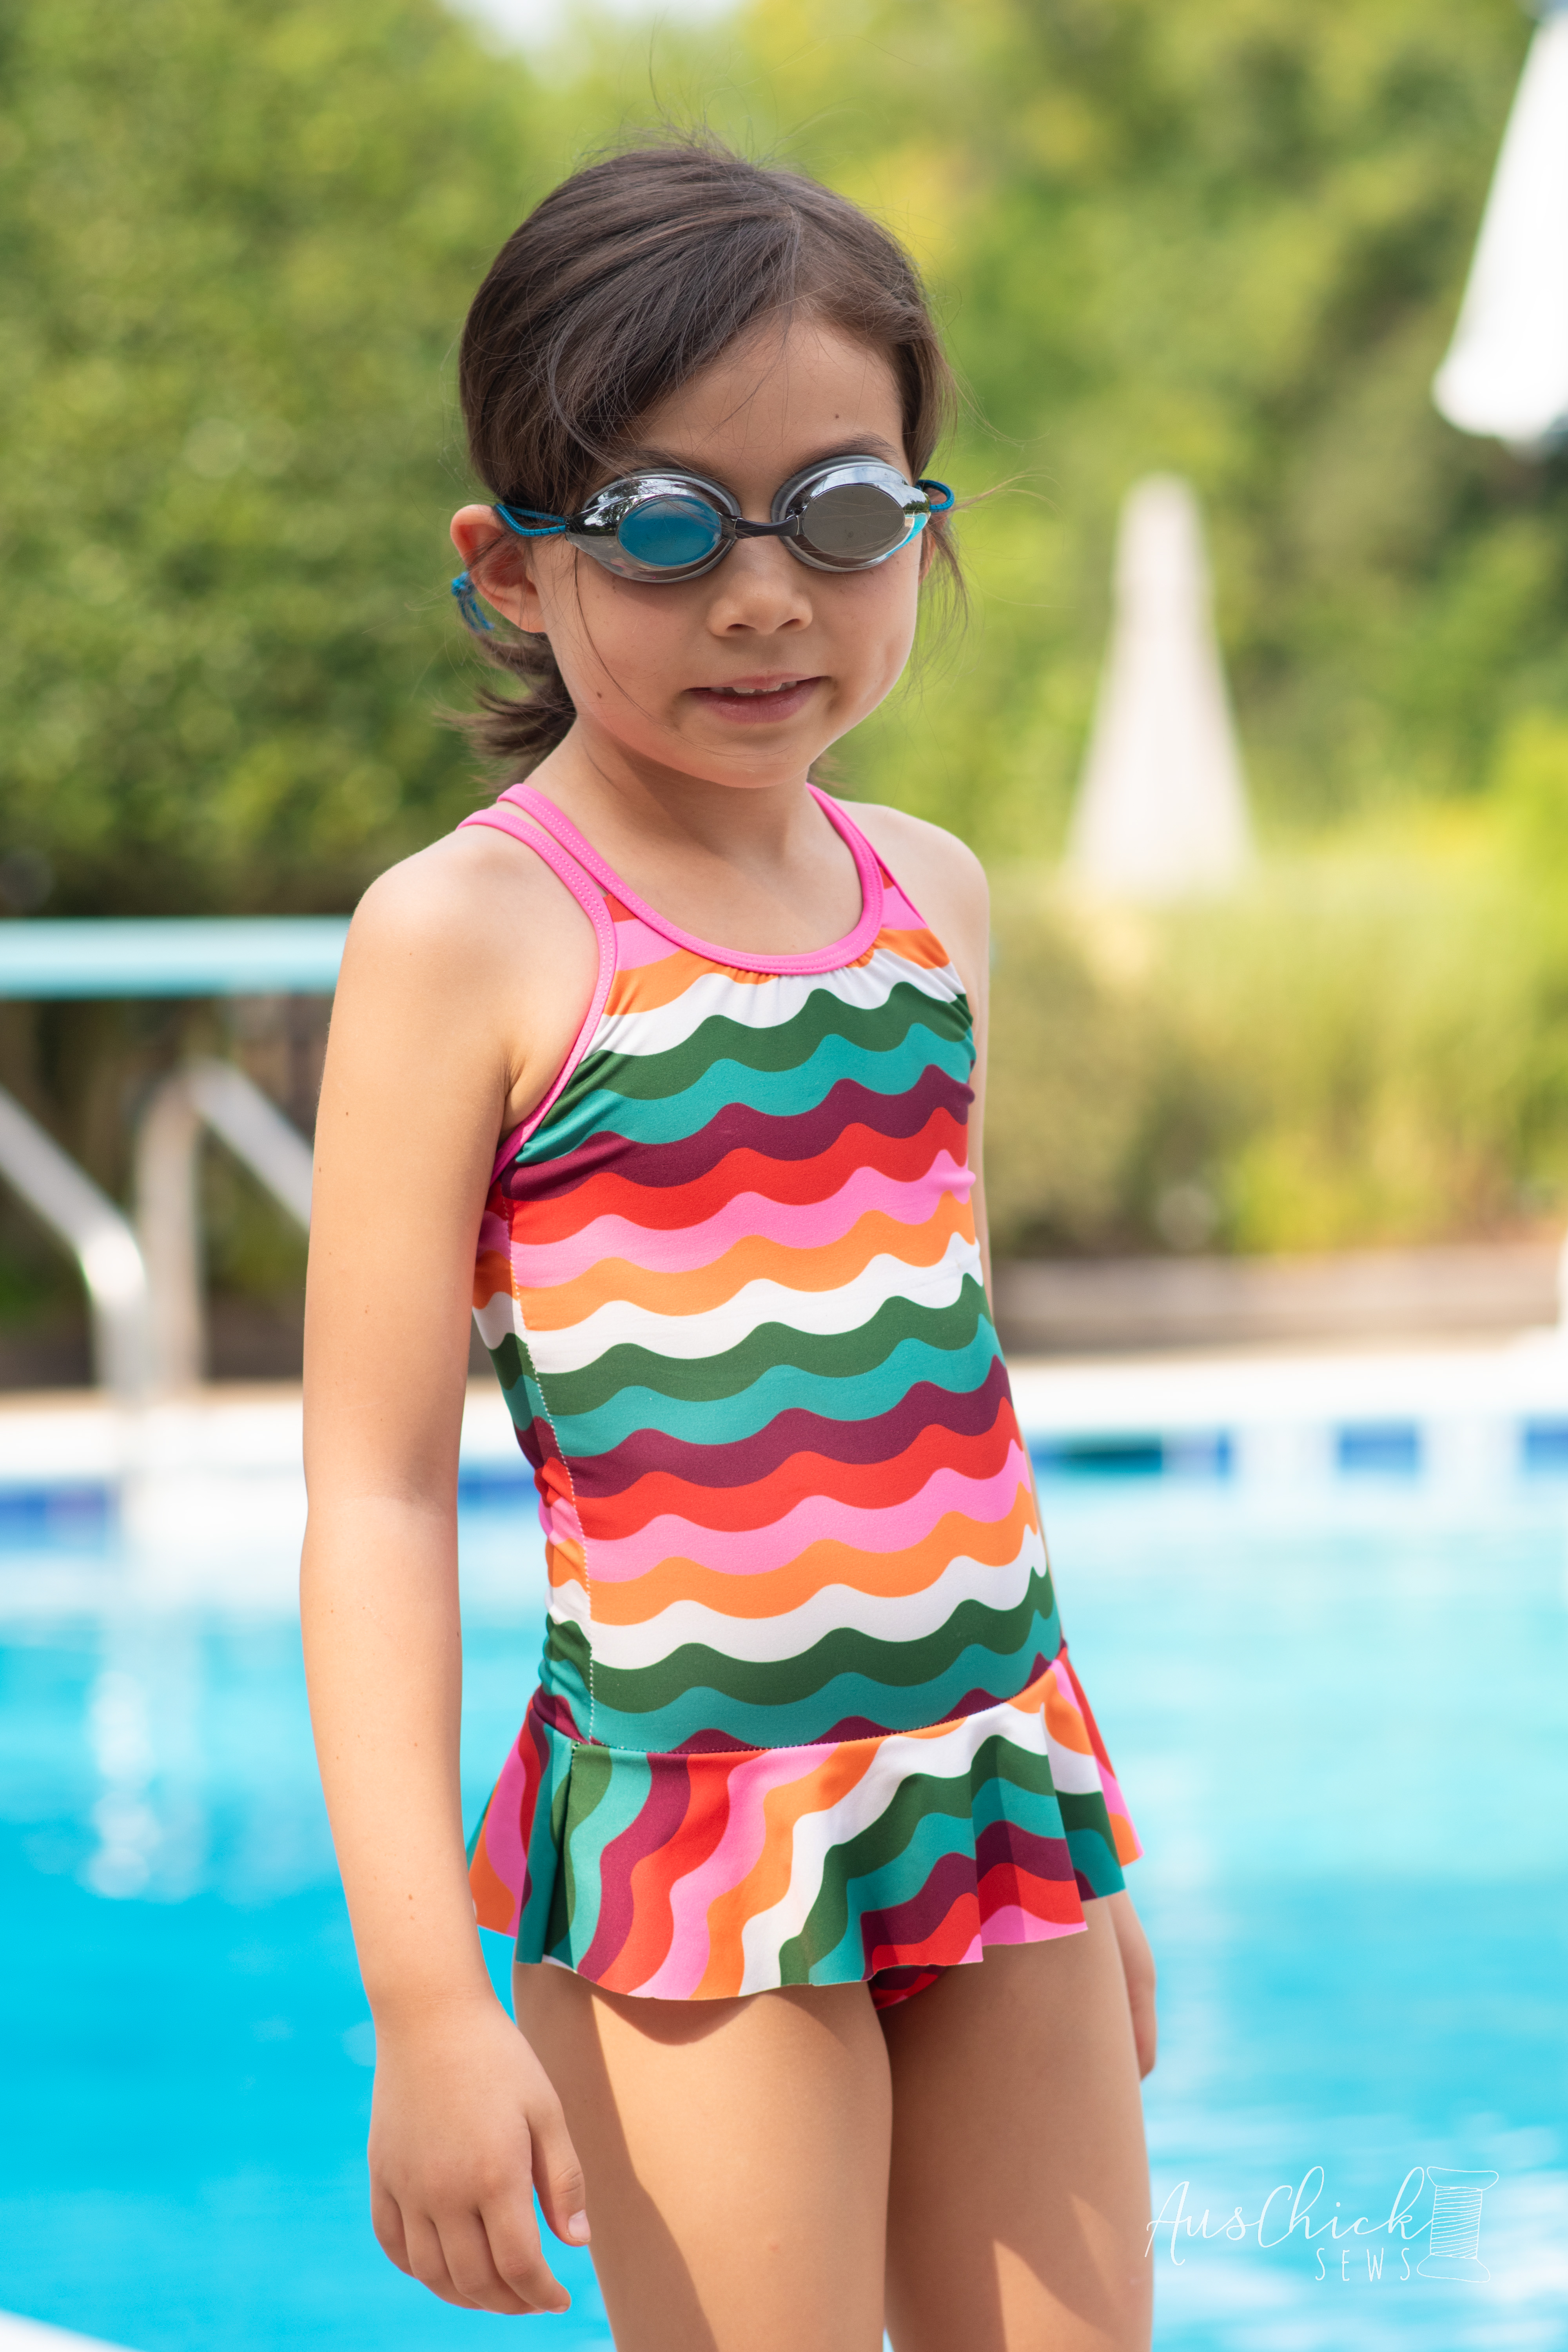
My youngest is wearing Boo! Designs Twin Swim. This also assembles pretty quickly and I love that there are no seams to rub against the skin on the inside. I especially love the binding detail on the back and the great coverage over her butt.


Now that my eldest is getting so tall, I decided to use Jalie Women's Racerback Swimsuit 3134 since it has bigger size range than Boo. This was a more challenging suit to assemble and I was bummed that it didn't come with a solid front lining piece. Next time I make this suit, I will assemble the outer front first, then trace out a full front lining so that I can hide the side seams inside the lining.


I also needed to expand my swim wardrobe, so I whipped up a Jalie Valerie rash guard for me, and coordinating Jalie Claudia bikini. I really loved how both of these came together, and they were also pretty quick to assemble as well! Before making my own suit, I checked Beach Riot's Instagram page to see how they'd use this print in last year's collection. I noticed it was used sparingly, often as an accent, and they'd used it sideways. I thought that was a fun idea and decided to do the same. The nice thing about swim fabric is it's very stretchy in each direction, so you can get away with using it sideways!
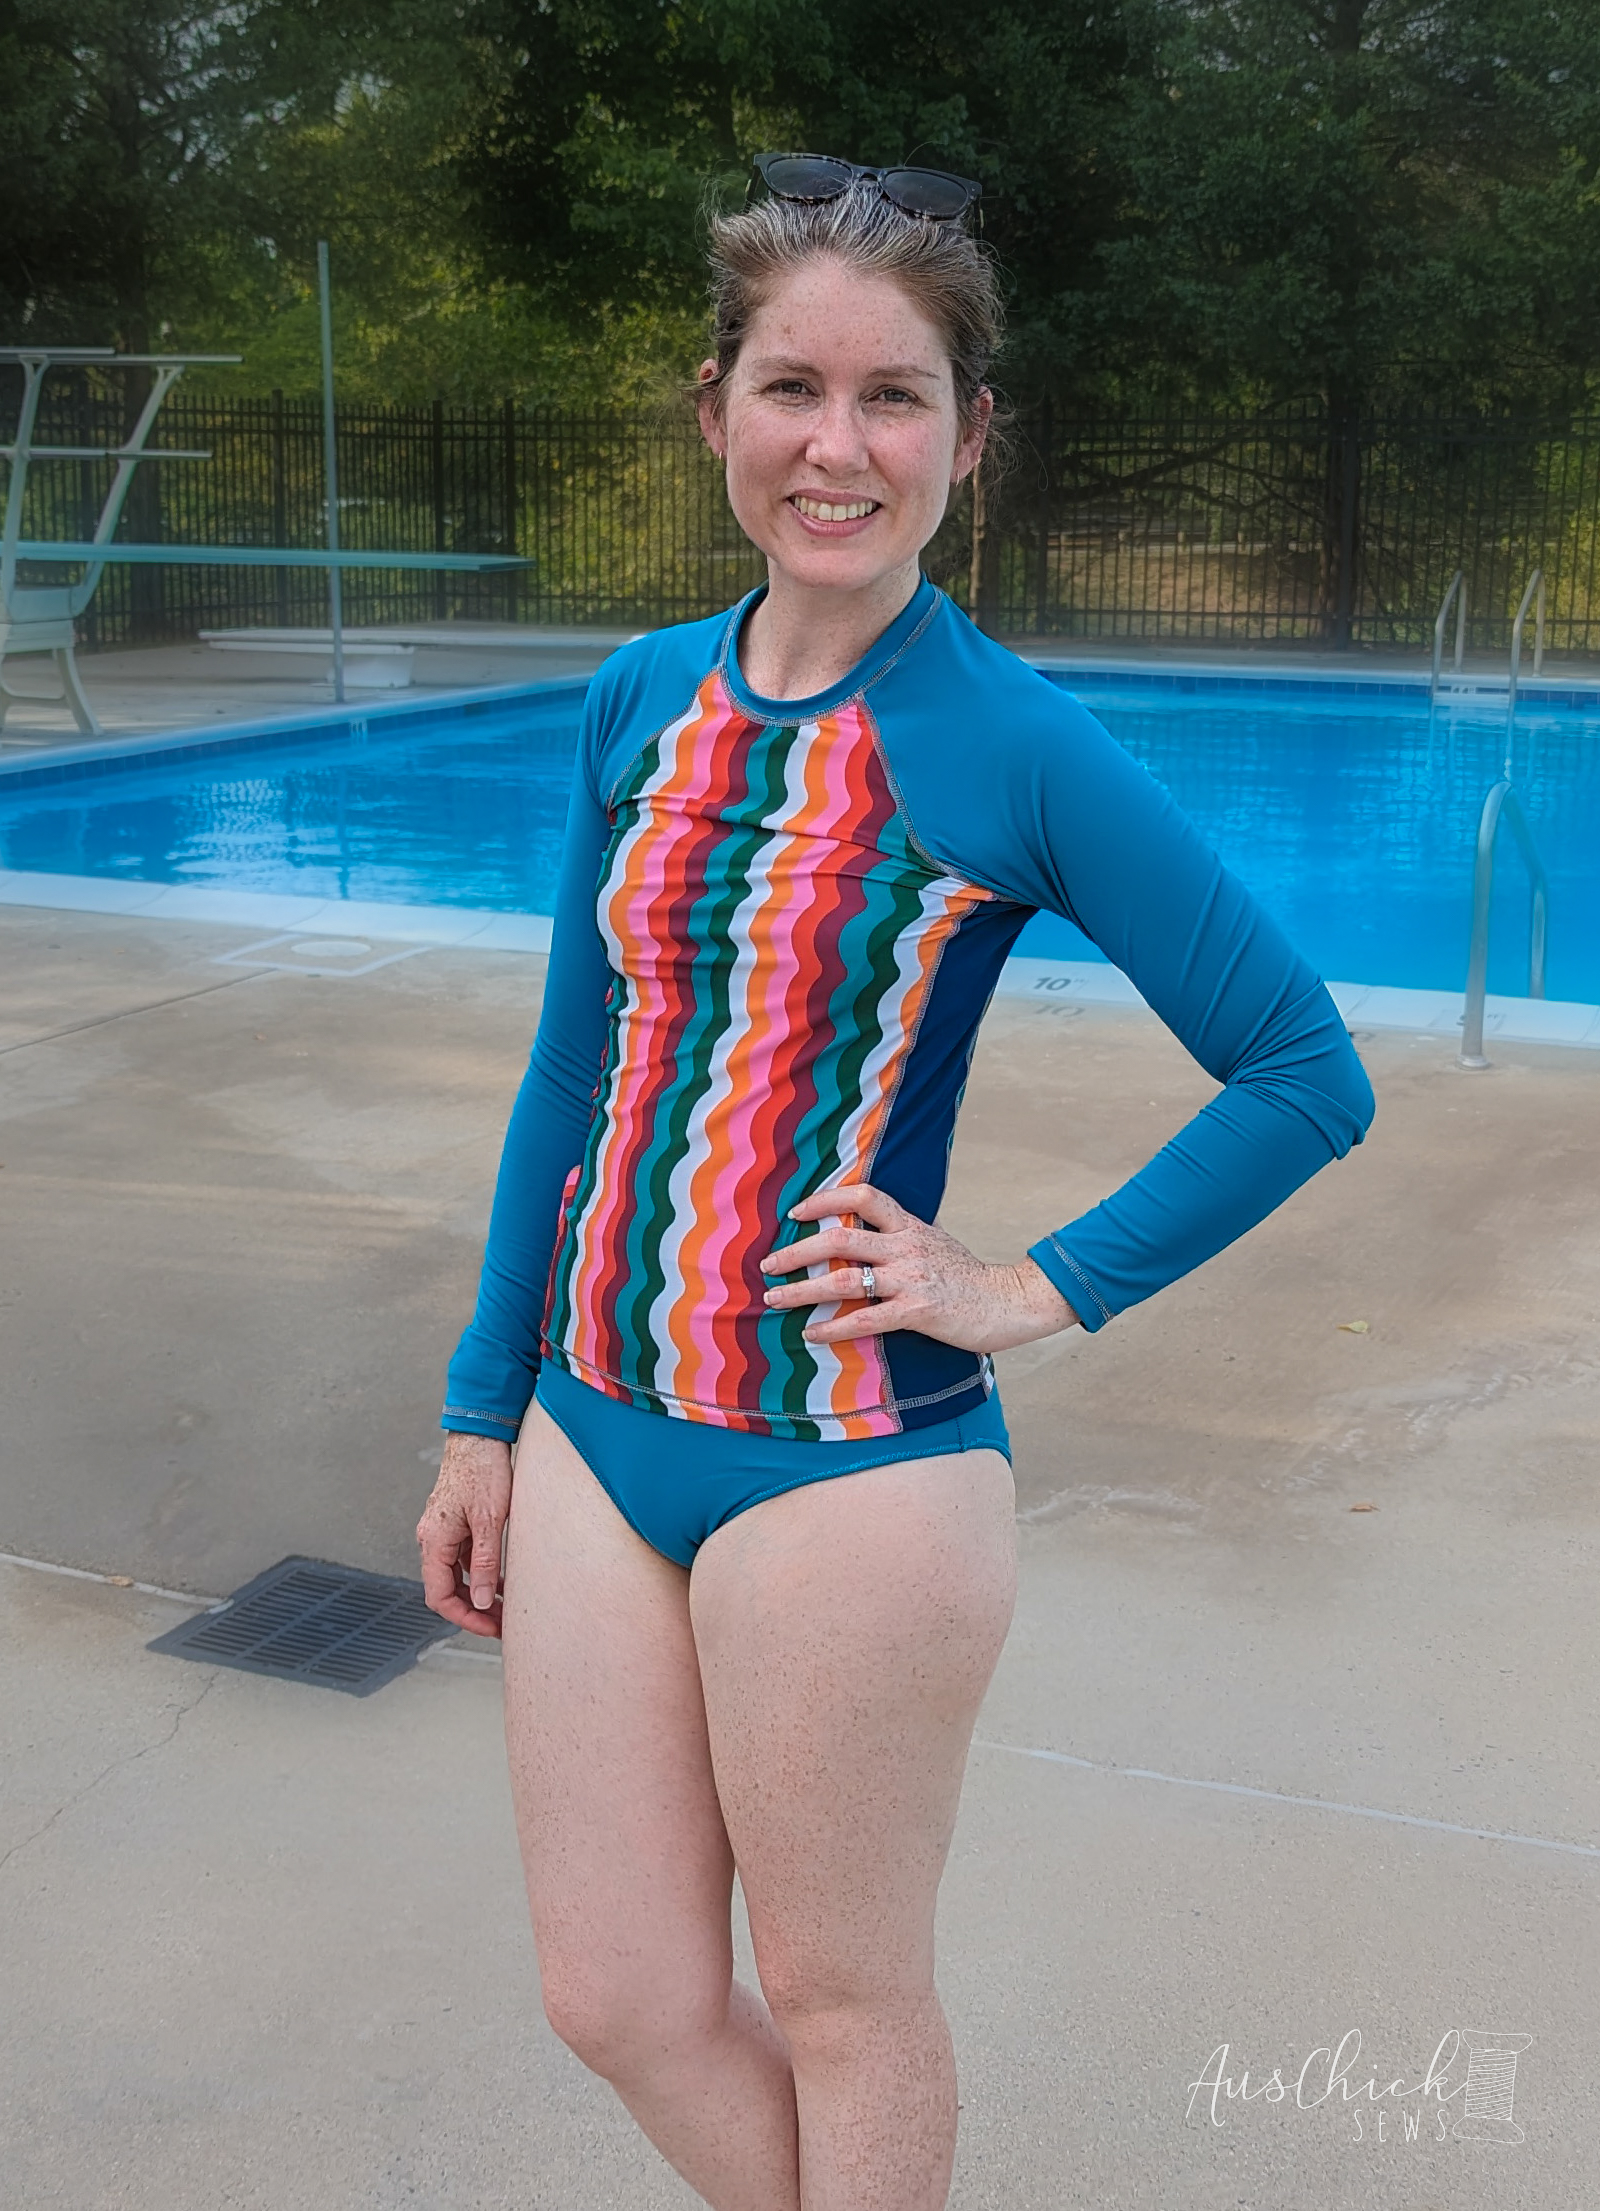
I assembled Claudia with my serger, but I should have done the darts with my sewing machine. This would have reduced bulk and minimized visible fold lines from the outside. I love that Claudia comes with instructions for adding pockets for removable swim cups - and this step was surprisingly simple to do as well!

Being Jalie, all patterns come with an extended size range, so my husband could theoretically wear the pattern my son's in, and my youngest could wear the bikini I'm wearing. I love how versatile these patterns can be!

I hope you're inspired to save yourself some money and sew up some swim for you or your family! Once you discover how easy it is to sew a rashguard, you'll be on your way to making your own swimsuits each season!


NATASHA  | @auschicksews

Unfortunately Fabric Mart Fabrics sell out quickly!
You can find similar items by shopping the following categories SWIMWEAR.

Comments

  1. Great job on all the suits! I snagged some of the Beach Riot fabrics as well and I'm working on one for myself as we speak. Love all the great designer choices at FabricMart!

    ReplyDelete
  2. Great job for entire family!
    I'm going to check out those patterns.

    ReplyDelete

Post a Comment

Thanks for leaving a comment! All comments are reviewed before posting to help us eliminate spam. Your comment will be posted within 24 hours.

Recent Posts You Might Like

Sewing With Intention: New Look 6106 and a More Coordinated Wardrobe

Sometimes a sewing project begins with a beautiful piece of fabric or a pattern you just have to make. This one began with my closet. Recently, I did a major closet purge. I took a good look at what I actually wear, what I kept reaching for, and—maybe more importantly—what was missing. Once the pieces I no longer loved or wore were gone, something became very clear: I want to be more intentional about what I sew next. Instead of sewing individual pieces that I love but don't necessarily wear together, I want to build a wardrobe where my handmade garments coordinate with the clothes I already own—and with the pieces I'm planning to sew next. For this month's Fabricista project, this beautiful lightweight shirting from Fabric Mart turned out to be a wonderful place to start. The Fabric That Started It All Fabric Mart provided this beautiful oatmeal and black heathered shirting , along with the matching thread for my project. One of the things I love most about this fabric is ...

Meeting Endless Summer Energy with a Maxi Dress

How are the temps still so hot?! I’m trying to make the best out of a blazing situation with a gorgeous swishy dress made in a splendid graphic print in an attempt to keep my cool when I am very much not. The heat persists, but so do I (while wearing sundresses)!  I really wanted a full length, all-fancy-design-details-included version of the new Chalk & Notch Noe Tank Dress since testing the pattern. This is View C. This version features a beautiful open back with a tie closure and the long gathered hem for maximum impact.  I chose the higher of two necklines. The pattern features full lining and I used the same fabric for both. I prefer to avoid any peeking-issues the easy way.  As I was scrolling through the challis options on the Fabric Mart site, this one stood out immediately, a beautiful kelly green with big abstract swipes of aqua. Simple, bold, (non-directional!), all of my favorite characteristics necessary for a showstopping dress. I wanted something very ...

The Perfect Plan for this Linen Blend! Until I Changed My Mind.

Hello Sewing Friends!  It’s Sharon from Sharon Sews with another Fabricista make.  When I saw this linen blend designer fabric on the Fabric Mart Fabrics website, I was intrigued.  After all, I, like many of you, love to find designer fabrics at an affordable price. It is a linen/nylon/rayon/Lycra blend, and I wondered what the designer had created with the fabric as I wasn’t familiar with that combination of fibers.  Surprisingly, I discovered a sleeveless, lined, mid-length vest in the same color with an almost identical fabric composition. Perfect! I’ve been wanting to sew a longer vest with matching pants, and that discovery confirmed this fabric would work beautifully for the look I had in mind.  The vest I’m wearing, from the June 2026 Burda Style magazine, it is not what I was originally going to make.  You see when I found the designer’s vest, I remembered seeing a Butterick pattern that was almost identical.  I ordered the pattern excited to...

Fall + Flannel = Shacket

If there is one piece that transitions easily between crisp fall mornings, mid-day warmth, and chilly autumn nights, it’s a shacket. Today, I’m excited to share my latest Fabric Mart make: the Ellie and Mac Patterns Connie Casual Shacket, sewn in a dreamy plaid flannel coating fabric . Here’s a glimpse at how it came together, along with a few construction tips for planning your own version! The Ellie and Mac Patterns Connie Casual Shacket pattern offers plenty of options needed to make the perfect transitional top layer for fall. With a relaxed body, oversized sleeves, three lengths, and a curved or straight hem option, you can make your dream shacket a reality.  For this sew, I selected a plaid flannel coating fabric with a soft blend of sage green and cream tones from the Fabric Mart website. Heavyweight flannel is ideal for a shacket because it provides structure and added warmth. As a bonus, this particular fabric is extra soft and snuggly, which I love. In addition to the fa...