

Today's big reveal day! This week's challenge was to pick one handmade garment that you previously made but turned out all wrong. Whether it was the fit, the color or type of the fabric, etc, turn it into something new! They could change the garment and make it an entirely new item or alter and adjust a failed garment to make it great! We had both of these scenerios in the challenge and I'm so happy these ladies put themselves to the challenge. Doesn't it make you want to tackle that failed project pile?!
This week's guest judges are Pamela Leggett from Pamela's Patterns and Angela Wolf from Angela Wolf Patterns. See previous post for requirements and prizes.
And if you played along, use #fabricistafashionchallengereader on Facebook, Twitter or Instagram or email me a photo of your Handmade Remake, and you will be entered in a random drawing for prizes. Submit your photo by Thursday night.
Let's see what they made!
Chui from Wear the Ducky Tie

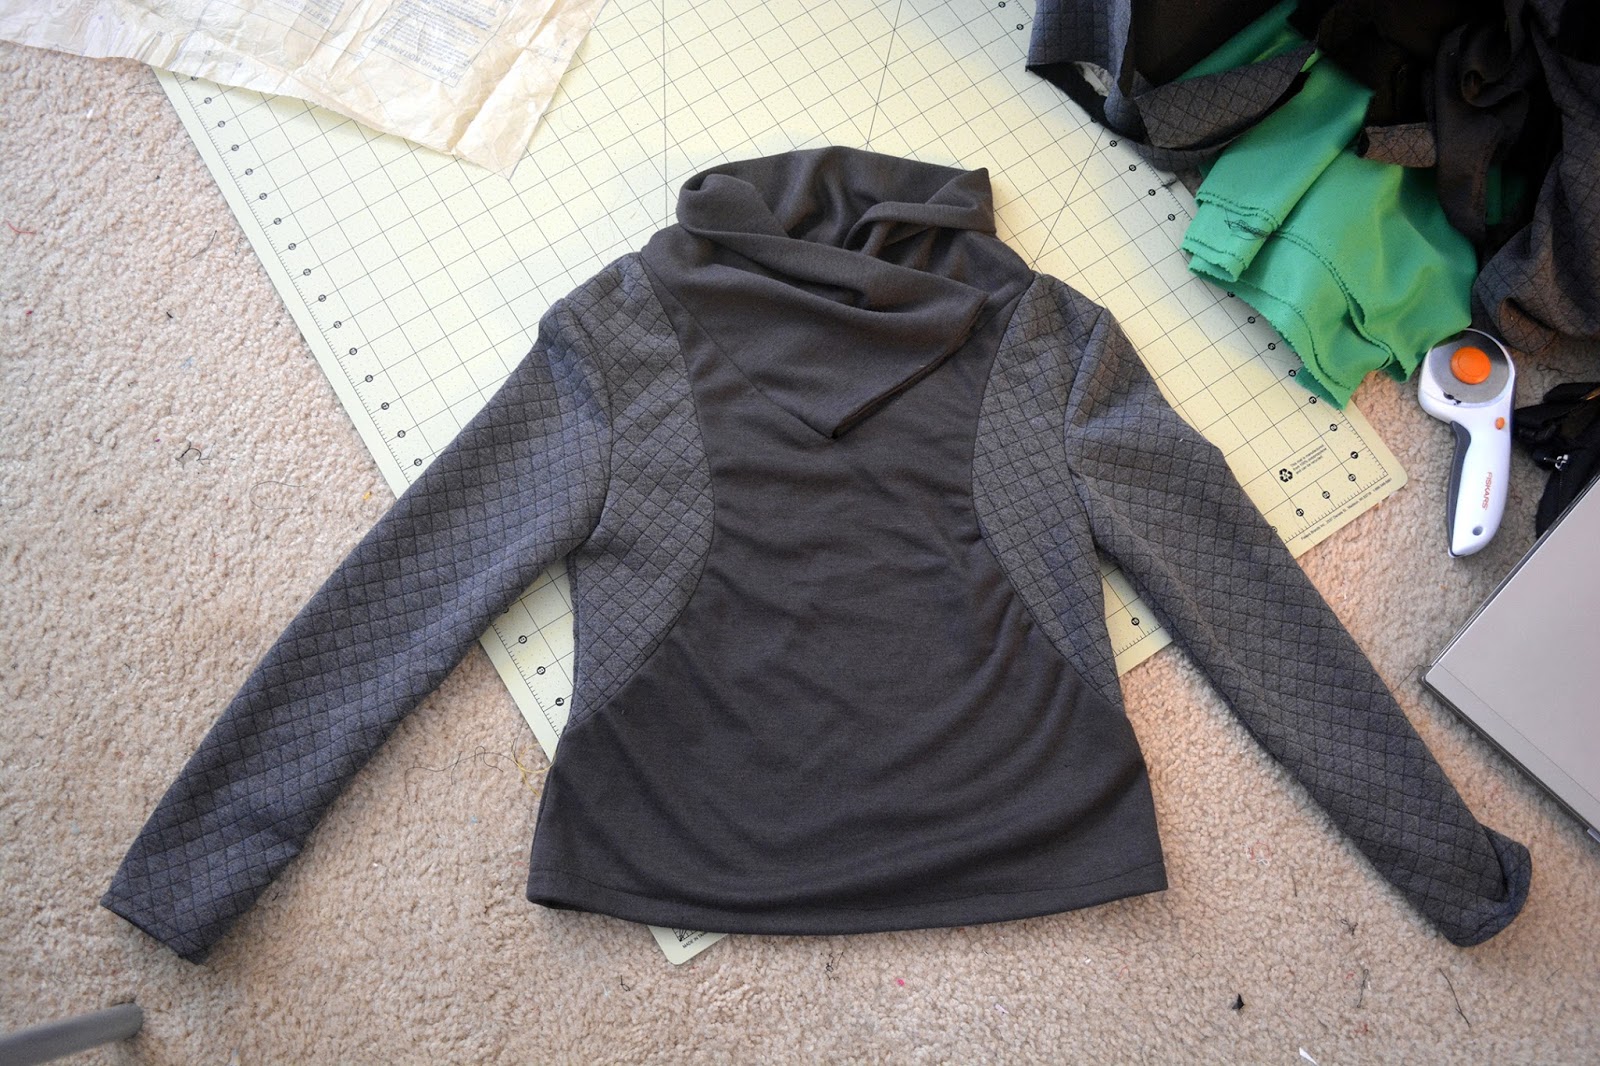
The original garment was a draped collar tunic I made following a tutorial by Unpetit Designs. I loved the collar but wasn't digging the dolman sleeves. The fabric I used was heavier than the inspiration so it didn't drape as nicely and the ends of the sleeves were too narrow.

I decided to revamp it by keeping the collar and the general shape but inserting set-in sleeves and adding some contrasting fabric for visual interest. I loosely traced the side front, sleeve and side back pieces from McCall 7199 to make those changes. I had wanted to but didn't have enough fabric to copy 7199 exactly.

I like how the quilted pieces pop and the sleeves have less bunching. It did go from too loose to a little tight but I was on a bit on a time constraint. I was out of town Friday night to Monday night and I couldn't take my seam ripper on the plane with me!

Overall, I'm happy with this new style but I would still like to tweak it.
Dawn from Two On, Two Off

Back in April, I made what I thought would be cute peasant blouse. Well, it turned into a pirate outfit that was not cute. It was way too much of everything -- ruffles, gathers, elastic, ugh. I did love the fabric but could never see myself wearing it.
When I was done, this is really all that was left. There was a tiny bit of scraps too but not much!!!

This is the original top with the arms cut off.

This challenge gave me the opportunity to cut it up and start again. Basically, I took my shirt, cut the raglan sleeves off, flipped it upside down and added an elastic waist and pieced together a double thick hem to give it some body.I love the double-thickness hem I added to the bottom. I love the darker colors and I also love the extra weight it gives the skirt. I chopped up the sleeves and pieced this together. It's six inches, folded in half to make the hem.


Here's what I ended up with. I really like it and I'll definitely wear it now. I also think it would be great with a chunky sweater and tights. All in all, I think it's a win for me regardless of what happens in the contest. I really like how it turned out and I'll actually wear it now. I was dreading this contest because I HATE seam ripping things and I will literally let them sit for months rather than do something with them. I'm a loser like that. This motivated me to get off my buttocks and just DO IT!


Donna from Curvy Girls are Chic


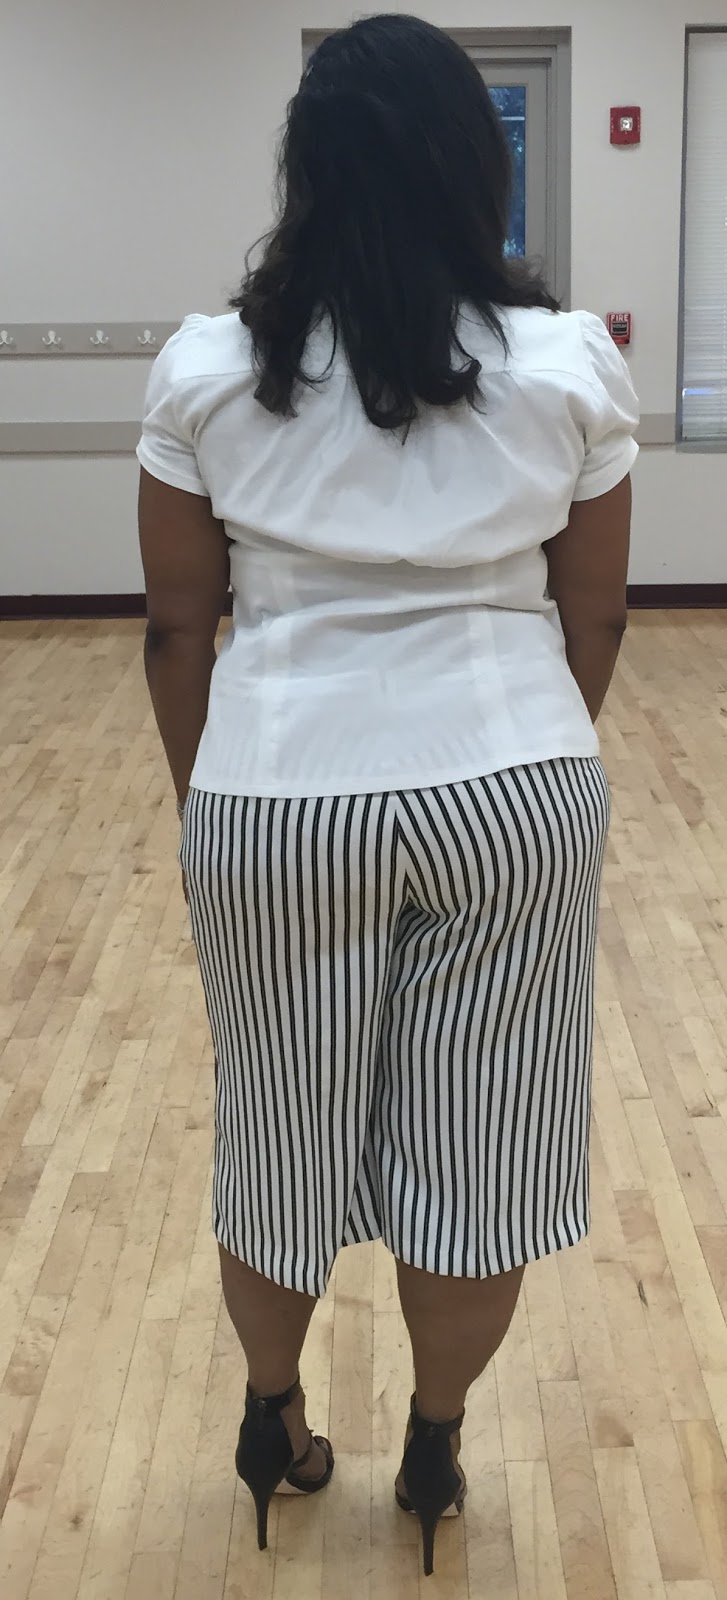
Culottes made a comeback
this summer although they never left some fashionistas wardrobe. I like them
because they are in between the length of shorts and pants and most look
similar to an A-line skirt because of its drape. I purchased this black and white stripe fabric
from Fabric Mart initially to create culottes and a blazer (an updated summer
suit). When I received the fabric the stripe is horizontal vs vertical which I
found challenging as the stripes when against the grain vs with the grain. So I
decided to just create the culottes with this Burda Pants Pattern.
I chose this pattern because they were not too wide or too slim.
Here is the situation: Initially
when I took, the pattern out I said “these pattern pieces seem small? I took
my measurements against the pattern pieces and said hummm this says it will
“fit” even with the ease. The one joy about sewing for yourself is you can fit
before the garment is finished. You can even stick one leg in one pants leg to
see how it will go. Well yes, they “fit” but the fit is too tight! I also found
it very challenging with the pockets, matching the stripe with the pocket yoke
because a huge challenge.


Craftsmanship /
Do Over – I decided that I did
not need the pockets, they show through the white fabric and it is not very
attractive. If you have white pockets in
white pants, it should be done with “flesh-tone lining or fabric.” Therefore, I
eliminated that. I took the pattern pieces
and compared them to another similar pattern and for sure this pattern is many
times too small. The size 14 was bigger on the McCalls than this Burda. I
digress I still used the same Burda pattern, recut the pieces, widened the
hips, raised the back rise, and I also added belt loops in case I ever wear
them with a tucked in blouse. I also changed the front pleats – initially these
culottes had one pleat but I divided the pleat in half, added a pleat (for two
pleats), and placed the pleats directly on a dominant stripe. I hemmed the pants with lace hem tape. The
waistband and hemming were never completed in the first pair they just went to
the corner of shame L

Fit – The pants fit much better, there is no
cutting in the crotch area, it is not pulling in the rear area
and I have room
to move in the waist and the hips.


Elizabeth from I Sew, You Sew
From "I don't want to be a
pirate" shirt to pleasant peasant blouse.

Tell us about the project - I call this original, handmade beauty the Jerry Seinfield "I don't want to be a pirate" blouse. Watch this Youtube link to see what I mean. This pirate shirt was a definite fail for me and has remained balled up in my closet for about one year. The combination of terrible proportions, blah color, lack of embellishments really repulsed me and I never wore it. When considering this project I thought this top would be a perfect blank canvas for an embellished peasant top. Three things really elevated this garment from drab to fab- a dye bath, changes in proportions and embellishments.

Dye Bath:
The first thing that had to change was the color. I used a navy liquid RIT dye bath with one cup of salt added to it and dyed the top, lace and length of cotton swiss dot that would become the sleeve tabs. I find the liquid RIT dyes cloth much more evenly than the powder. The laces, swiss dot, and shirt all came out of the bath in varying shades of navy and I love the bit of contrast between all of them. This color is so much easier to wear than the original off-white that just ended up washing my face out- not to mention making me look like someone from The Little House on the Prairie.

Proportions:
I picked apart the garment's unflattering proportions, shortening the front and back hem and creating a split hi-low hem. I also thought that the length of the original sleeves hit an awkward place on my arms so I picked out all the elastic threads and rolled them up holding them with a functional sleeve tabs. The sleeve tabs were interfaced with tricot and the buttons are shell buttons from my stash. The new sleeve length now hits the narrowest part of my torso. These two changes really helped bring the garment up- instantly evening out the proportions.

Embellishments:
I altered the neckline to add interest, I found the original neckline completely boring, so I notched out the center front finishing it with bias tape. I added the lace and tassels after the dye bath, stitching the lace down with two rows of stitching to make sure everything stayed securely in place. The tassels were made from embroidery floss found in my stash. I glanced over a tutorial on tassels found on Pinterest but mostly winged it since I've made tassels in the past. I also applied lace to the hemline to add interest in that area as well.

Before remaking the top the design completely
overwhelmed my frame. I love the new
proportions, color and embellishments on this top, I have already worn it out
and received compliments. Hooray! I don't have to be a pirate any more!!


Kristen from Sunny Sewing

In July, I got the idea to use a favorite cotton lawn fabric that I had been hoarding since May of 2014 to make a BurdaStyle maxi skirt. It had a yoke, gathers at the hip, and an invisible zipper that went down and attached into the pocket bag. I underlined this skirt with very soft and light ivory cotton.

When finished, I was not happy with the look of the skirt on me. I felt frumpy, heavy, and it emphasized my large hips too much. I didn’t have an appropriate top to wear with the skirt either; plus, I knew a pear-shape like me should not wear gathers at the hip, let alone the largest part of my hip but the skirt was too cute to resist trying. In the end, the style of skirt just was not right for shape. I knew I would eventually have to cut up the skirt and make something better from it because I did not want to waste fabric that I loved. Thankfully this challenge came along.

I cut up the Burda skirt and remade the fabric into Simplicity 1801, a cute sundress. This dress has all the right elements to make me feel great while wearing it. My waist being the smallest part of me, I like to place some emphasis on it instead of my large hips. This dress has shoulder and under bust gathers, a nice smooth yoke at the waist, and gathers at the lower waist in front and back. I like that it does not gather on the sides, leaving that area smooth. There is a yoke for the upper back that makes the top fit so nicely. I used a size smaller than my measurements because I do not care for too much ease, sewing a size 12 for shoulder, 14 for bust/waist, and grading to an 18 at the hip. The instructions for this pattern are excellent. Everything is clearly explained and there are plenty of pictures.
Adjustments I made to the pattern:
*I raised the neckline center 1” because it was too low, I also had to adjust the front facing for this, too
*1/4" high round back (this worked great because the back hugs my body so well now)
*1/4" forward shoulder and 1/4" square shoulder – both these are perfect because the shoulder seam now hits my shoulder in the right spot
Construction: I took care to serge all edges. I used the ivory cotton from the original skirt lining to underline the whole dress. The floral fabric, while beautiful, is a lawn so it is slightly see through. I stitched the midriff band in the ditch to catch the midriff facing on the underside. I made sure to hand stitch the facings down, catching the underlining only so no stitches were seen on the front sides of the dress (I included a close up of the back facing). This is the first time I’ve done this, I normally do not enjoy any hand sewing but I wanted to keep the facings down and keep the dress insides looking nice. The invisible zipper is truly invisible and I took care to match up the waist yoke seams on both sides of the zipper (I included a picture of this).

I had to be very careful when cutting up the original skirt to make sure I had enough fabric for all my pieces. The bodices were cut from the bottom part of the skirt, the top half of the skirt being saved to cut and sew into the dress skirt section. The waist yoke and shoulder yokes were cut from the old skirt yoke. It was challenging to keep everything on grain! I had to dig and find a tiny scrap of this fabric that I had leftover to cut out the upper back yoke. I ran out of the ivory cotton underlining for the front bodice so I had to use brown cotton I had in scraps; the bias strips for the arm scythe are also in the brown cotton scraps. I had to use some of the scraps previously leftover from the original skirt floral fabric for the underlining of the back bodice. I just barely made it work; there are no leftovers from the original skirt!
I’m very happy with the new dress, the fit is just what I wanted and I’m even happier I was able to rescue the floral fabric. The bonus is that I no longer need to worry about what top to wear with this fabric since it is now a dress. I see myself wearing this quite often.


I was pretty nervous about the challenge right after it was announced. I was torn do I take a previous EPIC FAIL project and start from scratch? Or do I try to salvage a project that had a little hope? After much back and forth I decided this was a challenge and the biggest challenge for me was to try to rework a previous FAIL. You see most of my fails end up in a fail pile in the closet of my sewing room never to be seen again.


Earlier this year I made up Vogue 9047 thinking it would be a pretty easy sew and a great work dress. I liked both views and decided to make View A but a color blocked version using a pattern for the bodice and a solid for the skirt. I thought this would give the fitted shirt tucked in to a high waist pencil skirt look.
The dress is described as a close fitting pull over dress with a raised waist. Well when I was done the waist was more than raised, the bodice was so short it looked like an empire waist. The bodice was too snug and the darts hit in the wrong place. Additionally my pattern pairing did not work as anticipated because the narrow black stripes got lost in the mainly red fabric. I also didn’t like how the darts distorted the stripes over the bust. When I was done this made it to the fail pile.
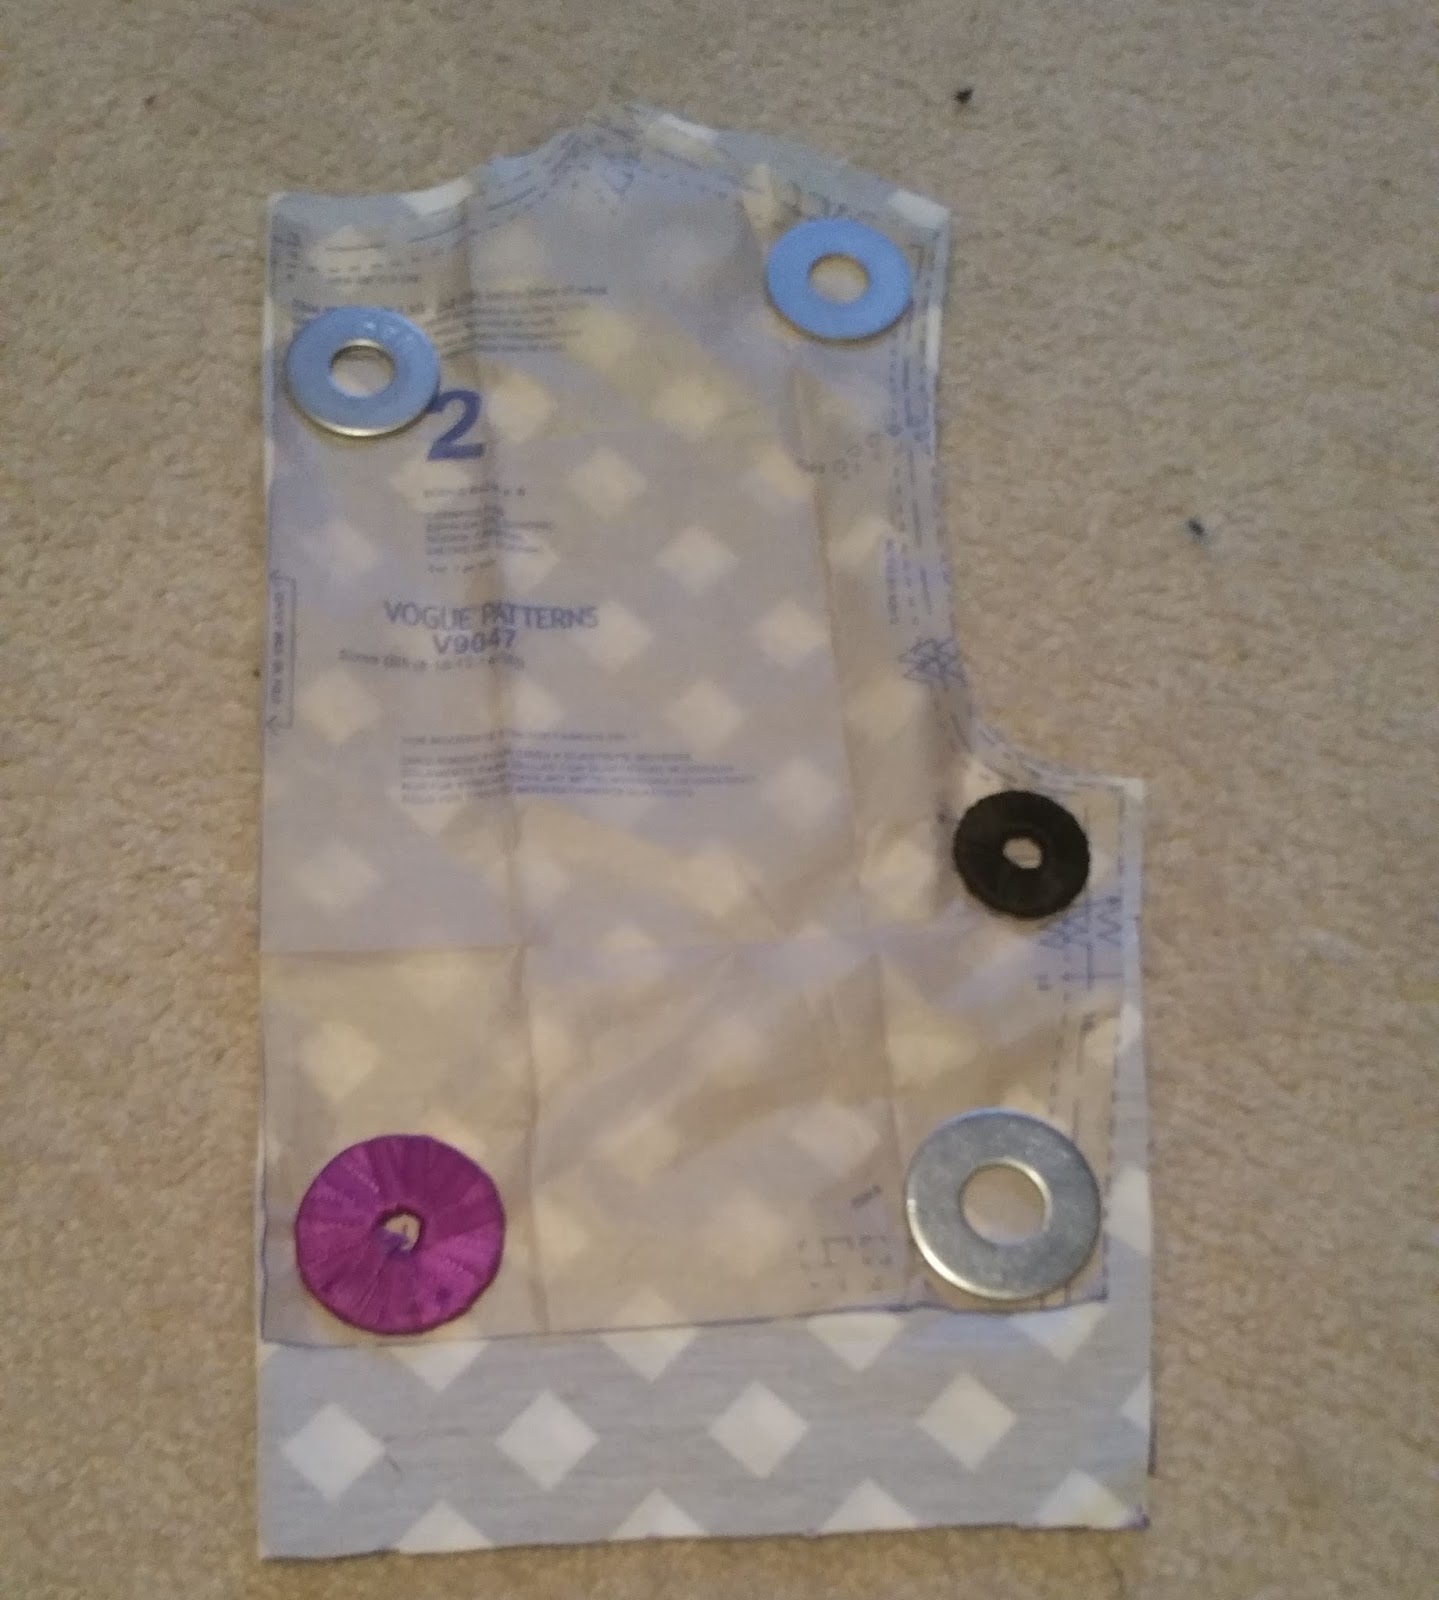
I decided to salvage this dress by removing the old bodice and creating a brand new better bodice to add to the old skirt for a revamped piece. First I had to address the bodice fit issues. I started by cutting a larger size (which I had to eyeball because I trimmed down to the size I thought I needed the first time). This alone added a bit to the bodice length at the shoulders but I then lengthened the front bodice piece by 2” and the back bodice piece by 1’5”. To address the misplaced darts I chose the darts for the new larger size and shortened them about ¼”. I also chose to use this beautiful black on white lattice print ponte for the new bodice as I felt this bigger bolder pattern would work much better with the solid black skirt.


After making those changes and sewing up the bodice I attached the skirt and VOILA! Here is the revamped version. I feel it was saved and now I love it.


Be sure to vote for your favorite remake! VOTE HERE! Voting ends Friday at 5am. Voting is over.
WOW!!! What a great job everyone!
ReplyDeleteI need to start another project so to block my nervousness until Friday. LOL
Good Luck.
These are great! I love seeing what all of the ladies made. :) I am inspired to pull out my most unfortunate fleece sweatshirt fail and remake it into something much more awesome. Off to vote now...
ReplyDeleteThis is unexpectedly one of the most inspiring sewing posts I have read! I love what each person has done. I'm so impressed -- and also inspired. I have several big fails sitting around that need to be transformed;)
ReplyDeleteGreat job ladies! Very impressed!
ReplyDeleteGoodness how can you choose a winner here. Each project is unique in how it was tackled and what the eventual outcome was. Success all round!
ReplyDeleteWow all of these look so good! Nicely done ladies!
ReplyDeleteMy auntie Donna got skills. Great job! No fabric wasted. Did I say cute?? :) :)
ReplyDeleteGreat transformation Frougle Fashionista!
ReplyDeleteYou guys did an awesome job!!!!
ReplyDeleteGreat work ladies!
ReplyDeleteGreat job on your project makeovers!!!
ReplyDeleteWow, that was a hard decision! Chui, I loved your transformation. I may even look into revamping some old shirts. Kristen, your transformation was absolutely to die for! The fit was great! Tiffany, I liked the way you lengthened the top. black and white was a great alternative. Dawn, I love that fabric and it looks ten times better as a skirt. Great job on the details as well. Good luck everyone!
ReplyDeleteThank you Jenese
DeleteGreat work Tiffiny your remake looks great
Delete. Good job
Thank you for a great explanation. I was looking online for a similar idea and really appreciate it
ReplyDelete