

This is the last and final week of the Fabricista Fashion Challenge! I have had a lot of fun seeing what everyone has come up with in every challenge-- it is so inspiring! I'm sure these ladies are excited to have made it this far but also looking forward to being finished. This challenge is a lot of work!
Everyone wins a prize this week, but the grand prize winner receives $25 a month for one year to spend on fabric, plus be a Fabricista blogger for 6 months writing guest posts for our blog. (A $300 value with media exposure.) You will also receive a Julie's Picks Membership.
This week's judges are Melissa Watson from Palmer/Pletsch and Sharon Blair from Portland Sewing. You can read their bios HERE.
Let's see what the contestants made.
Elizabeth from I Sew, You Sew

I love my plaid wool skirt made last fall
from thrifted/reclaimed wool. However I often
found that the one coordinating top that I had was either at the dry cleaners
or too warm to wear. So my lovely wool
skirt has spent too many days lingering in the closet when it could be a major
player in my fall wardrobe. I also had
the feeling that the jackets I tried to pair with the skirt were either too
casual or too long and covered up my beautiful plaid. In order to better fit my wool skirt into my
wardrobe rotation I decided to make a coordinating top and jacket.

First Coordinating Piece: Moto Jacket
Butterick 6169 seemed like a great pick for a jacket
to pair with my plaid skirt. Maybe it
makes me think of 90's grunge and that harkens back to my high school days, but
I really wanted to see what the two would look like together. I love the combination of the two pieces and
wanted my jacket to have a little twist to it, so I used a herringbone tweed
wool for the sleeves and a black sateen with a little stretch for the body of
the jacket. For the lining I used a dark
navy bemberg rayon from my stash.


Construction and Fit:
I was a little nervous that the black
stretch satin would stretch out during construction so I used strips of fusible
knit interfacing to stabilize the seams. In this case I think it might have puckered my seams slightly- so it was
the choice between stretched out seams or slightly puckered seams!
I also stabilized the wool tweed with
the same interfacing and it worked great!
Wool is so warm and it definitely makes the sleeves cozy. I wanted to reinforce/stabilize the sleeve
caps of the sleeves so I used thick red fleece remnants to fill out the sleeve
caps. I referenced the tutorial on the Lisette site to
figure out how to do this. She uses
quilt batting, but the fleece I used is pretty close in texture to
batting.


Final Thoughts:
I feel that all the small changes made
the fit of the jacket were just right for my frame and I will be able to wear
long sleeves and dresses under the jacket very comfortably. Nothing screams "fall" to me like
plaids and I love wearing wool plaids in the colder seasons, I'm thrilled that
I now have the perfect jacket to wear with my skirt. Also when I wear my new jacket with my plaid
skirt I really feel like I'm on a time warp to 90's grunge but I am completely
fine with that! I liked the early
90's! I think the jacket gives the skirt
a little bit of edge instead of the usual preppy feeling I have when wearing it-
I love options for styling!

Second Coordinating Piece: Fitted Button-Down Shirt
I love print mixing but don't always take
the time to try it, so this challenge was perfect since it pushed me into
finding a print that would work with my plaid skirt. I loved this pairing and really wanted to get a similar look
so I combed my local fabric store and found this cotton voile and knew it would
be perfect. I love cotton voile for
button-down shirts.
Construction and Fit:
Butterick 5526 was almost exactly what I was looking
for when trying to come up with the perfect top for this skirt. I say "almost exactly" because I
really took issue with the collar. Can I
say ugh!! I cut the collar and
considered using the mandarin collar option but when I stitched it on the shirt
it looked awful.

So I decided to compare the Butterick
collar and collar stand with the Grainline Archer collar and collar
stand that I knew I liked. The drafting
of the two collars is very different- both the collar and collar stand of the
Archer are significantly smaller than the Butterick pattern.

I ended up Franken-patterning the Archer collar onto the Butterick
pattern and it worked perfectly. This
was a moment when ripping out a completed collar was totally worth it. I know the original Butterick collar would
have completely overwhelmed my slightly narrow shoulders, but the Grainline
Archer collar is the perfect scale.

I love the princess seaming on this pattern for two reasons, the
first being that I feel the slimmer lines of the princess seams help the shirt
tuck into the skirt more smoothly rather than billowing out like other
button-down shirts. I can't stand the bunchiness
that happens under a skirt when a top is tucked into it! The other reason being that princess seams
work in your favor if you usually grade between two sizes in bust and waist. I started out with my usual size 10 bust and
let the seaming out for my waist and hip area since I normally grade those to
around a size 12.

I added sleeve tabs to this top since I often wear my sleeves
rolled up and used pearlized shell buttons from my stash.
Final Thoughts:
I really took my time in constructing this top, I wanted to wear
it with pride and I do! I serged all the
seams to finish them and everything feels just perfect with the fit. It is soooo satisfying to wear a handmade
garment with pride and know that the styling and fit is exactly to your
liking. And I love the combination of
these two pieces, I can see myself reaching for this pairing over and over, in
fact my co-workers will probably tire of me wearing them this winter! I'm also pretty excited that all three of
these pieces play together nicely and so can be worn all at once. I have had so much fun during this challenge,
coordinating fabrics, thinking outside the box and sewing pieces that I will
grab over and over with my skirt.
Kristen from Sunny Sewing

A few years ago my Mom gave me this amazing jacket. It is my favorite color and I was so excited. Then it sat in my closet all this time because I felt I never had anything to wear with it. Sure I could have worn it with a pair of jeans and a top, but my closet is full of t-shirts and yoga pants and I currently do not have any jeans that fit me (though I hope to make a pair soon). So this jacket was the perfect item for this last challenge.

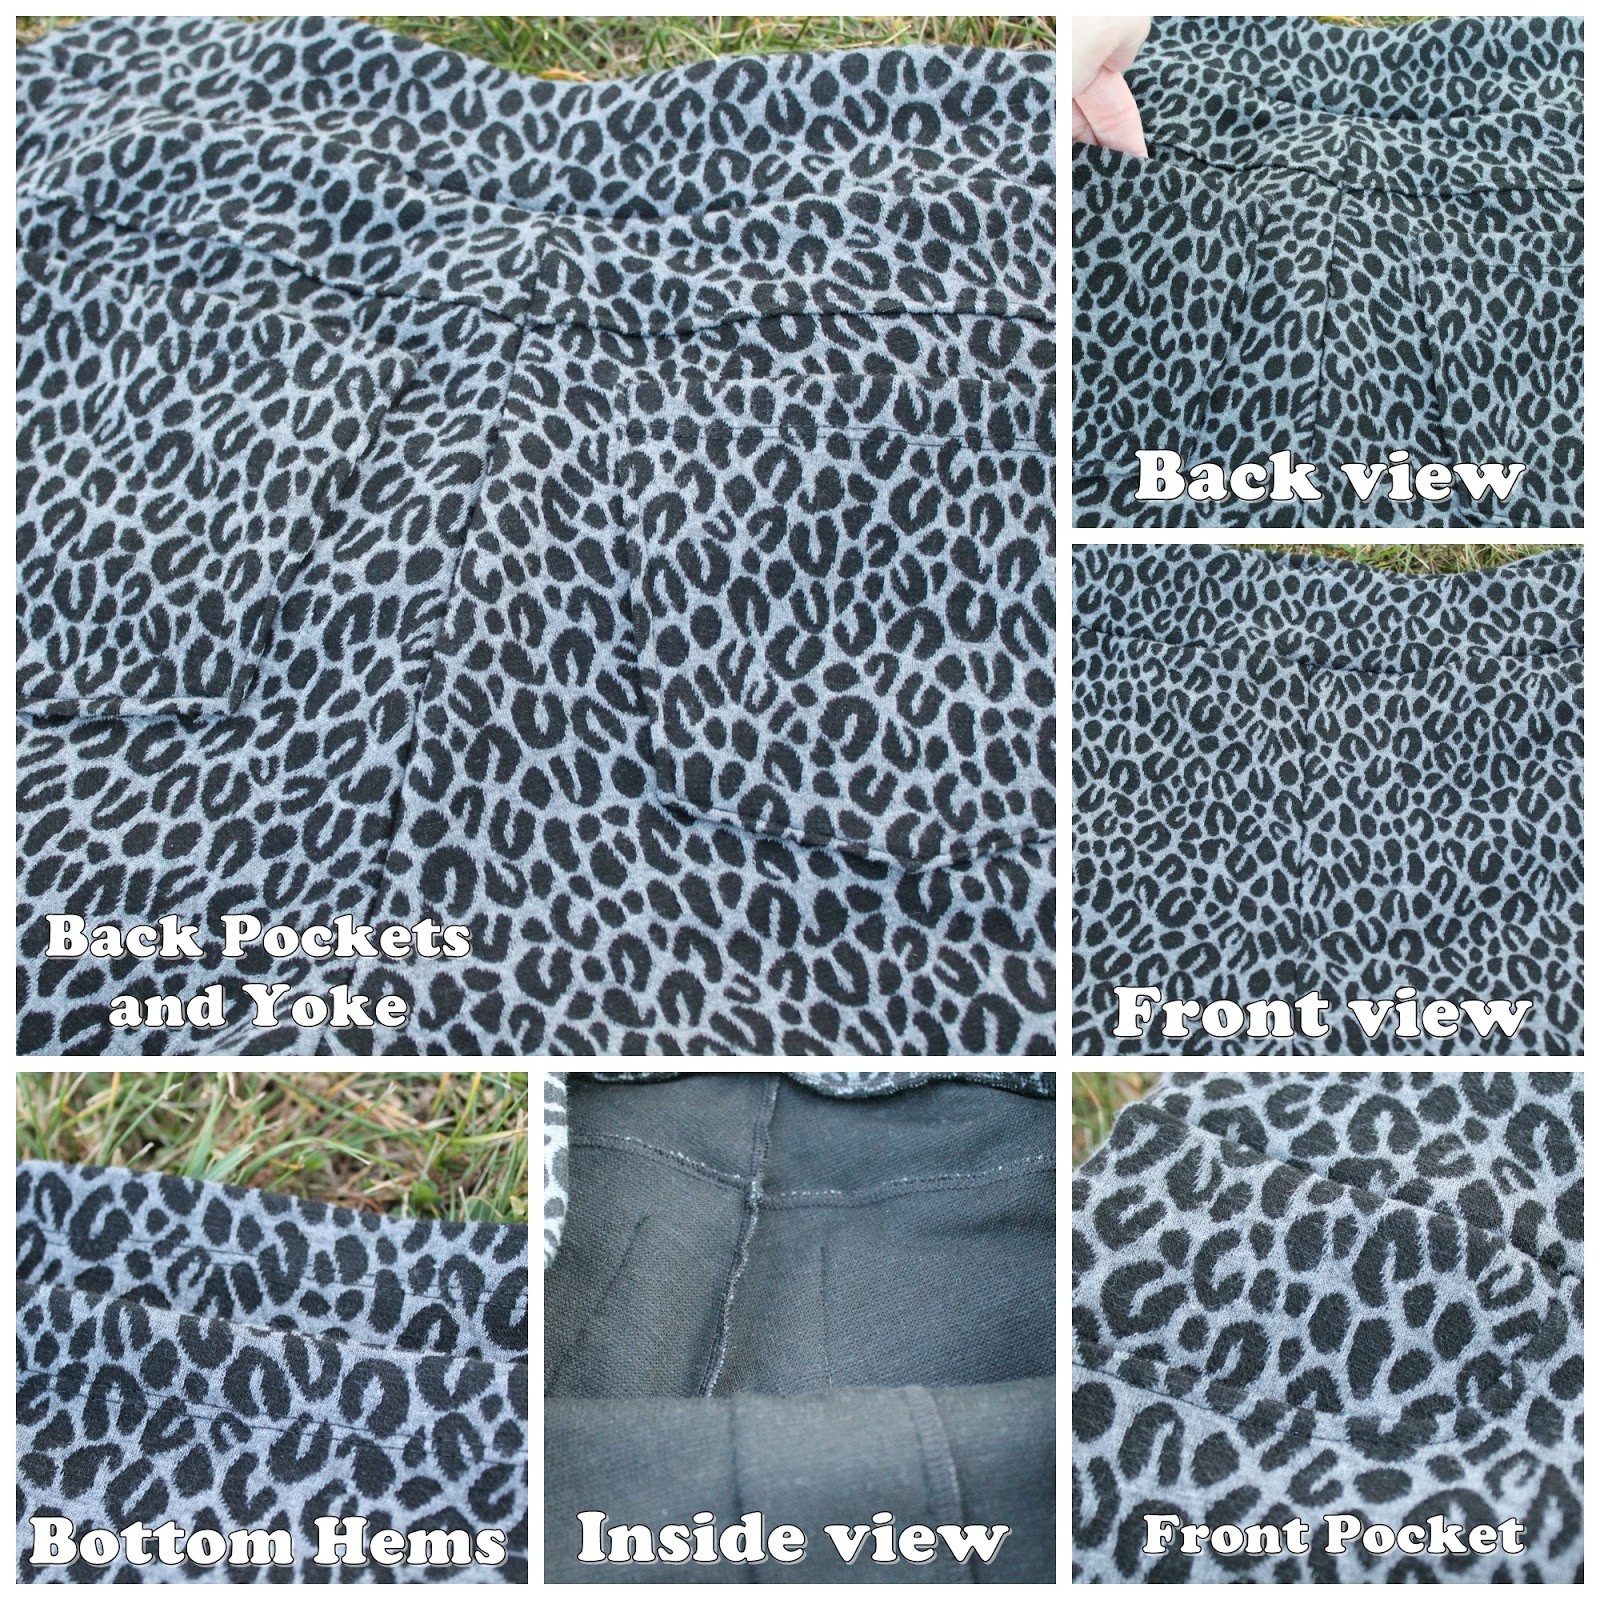
The pants were the hardest for me to decide upon. I tried 3 different patterns before tracing off a RTW pair that I borrowed from my Mom (thanks Mom!). I had issues with the other patterns in getting the crotch curve and thigh area just right for my pear shape. They were all close, but not close enough for this last challenge. So after 4 muslins (1 of each pattern, and the RTW trace off), I was happy enough to set off to buy my final fabric. However, I found that the one I had my mind on was not stretchy enough. I’ll admit, I was a bit crushed. After some thought, I found this animal print fabric in the Ponte section. I wasn’t sold on it at first but after I sewed the pants and put them on, I am sold now! The fabric is so soft but heavy enough for pants. I am very happy and comfortable in them.

I know it is hard to see the details with the print, but there is a mock fly and fake front pockets. I didn’t want the bulk of any pockets in the front. There are pockets in the back as well as a yoke. The waistband has elastic encased and this is a pull on pant. All seams are serged. Topstitching was done with my cover stitch. These are one of the most comfortable pair of pants I own now.
I wanted to make this color block top for awhile now so I was set on making it to work with the jacket. This is a BurdaStyle Pattern (10/2014 #103). The top is an envelope-type in that the back comes over to the front at the shoulders; it also has a slight cowl. It was time consuming to trace all the pieces, cut each color, and sew them together, but it was worth the trouble.


I completed a ½” sway back adjustment, and a 1” full upper arm adjustment. I used a size 38 for the shoulders/high bust, a 40 for the bust/waist and graded out to a 48 for the hips. I was careful to match my seams so that everything would line up on point. I cover-stitched each color hem separately before serging the shirt together. I even switched out serger thread in the middle of a seam where the top goes from black to white because I did not want the threads showing to the front side. I absolutely love this top; it is very much my style. I also love that it pulls the jacket and pants together into an outfit. I'm happy that they can be worn together, but also that they can be worn with other things in my closet. This is something I can wear that is dressier than my tees and yoga pants, but still very comfortable.

Tiffany from Frougie Fashionista
I can't believe this is my FINAL challenge entry! These last 5 weeks have truly been a challenge but also very rewarding. I'm so thankful and humbled to have made it to the Top Three. All 6 bloggers are very talented ladies! OK, Let's get to it!
The final challenge was to create a 3 piece wardrobe based around a hardly worn item from your closet (RTW or handsewn). The instructions were to sew two other pieces that would make you to wear that item more. The only stipulation was that you couldn't make two of the same item, for example if you selected a shirt you couldn't make two skirts or if you selected pants you couldn't sew two shirts.

Despite my very full closet my first thought was "I don't have any clothes I hardly wear" because I really try to wear most of the items I buy/make and purge the ones I don't each season. Still I had to be honest when I came upon these red ponte fitted ankle pants and say "I've only worn these a handful of times". I love these pants because they are my first handmade pair (with the exception of joggers) so it would be great to wear them more. These are a copy of a pair of RTW pants from Target. I deconstructed the pants and tracing them to make a pattern. These are seldom worn because I always wear them the same way, with a black shirt and black shoes, which is rather boring. I made the pants in red because I love red but after making them I was at a loss for what to pair them with, hence I went with the safe bet basic black.

I tried to think outside the box of the safe neutrals, black and white. I wanted to pair the red with something bold and at first I thought yellow! However my husband said I would look like ketchup and a mustard, which I would argue go together just fine, but I didn't want to evoke the thought of a cookout. Then it hit me to pair the red pants with purple, my other favorite color. So I decided to sew up a purple top, but that left me with one more piece to make. Purple and red seemed like a fall color palette to me and I felt camel was a great fall color that wouldn't overpower the two bold colors. With that I decided a camel coat would transition the other two pieces right into the fall season.

I chose McCalls 7249 for the top because who doesn't love gathers. Gathers are always good in my book for camouflaging your least favorite areas, which for me is my midsection. I selected View A, the sleeveless variation, even though the cooler weather is settling in because I am hot natured and love sleeveless shirts for layering even in fall and winter. Thankfully I had this rich purple ITY in my stash that was a perfect, bold complement to my red pants. The pattern is described as a close-fitting, pullover top with gathered front overlay and narrow stitched hems. This pattern had three pattern pieces, finished edges, self facings on the overlays and understitching at the neckline. I finished all of my seams on my serger for a clean interior finish.


For my second piece, I envisioned a coat to take this simple top and pants for a simple combo into a pulled together "look". Something not too heavy and with some flare. Butterick 6244 came to mind as it is a simple silhouette that adds drama with its draped collar. I love the length of this coat!

I had a tough time finding the right fabric for this project. The pattern calls for double faced wool and unfortunately I couldn't find any camel wool locally. So I decided that fleece would be a great alternative that would give me the felted texture of wool while being both super comfy and warm.


I hemmed the sleeves but decided to leave the collar and bottom hem unfinished. Fleece is pretty thick and I felt a narrow hem would negatively affect the collar drape by weighing it down.


I am definitely looking to forward to wearing my red ponte pants with my two new pieces either to work or out on the town. I've paired all three pieces with my purple BCBG peep toe pumps which I think dresses it up a notch and with a pair of my favorite boots give the look a more casual feel.


When I remove the coat I love the bold juxtaposition of the regal purple and vibrant red.. I'm glad this challenge was presented because it has prompted me to be BOLD and reevaluate all the items in my closet.

Vote for your favorite 3-piece wardrobe and who you think should win the Fabricista Fashion Challenge 3.
REMINDER!!
Reader Participation! Sew along with the challenges! Use #fabricistafashionchallengereader to share a photo of your finished projects on Facebook, Instagram or Twitter. You can also email me a photo of your finished projects - fabricmartblog@gmail.com. Submissions are due by Oct 15 at 11:59pm. We will choose one winner at random to win a prize. This week's prize is a notion prize pack.

Fantastic Tiffany, I would buy this item in a heart best. Love the colors. Textures and design. If you don't win this challenge, someone eyes are impaired. Good Luck!
ReplyDeleteThank you
DeleteThey all did great!
ReplyDeleteElizabeth, I love the jacket. With the plaid skirt it is chic.
ReplyDelete