


Recently, I've happily been able to reintroduce skirts into my wardrobe! I have really been looking for interesting skirt silhouettes and Vogue 8750 definitely fits the bill.
I picked up this J. Crew tweed during a designer fabric sale. It's a 50/50 wool/poly blend with lovely little flecks of orange, brown and pink. It washed up well (the hand of the fabric softened just a bit) and takes a press nicely. I really enjoyed working with it and am so happy to have enough left for a jacket!
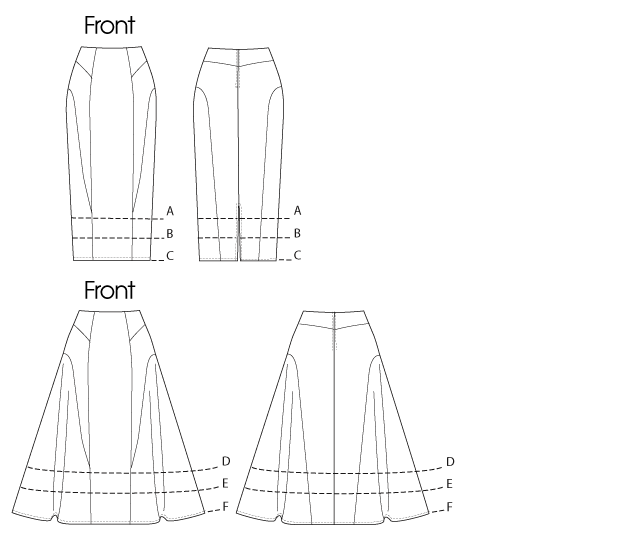
I just loved those seam lines on the pattern and was happy to see that the shortest, fuller version only needed 1 5/8 yards of fabric.
Typical for me with skirts, I cut a size 16 front and 18 back. There are lots of notches and other marks to help keep everything lined up. Because my fabric is highly textured, I used tailor tacks to keep track of all of the markings.
The pattern calls for grosgrain ribbon to finish the waist. When this treatment is used, I like to use strips of interfacing at the waist rather than staystitching.

I also interfaced the zipper area with 1" strips to reduce buckling once the invisible zipper is in.

At my daughter's insistence, I went with an orange zipper.

Here you can see where I marked the second side of the zipper to ensure I matched across the yoke seam.

But of course, there was a catch! I had gone on the hunt for my lining fabric which I'd bought 8 yards of! Not finding it anywhere, I found this magenta polyester pongee (also from Fabric Mart) scrap that was large enough to cut the needed pattern pieces from. I had already cut everything out before posting on Instagram so 1) I did not have enough lining to recut and 2) I did not want to rip out seams to underline it.
I decided to construct the lining pieces and finish the waist as usual.

Understitched lining

lining attached to zipper by machine

I always have an issue with the zipper tape at the corners. Will have to work on that!

The lining is only attached at the waist and zipper, and then is allowed to hang free, with hand tacking at the hem.
I ended up serging the raw ends since there would now be exposed seam allowances. This skirt was turning very colorful, very fast! But I like it!

This photo shows how I ended up with a topstitched hem! I was going to use hem tape as I really liked the length as-is when it was unhemmed. However, there is lots and lots of fabric at the hem and I ran out of hem tape. Deciding that the texture and color in the fabric could easily hide a topstitched hem; I went for it! I'm satisfied with the outcome.

It twirls!

Initially, I wasn't in love with the side panels. Once it was finished, and made into an 'outfit', I nearly began to like it a whole lot more. In the back, you can see it rides up a bit. I'll make a note to add a wedge to the back.
I made it a bit extra work for myself, but it was still a very satisfying project and I can't wait to sew my jacket with the tweed! Hurry, there are 23.5 yards left!!
- Nakisha from Sew Crafty Chemist
Lovely skirt!
ReplyDeleteThank you Levone!
DeleteHandsome work!
ReplyDeleteWill some wise human do a tutorial on dealing with zipper tape? So far (at age 56) each new technique I use either does not work or will not wear for long (cutting it anywhere near the top will fail in time). My only sure fire solution is to not run the zipper up all the way to the top edge. And maybe that's how it's supposed to be, but you can't blame a gal for trying.
Thanks SJ! I always do this and then think "There's got to be a better way!" :)
DeleteI really like those side panels. I play an instrument that requires me sitting and in a very unladylike position. I think a longer version of this just might work for me when I'm playing, Looks great on you!
ReplyDeleteAh cello?? My daughter plays euphonium and trombone :)
DeleteI hope you make it! It was very easy to put together!
So cute! You did an excellent job on this. I do the same with "making an outfit" - a make I'm not in love with can become my favorite thing when I ditch the sweatpants and junky t-shirt and add accessories, shoes and nicer clothes.
ReplyDeleteExactly! Add to that if you're scowling at it while wearing junky t-shirt and sweatpants!
DeleteGreat skirt! And yay for twirling!
ReplyDeleteThanks Michelle!!
DeleteLove the pattern and your skirt!
ReplyDeleteI love it especially at that length,, the longer the skirt length the fuller it would be, with so much fullness at the sides its all about choosing the right fabric. Which you did☺.
ReplyDeleteLove your skirt. Looks great on you and I love the twirl!
ReplyDeleteLove the pattern you chose!! Looks great on you. I think my daughter would like this.
ReplyDeleteJane
I love this- the orange zipper, the fuschia lining- it all is so much fun! You look fantastic in it too!
ReplyDeleteCute skirt :)
ReplyDeleteBLOG M&MFASHIONBITES : http://mmfashionbites.blogspot.gr/
Maria V.
Love the flutters at the side seam! Looks like a great basic with a kick!
ReplyDeleteIt looks great on you. Good job!
ReplyDeleteThis is just the type of skirt that I love.
ReplyDelete