I'm short. I'm fairly rectangular from the front on. Would I really like this style on me??
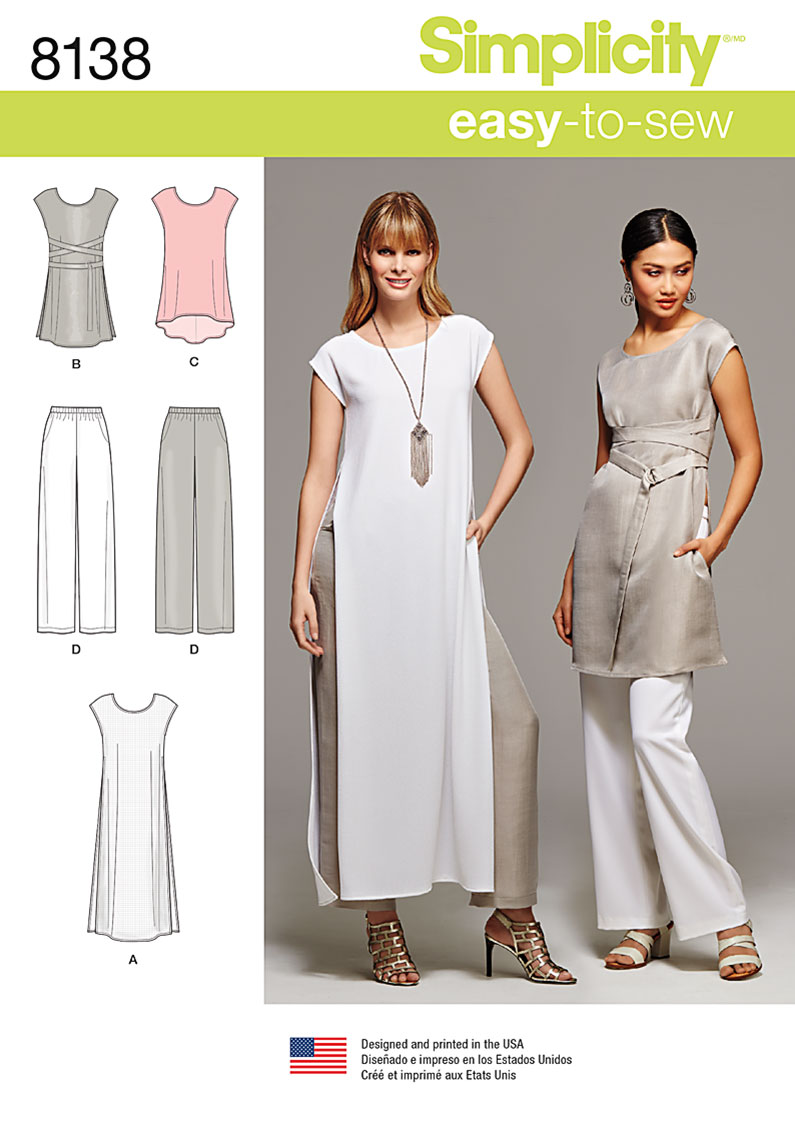
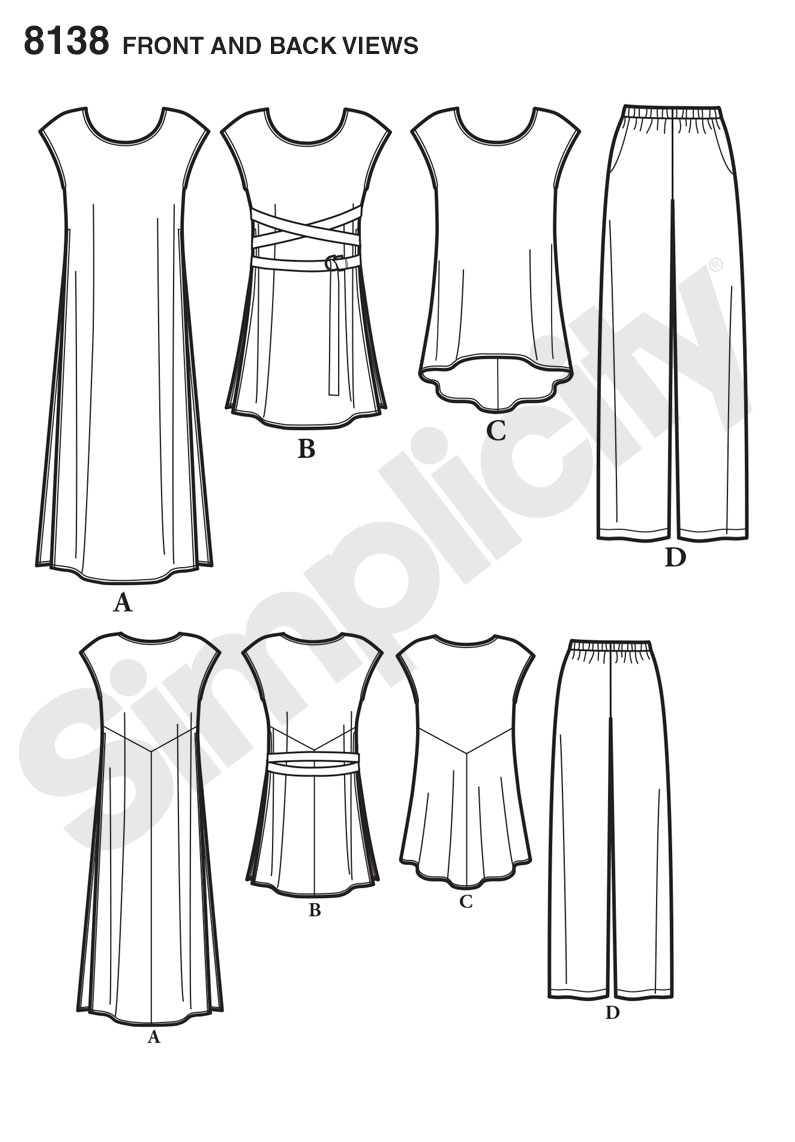
I saw cute versions on other sewing bloggers and decided, okay, I'm going for it! I was in my local Hancock store and saw new Simplicity patterns (before they were released!) and scooped up Simplicity 8138. I loved the seaming in back and the cut on sleeve.
I managed to miss that there would be a LOT of extra volume in the top -- which the line drawing does indicate! I just didn't pay close enough of attention.
I chose a size 14 and since I didn't want to add a dart, just graded out a bit through the bust and waist. I was so excited to get it together, that I didn't think about fabric handling. I'd already assembled the back before I decided French seams may have been a good idea. Oops :)
I used this olive green Poly Crepe Georgette. While I've worked with poly crepe before, I'd never worked with georgette. I was afraid it would be shifty/slippery but it was pretty well behaved. It has a pebbled texture which I think helped.
Because I was on the fence about the style, I didn't want to rip out any seams and decided to just go with pinking. I sewed each seam, pinked it, pressed it open and then pressed it to one side. It's not nearly as time consuming as it sounds.
The crepe is very springy/spongey and handled seam pressing pretty well. For the hems, I had to press and then use a wood block (or clapper if you have one), to get the seams flat. But it DID press nice and flat.
I was impressed with how easy this fabric was to sew. Not too slippery and it didn't get sucked into my machine - yay!
However, this fabric REFUSED to become bias tape! I decided it was too thick for that anyway and ended up cutting bias strips of fabric (it does not fray on the bias), attached the bias to the neckline, folded it inside, topstitched, and trimmed away the excess. I did okay on my trimming. But the neckline lies flat so that's what counts!
Now, I was very unhappy with it when I first sewed it up. I did NOT like it. But I realized it was the volume. It looked like I was wearing a giant dress. Not trendy and cute at all! I decided I would remove 5" from each side, tapering to nothing at the waist (yes, 10" total), narrowing the front piece.
Also, I lowered the side openings 2 inches! EEK! I'm okay with the amount of skin showing now. I can't even imagine if I hadn't!
So...trimming the front...I went to my cutting table, laid everything out real nice and neat...trimmed off the fabric and
uh-oh
I'd trimmed the BACK! I had no intention of trimming the back!!! But it turned out okay anyhow. WHEW.
The back is slightly longer than the front. I chopped an extra 2" from the front length to make that a bit more noticeable. Otherwise, I was afraid that it would appear that it was an accident.
I think I could possibly make this one again in a knit. As it is, this one is easy to get on but requires acrobatics for me to get it off. Part of that is the armholes. While I considered my own placement for the side slit, I just used the pattern markings for where to start sewing the side seams. I could have lowered that about 5/8" for a more comfortable fit.
I wore it to the Beyonce concert this past Monday with jeans and Chucks
 |
The back was like my own personal cape
so I tied the front to ensure I didn't flash my mama-belly :-p
|
I initially planned to wear white skinny jeans and heels. In my infinite wisdom, I changed my mind. The concert was delayed 2 hours due to severe storms and a lightning strike. But once Bey got going...she was as amazing as usual!
Nakisha


This is super cute on you! I love the style and am really glad you attempted to make your own. Zara does styles like this. :-)
ReplyDeleteThe georgette does sound scary! I am about to embark on some for me, and I am crossing my fingers mine looks 1/2 as good as yours does. I will definitely remember to french seam those suckers. LOL.
Ive got the same pattern and intend to make it soon. Thanks for the heads up about all the extra volume. Love how yours turned out.
ReplyDeleteThanks so much ladies!!!
ReplyDelete