

It's that time of the week...time to reveal what the contestants in the Fashion Challenge have created! This week they were asked to make a garment using a sweater knit print. They all received a piece of the same sweater knit. You may be thinking, ok they are just making any garment they want. Well yes, that's true. But for one, they may or may not have experience using it and two, they have to share with our readers some tips on working with sweater knits. Learn more about the details and requirements of the challenge HERE.
At first glance, these ladies have set the bar high!!!! They all look amazing and were so creative in how they executed the project.
You may find a more detailed blog post about each of their projects on their own blog. We had to modify the length of each blog post to better fit into this space. Click the link to their blog to see more.
Let's see what the contestants made...
Melanie from It's Melanie Darling


I work with knit fabric often and love it. Ponte Roma is my knit of choice because it handles well and holds its form well. With this particular fabric, my serger was going to me my main tool, as I love neat and clean insides to be constructed as well as the outside. The facing was finished with a serged seam and I used my overlock for my hems.

On this particular garment I used Burda 6587 for the bodice and pleated and draped and pleated the bottom of Duster cutting a rectangle in 3 sections three times the size of my waist measurement. For the pencil skirt, I draped on my body, pinned, cut and sewed, creating darts for fit, and added a self-waistband. I learned the self-waistband technique from Andrea of Sew-To-Fit. She has a quick and simple video and she is a wealth of knowledge for all things Knit at http://www.sewtofit.com/.
When I’m working with a knits, especially a knit as soft and loose as this one, I always do the following:
1. I baste my seams before final sewing to check for fitting issues and to adjust any gaps and alignment issues before final sewing.
2. I Under Stitch facings and serged neck areas where appropriate to make sure no seam rolling and that the fabric lay flat and neat (I didn’t have too with this particular garment).

3. Then I do all my final sewing of all seams, and serge each seam to finish.

P.S. I have seen and heard on several blogs, that tissue paper under your fabric will help to keep your fabric aligned, I have a walking foot on my machine so I have not had to do this, but I thought it was a great tip.
There are so many wonderful resources for sewing with knit fabrics and I tend to read up on them periodically. Beth with 110 Creations, has a great series on sewing with knits, that can be found HERE.
I used Vogue V9213 to make my look. A sleeveless, draped sweater knit vest with leather fringe. I made the fringe by recycling my grandmother’s old leather coat.
There are so many wonderful resources for sewing with knit fabrics and I tend to read up on them periodically. Beth with 110 Creations, has a great series on sewing with knits, that can be found HERE.
Brittany from Brittany J. Jones


Fall means lots of layering! Cardigans, leggings, sweaters, boots I love it all. I knew I didn’t want to make a dress, or a cardigan, but cardi-dress came to mind, and I knew I wanted to try that. I googled cardigan dress and found this inspiration pic.


McCalls 6886 is truly my TNT pattern! I used View E from that pattern, and added View B sleeves to it. Because the front of the dress is cut on fold, I cut those out on a single layer, one to line up the fabric, and two to have it open. For the neckband, and button placket, I measured the length of the dress from the center “V” down to the hem, adding the half of the neckband to it. That gave me 52”. So I cut 2- 52”x4” strips.


After sewing that around the front of the dress, I started to have major doubts, that it was too simple. I talked to my mom, showed her my inspiration pic, and she said you have to add those pockets, it’ll be a great detail to it. I had NO clue how to make these so I just started by cutting 2- 2”x2” strips. I found the place where I wanted them to be, and marked it. From there, I folded in the the end, and with the raw edges facing up towards the mark, I basted it down to the front of the dress. Once it was basted, I flipped it up and sewed the ends down.


While sewing with this beautiful sweater knit, I did 3 things that I think will help every beginner that is a bit nervous of giving this fabric a try.
1. Pre-treat your fabric. I learned the importance of this the hard way when I first started sewing. I searched online on different sites, and most of them suggested hand washing sweater knit fabric. I personally know that I am not a hand washing type of girl! I will forget overtime and having it in the washer!! So I decided to treat my fabric as I’m more likely to do once it’s made and that on a gentle/delicate cycle. I treated it and let it lay flat overnight to dry. Fabric turned out great, with no noticeable shrinkage.
2. If you have a fabric that has a print like this one, cutting it out on single layer is KEY to lining up your print. I learned this from a Mimi G “Tipsy Tuesday Tip” where she talked about lining up stripes. Same steps apply here for lining up prints.
3. If you start sewing and your fabric starts to get chewed up, I used tissue paper (the tissue in gift bags) and put it under my fabric. This helps the fabric not to get stuck. You only need a small piece, and once you’re done, it tears off so easy!! I put a piece on top and bottom when sewing my buttonholes on.


I also made the black sweater knit dress that I am wearing in the photos, to go along with the challenge this week and to coordinate with my look. I self-drafted it from a RTW dress.


Generally speaking, you should pre-treat most fabric, to allow it to shrink before you sew your garments. There is nothing worse than making something to fit perfectly, only to wash/dry clean it and it shrinks. I have had it happen. Nevertheless, I did not pre-treat this sweater knit. For sweaters/sweater knit dresses that I really, really, really like, I have them dry-cleaned to avoid the pill, fade, and lint factor. Well, I “triple” like this fabric and knew my garment would have enough volume that I could risk potential shrinkage at the dry cleaners. However, I have experimented with pre-treating sweater knit like this before. This is a poly/lycra blend with care instructions to gentle wash on cold, and tumble dry low or lay out flat to dry. I followed the same instructions with my previous sweater knit, except I placed my fabric in a mesh laundry bag to reduce fraying on the cut edges. My best advice for pre-treating sweater knit is to FOLLOW THE CARE INSTRUCTIONS ON THE FABRIC BOLT. You don’t want to end up putting sweater knit, especially one with wool, in the washing machine when it is meant to be dry cleaned.

When sewing with lightweight sweater knits, I treat them just like I treat slippery fabrics. I open the fabric out, lay it across my cutting mat and weigh it down with something with a firm weight to it. After securing the fabric in place, I lay my pattern piece on the fabric and place another weight on top of it. Weighing it down keeps the fabric and pattern from shifting when you cut. Personally, I use my Spring/Fall fashion magazines as “heavy” pattern weights…you know the ones with over 500 pages of must-have looks for the season. Of course, you don’t have to use fashion magazines, but it is a good idea to use a pattern weight that is going to keep your sweater knit and pattern from shifting around on your cutting surface. Which leads to my next tip, cutting;

A sharp rotary cutter is going to give you a more precise and clean cut, because it gives you more control over the cut when working with sweater knit. You are not lifting the fabric from your cutting surface as you would with fabric shears/scissors. Since the cut is so sharp, you also minimize the amount of fuzzy lint that you experience with cutting sweater knit with shears. It is a good idea to line a metal ruler up against your pattern and use that to help you guide your cut, especially along lengthy straight edges. I recommend using a metal carpenter’s L-ruler, because the side of the ruler is thick and the rotatory blade lines up well against it. Therefore, the blade has less of a tendency to veer off track when cutting. Plus you don’t get nicks or slices in your ruler, like you would with wood or plastic rulers. This is a tip I picked up from a bag-making class (my second-ever sewing class) that I took at Lillstreet Art Center in Chicago several years ago. You can find these rulers at the hardware store.
Tip #4: Cut each fabric piece out one-by-one…wait what?
I know what you are thinking… cut each piece out separately…Ain’t Nobody Got Time for That! Well, hear me out. Although it takes a smidgen more time (ok a lot more time), to cut fabric pieces out one-by-one, I find that my pieces, are much more precise and EVEN vs. folding the fabric over and cutting two pieces at once. Sometimes, lightweight sweater knits, especially those that are loosely woven (think more sheer sweater knits), can be difficult to fold over just right and keep in place when cutting due to the nature of the knit. From my experience, the two pieces end up looking choppy and ill-matched. If you are like me, I don’t have the patience for pieces not lining up well when I go to stitch them. Plus you don’t want to affect the fit. Now, I did cut my back piece on the fold and that is, because I didn’t see the point in disturbing the print of the fabric to cut two pieces, only to sew them back together. If you are trying to match prints, you probably should cut your pieces out one-by-one with the right sides up anyway to make sure your prints match up. Therefore, spend the time on the front-end to make nice cuts.
Tip #5: Slit Notches Oh No, Triangle Notches Oh Yea!

If you have ever sewn with sweater knit, you know it is almost a losing battle to find slit notches after making them. Once you cut into sweater knit, the cut edges unravel a tiny bit, therefore, your little slit notches blend and get lost in with the unraveled edges. You really can’t find them well, if at all. You can try marking your notches with a fabric marker, but sometimes I have a hard time seeing that marking on certain fabrics. As I was thinking of a better way, I remembered that up until almost two years ago, I NEVER EVER made slit notches in ANY type of fabric. I always made triangle notches, because this is how my first garment sewing teacher, Miss V, taught me in Chicago. She laid a lot of the sewing foundation that I revert to still today. So triangle notches for sweater knit, ohhhh yea. What you do is cut an outward triangle where the notches are marked on your pattern. For single notches cut one triangle, for double notches cut a wider triangle, and for triple notches cut an even wider one. When it is time to match it all up, you will have a nice outcome like this…
Elizabeth from Elizabeth Made This

This particular sweater knit has a lot of good bounce and drape to it, courtesy of the lycra and polyester. I knew it would make a great skirt with a lot of swirl factor. I chose Ottobre 5-2014-10. It's a 6-gored skirt with cut-on godets that flare out considerably at the bottom to create a beautifully voluminous hem. You get the effect of a gathered skirt without all of the bulk at the waistband.


The skirt is lined with brown nylon tricot. The tricot makes the skirt hang nicely without the bother of wearing a fussy slip that's constantly shifting. The tricot also helps fight the fall/winter static that is so common in my dry cold climate. I really love the swish factor of this skirt. I don't think I've sewn a sweater knit that was so easy to work with or had such a nice weight to it. This is just the kind of skirt I love to wear with boots and tights in fall.
Velvet Trimmed Cardigan
For my second piece, I made a velvet trimmed cardigan using Ottobre 5-2012-6. This hooded cardigan pattern seemed another good choice to show both sides of the sweater knit.

Hood
The hood uses the wrong side of the fabric facing out. I liked the softer shades of the wrong side around my face, and they looked nice against the brown ponte I used for the hood's lining. The pattern doesn't call for a lining, but hoods are simple enough to line. Cut the lining 1/4" from the hem line fold of the hood (7/8" shorter at the crown of the hood on this pattern). After I pressed the hood's hem, I sewed the hood lining to the raw edge of the hem from the wrong side. After pressing, I understitched the lining so that it would lay nicely without rolling towards the outside. Then the right side of the lining is flipped to cover the wrong side of the hood. The hood is cleanly finished and hangs better now than an unlined hood.

Hems and velvet trim
To highlight the contrast between the right and the wrong side of the fabric, I pressed up the hems towards the right side of the cardigan. I wanted to use more of the velvet ribbon as a decorative element on the cardigan. The raw edge of the hems is covered with the ribbon. The ribbon sits so that about 1/2 of the width sits covering the hem and the other 1/2 goes into the body of the cardigan. I used the same trim on the sleeves too.

The front corners of the cardigan and the ribbon have mitered corners. If you're looking for a good tutorial on mitering corners, there's a good one here from the Colette Patterns blog.
Zipper pockets
I love putting zippered welt pockets in my garments. They're very secure and add a great decorative element to any garment. I sewed regular zippered welt pockets from the right side using the help of Sandra Betzina's method from this video.

Sweater knit tips

Interface your hems
Adding a little interfacing to the hems on a sweater knit adds some nice weight. It also helps you press a perfect hem, which might be hard to do on some more synthetic fibers. SewKeysE tape from Emma Seabrooke is my favorite for hems. Just press it to the wrong side of your hem. Next, press along the edge where the top of the tape hits the rest of the garment. Now your hem is ready for stitching. If you're working with a more sheer knit or one with an open weave, you can use a strip of your sweater knit as a layer of its own interfacing.
Practice your seam finishes
For sweater knits, sewing and finishing a seam at the same time with a serger, might not be the best option. Sweater knits are bulkier and often have more open weaves than regular jersey type knits, so they can stretch and grow in the serger, leaving you with a distorted seam.
To combat this problem, first sew the seams with a stretch needle and then finish the seams. You can use your serger to finish the seam, do a double stitched seam, or you can press the seams open and stitch them flat with tiny hand stitches. I did this kind of finish on the inside of the cardigan because part of the seams shows on the hem. The open seams lay completely flat, and it's easy to bury your hand stitches in the loft of the knit.

Whatever seam finish you choose, practice with some scraps of the knit to help you decide. Practicing can also help you determine if you have an unruly knit that might need some extra TLC.
Choose the right needle
When you have the right needle, sewing sweater knits is easy. For most sweater knits, I like using a 75/11 stretch needle. Ballpoint or universal needles are some more options. My machine prefers the stretch needles for knits in general, but especially ones with lycra. If you're working with a more stable sweater knit, a universal needle works great. Practice on those scraps before you start sewing your garment to avoid headaches later in your project!
Jennifer from Clothing Hacker

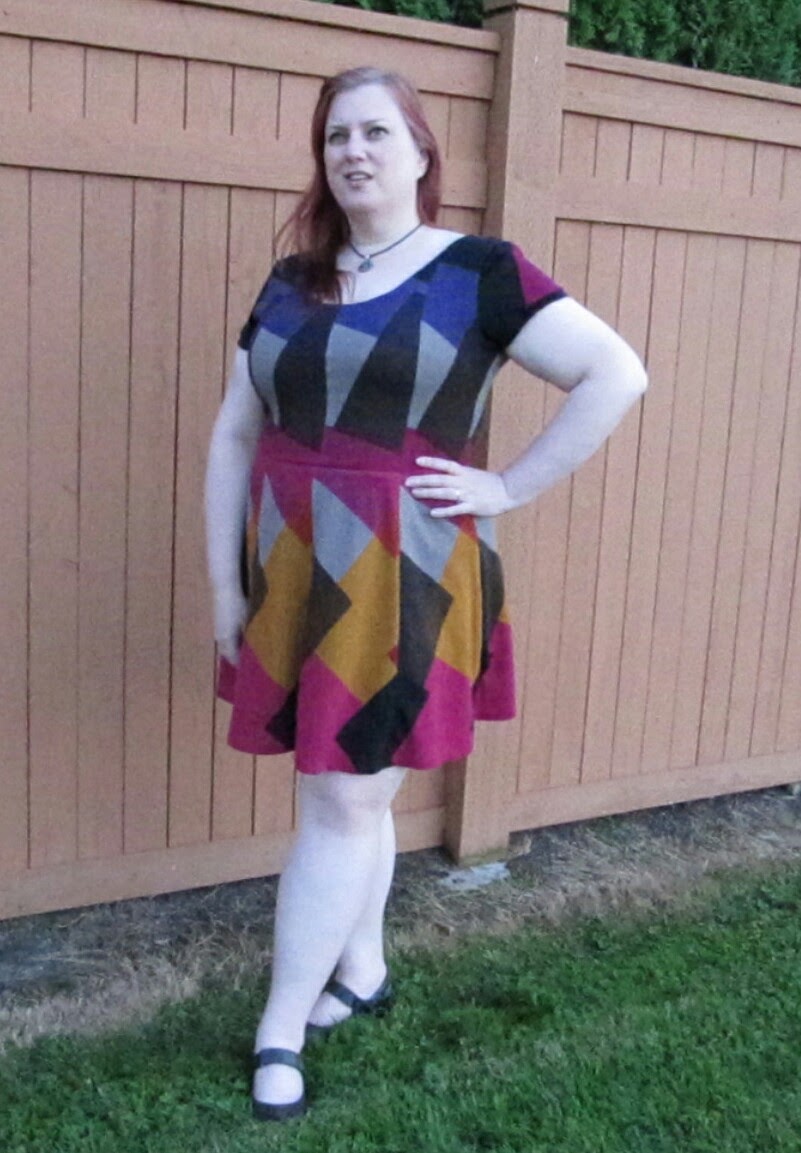
So, I decided to use my TNT Kitschy Coo Lady Skater pattern and divide each bodice and skirt piece vertically into 2 pieces, adding seam allowances between them, thus making 4 panels across the width of the dress.


I started with the bodice and cut out one of the center front panels first. Then used it as a guide to determine where to lay the side bodice piece that was going to be next to it, matching the seam line on one side. Since the top of the bodice pieces were very different shapes, I focused on making the fabric pattern at the waist seam consistent to get the effect I was after.


My original sketch planned to use another sweater knit I have in my stash that is solid black for the sleeves, but after I pulled it out and looked at it, it didn't have the same sheen as the provided fabric and it just looked dull and lifeless next to this gorgeous knit. I considered leaving the dress sleeveless, but ultimately I want to have a dress that I will actually wear, so I decided to use the leftover fabric, which I barely had two pieces just big enough to cut the pattern's cap sleeves. I just positioned the sleeve piece such that the front of both sleeves had as much of the black as possible, to try to keep as close to my original vision as possible.


I also had planned on using that other sweater knit for the neck band, but that was out now. I didn't want to just turn and stitch the neckline, so I made the decision to fully line the dress with a black cotton thermal knit with cameos printed on it that I picked a long time ago for very cheap and have thought I might never use. It had almost the exact stretch amount and was just a tad lighter than the sweater knit, so it seemed the perfect pairing. I used the unmodified pattern for the lining pieces and attached them to the shell at the neck, armscyes and the waist, letting the skirt lining basically hang free and just using french tacks to keep it in place.

There are many different types of sweater knits. This one was what I’d consider a pretty stable sweater knit. The weave is tight and the fabric is opaque, but I’ve worked with very loose weave sweater knits before. I think Seamwork’s guide to sewing with sweater knits is a good starting point.
In addition to the tips Seamwork provide, these are the things I have found helpful when I work with sweater knits:
1. Keep a lint brush handy! Or what I refer to as a “rolly sticky.” When you cut into these fabrics, a million little loops get opened up, so there is lint EVERYWHERE. Not just on the cutting table, but they’ll be all over your machine and workspace and the garment and my dress form was covered in tiny pieces of sweater knit.

2. When cutting, mark your notches with pins or thread or do like I was taught growing up and cut them outward, not inward to avoid losing them in the weave of the sweater knit.


3. BASTE, BASTE, BASTE! This is always a good idea anyway, but even with TNT patterns, it’s just smart to baste your seams first with sweater knits. Because sweater knits tend to be lofty, the stitches have this great way of just sinking in and disappearing, which is fantastic, but it also makes it so that the stitches are nearly impossible to see to rip out. Luckily I didn't have any mistakes this time around and I only know how hard the stitches are to rip out because after the dress was assembled, I thought maybe I would add a pocket. After about half an hour and only having about an inch ripped out, I decided it was way too much work and just resewed that bit shut again. But I definitely basted almost all of my seams first, especially that waist seam, since I wanted the vertical seams to match up perfectly. Below is a photo of how the seams just disappear. That is actually a seam right down the middle of the photo.


I tend to be a fairly lazy sewist most of the time since I’m just making clothes for myself, but seeing how great this dress turned out actually made me take the extra time to hand sew an invisible hem. The fabric is nice and lofty, so I was able to catch a few threads of the body without anything even showing on the right side. Overall, this fabric was a dream to work with. It pressed really well, the seams absolutely disappear into it and it’s just gorgeous. I got to use a technique I’ve been wanting to use for a while and it made an amazing dress that I’m incredibly proud of and have been showing off to everyone who’ll pay attention to me.
LaTonya from Sew So Petite

Fall is here. Time for football games, changing leaves and cooler weather. When I think of Fall, I think sweaters. A girl can never have too many! I wanted to make something big with this fabric. The pattern of this fabric is so big and bold and I did not want to lose any of that. I also wanted to do something cozy yet ultra feminine. I do not currently own any sweater coats, so I jumped on the opportunity to make one for my first challenge. I used McCalls 7262 for this sweater coat.
This was a challenge for me in other ways. I'm usually a monochromatic type of girl; solid colors only, etc... So this fabric was way out of my comfort zone. But it all worked out.

Fit
Since this is a draped sweater coat, I was worried that the "fit" of the garment would not show. I am a petite girl and I usually have to make quite a few adjustments to all my patterns. However, not so much with this one. I took 2 inches out of each side seam because I was swimming in this coat. I also took 3 inches off the bottom to shorten the length. I wanted to keep the draped look of the coat without looking like it was too big on me, even though I cut the smallest size.

Craftsmanship
Before I cut into this fabric, I needed to decide if I wanted the colors to match up at the seams. The fabric is so geometric and free that I felt that I should continue with the free flowing geometric 70's vibe. I think that by not color matching the seams, it really gives it the drapey, flowy look that I was going for. I also wanted to break up all the colors of the sweater, so I decided to contrast the sleeves with a plain black knit fabric. It has the appearance that I am wearing a black undershirt with a short sleeved sweater, when really, it is all one sleeve piece. I serged all my seams on the inside. Making sure that the inside is as neat as the outside is so important to me.


VOTING IS NOW CLOSED
Vote for your favorite in this week's challenge now! Winner of this challenge will receive 3 patterns of their choice from our hand-picked pattern collection of Independent Pattern Designers.There's still time for our readers to participate! Post a photo of your finished sweater knit garment (and type of sweater knit can be used and in any way you like.) Use #FabricistaFabricMart when posting a photo on Facebook or Instagram. Post it by Sept 15 and you may win a 3 yard piece of the sweater knit the ladies used in the first challenge!
I love Melanie's duster! That's exactly how I would've used this fabric. A simple design let's the fabric standout. When you get tired of wearing this, ship it right over!
ReplyDeleteMe first, LOL!!!
DeleteTee, I love the fringe on your cardigan! Great Job!
ReplyDeleteYou all did such a fantastic job! That fabric screams fall. Love it.
ReplyDeleteI love Melanie duster, I can take it off your hands. When you're done with it.
ReplyDeleteI love All Melanie's
ReplyDeleteI'm short and wide, so this fabric would have been a little overwhelming on me. I love love love Jennifer from Clothing Hacker's solution. She tamed that print and made it work for her!
ReplyDeleteI absolutely love Melanie's duster and the various ways she styled it.
ReplyDeleteYou all did a great job! Melanie I love your look, it's so versatile. Tee, the use of the fringe really blew me away. I love the fitted dress, Britt. Jennifer, your use of the fabric and is print was great. Everyone did a great job, though. I liked the hood on Elizabeth's piece. LaTonya, yours look like a staple piece for the fall. Great job to all.
ReplyDeleteMelanie, that duster is tough! I absolutely love it! You ladies all did such a wonderful job!
ReplyDeleteEach and every design is FABULOUS in this gorgeous fall colored sweater knit.Kudos to all contestants!
ReplyDeleteMelanie's duster and pencil skirt combo was outstanding to me. The variety of ways she rocked it was brilliant.
ReplyDelete-Beau Jé
Melanie's duster and pencil skirt was outstanding to me. I love the variety of ways she rocked them. It was brilliant.
ReplyDeleteYou all did a great job!! Ver creative uses for this fabric!
ReplyDeleteNow this is a competition! Everyone brought their A game so it's going to be fun to watch over the next couple of weeks!
ReplyDeleteWow! You ladies did great! I'm really impressed with your garments and tips. Awesome first round!
ReplyDeleteFirst I must say the fabric alone is amazing, Melanie I love your duster so many options for styling, Meg I love what you did by adding the leather fringe to your wrap, I would wear this with everything. Latoya, your sweater has so many options as well, beautiful. Brittany your dress can be worn professionally and for play great job. Jennifer the way you match the print tells a story of its own, good job. all you ladies did an amazing job , congratulations on your first challenge
ReplyDeleteOh my!!! What beautiful garments and wonderful explanations and very handy tips...If I wore a hat, it would be off to all of you!!! :-)
ReplyDeleteI LOVE what Jennifer did with the fabric, that is awesome!
ReplyDeleteWow, I agree with Carolyn, this is a competition! Well done! I can't wait to see what everyone makes next week!
ReplyDeleteWOW, they all were "sew" nice!! I have to say my choice would be Ms. Melanie Darling that's definitely something I want in my closet!!
ReplyDeleteOmg you ladies did an amazing job... Good luck ladies... 😊
ReplyDeleteI love the duster Melanie made.
ReplyDeleteI am excited about Elizabeth's outfit. What a creative way to use the reverse side of the fabric for the skirt to tone it down! I love the hoodie too! The outfit is very flattering
ReplyDeleteGreat job to everyone, beautiful fabric and beautiful garments. It is very hard to pick one.
ReplyDeleteDeciding was hard. I think everyone did an outstanding job.
ReplyDeleteWOW!!!! Some awesome work here!!!! Love what you have done!
ReplyDeleteLove love love this fabric! I just recently got brave enough to sew with sweater knits and I LOVE the outcome! I really LOVE what Jennifer did with her sweater knit.....I have the same problem with mustard fabric against my face so I'll have to remember that advice in the future.
ReplyDeleteTo be honest that fabric is very busy, and not one that I would choose, but wow, these ladies made it happen!
ReplyDeleteI really like Melanie's duster.
Lee
Great job by everyone. I really like Melanie's duster as I love that pattern and have made it quite a bit but never in a print, until now! Look forward to seeing more from all of these ladies.
ReplyDeleteAll the entries are superb, but I'm particularly taken with Jennifer's dress! Such an inspired approach to a large scale print --- you're a genius Jennifer!
ReplyDeleteGreat job everyone! I know this can be a nerve wracking process and you all worked very hard to produce great pieces- so high fives and pats on the back all around! Good luck to each of you!
ReplyDeleteThis was a great first challenge and I think everyone did such a great job with their interpretation of the fabric.
ReplyDeleteI was very happy to see no repeats.
Great job everyone
I voted, but I did not want to have to. Boy oh boy, what a first challenge. I suggest that they all go on as winners. Jennifer, the article you mentioned is from THREADS magazine. I was reading some of my back issues and read this article about four months ago. I cannot find that issue right now, I have nearly all of the issues, but that is where it came from.
ReplyDeleteI thought it was, but since I couldn't find the article, I wasn't sure. I get several sewing magazines, so sometimes they blur together. The July 2016 Threads had a dress on the cover that used a similar technique where the designer used two of the same panels and sliced them up into strips slightly offset and sewed them together to created a cool shattered effect. I would love to do that sometime too, but that isn't the one I'm thinking of (in case that was the one you were referring to.)
DeleteIf I had to make a selection it would be Tee's outfit because of the intricate detailing of the leather around the armpits and the fringe. Gorgeous Tee!! Gwen
ReplyDeleteGreat Job to all the ladies!
ReplyDelete