


I love maxi-skirts! They let you really show off a beautiful fabric. Although there are lots of patterns available for maxi-skirts, you'll notice that many do not have pockets. I don't know why that is, as pockets are so essential! When I got my March issue of Burda Style magazine, I couldn't help but notice this skirt in the plus section:
The line drawing showed that it was a simple design but with a few features that I find desirable: pockets, a combination drawstring and elastic waist, and long side slits. I find that a combining a drawstring with elastic helps you to cinch the waist to just the right snugness. And side slits help you to move freely and provide extra ventilation on warm days. So, even though these are small details, they can really make the difference between whether you end up wearing an item or not!

I made this pattern three times out of different fabrics- one ITY knit, one rayon gauze, and one french terry knit. My first one was this ITY knit in a tropical leaf pattern that I got in one of the pre-cut fabric selections. My first piece from this fabric is here. I think that large prints are great for maxi-skirts. This skirt version is the dressiest one of the three that I made, and I can definitely wear it to work.

When making it, I discovered that the slit was really high! I moved it down about 4", so the slit would only go to my knee level, not thigh level.

My next version was out of this Kaleidoscope Blocks French Terry.
French terry is much thicker and more like a sweatshirt fabric, so I wasn't sure if it would have the appropriate drape for a long skirt like this, but I decided to try it anyway.

I centered the blocks and matched the dark stripes at the sides. It's really comfortable, and great for a cool summer night, as the french terry is much warmer than the ITY knit.

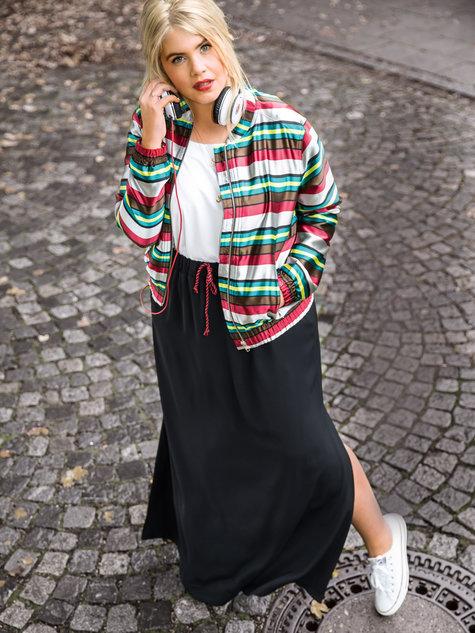
My last version of this skirt, and probably my favorite of the three is made from a striped rayon crinkled gauze (sorry it is sold out!).
This one was also the most challenging as the crinkled gauze tended to stretch out of shape very easily. That made matching the stripes at the side seams particularly challenging!

To stabilize the pockets so that they wouldn't stretch and grow, I stitched 1/4" wide twill tape into the pocket seams by feeding it along the seamline when serging.

So, the pocket ends up looking like this picture below. Now, even if I put my phone in my pocket, it won't stretch out of shape.

The waistband is a separate piece, which at first I thought was not necessary, but then I realized, that is how to create the opening for the drawstring. Sew the short ends together, leaving an opening at the front, like this:


Do you know what they call the little ends of shoelaces that keep the cord from fraying? They are called "aglets". You can purchase these on Ebay or Etsy, but a quick little way to make your own is to just wrap a short piece of scotch tape around the ends. After wrapping it a few times, just cut the homemade aglet to whatever length you would like!

I'm pretty sure that this won't be the last skirt that I make from this pattern- it goes together so quickly, and can be made out of woven or knit fabrics. It does take quite a bit of fabric though- I would allow 2-1/2 to 3 yards per skirt.

These photos are all taken in my garden- which is my other obsession, especially this time of year! I love flowers, flower arranging, and just getting some fresh air after a long winter.
Have a great Spring and enjoy the Skirt Challenge!
Ann
SewBaby News
Share your me-made skirts thru May 31st and be entered to win a $50 gift certificate to Fabric Mart! Share on Facebook or Instagram using #sewcoolskirts.
I adore all three versions of this skirt! They are all very flattering.
ReplyDeleteThank you Karen!
Deletehi ann you look very comfort in it i like i was watch you them i thougt why try it i been sewing for 40 years never did this one a good job, rose
ReplyDeleteThank you Rose!
DeleteAnn, I love your skirt ideas. I also love the tops you wore with the skirts, especially the pale blue cascading layers, and the ivory criss cross front draped top. I'm thinking they're RTW, but if you sewed them I'd love to know the details. Thanks for all the helpful hints and photos.
ReplyDeleteYes, the tops are from JCPenney- last year though. I really love both styles, so I hope that they repeat them again this year.
DeleteNICE job ... FIESTA :)
ReplyDeleteThank you, Monica!
DeleteI love all of your skirts Ann, great job. Maxi skirts are so good for summer!
ReplyDeleteThanks, Elizabeth. I agree!
Delete