

Week one is wrapped up and I can't wait to see what everyone did with such a basic fabric...cotton muslin! Sounds like it was challenging for everyone, but they pulled it off really well!
Let's cut to the chase and see what everyone made!
Danesha from Classyfied Life
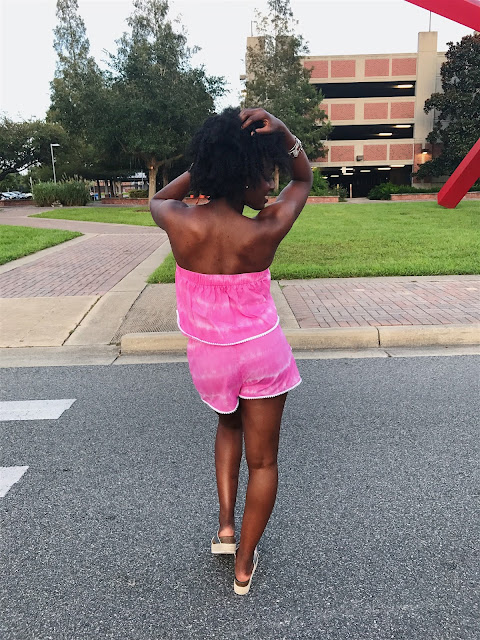
So this week's challenge was just that...a challenge! I NEVER use muslin....EVER! I am the type of creative who just goes for it. I am okay with cutting into that beautiful fabric and giving it a go in hopes that it will turn into something amazing. When I received the muslin I immediately knew we would be challenged to basically make a wearable garment... and I was right. I began to think about how I could first transform this plain white fabric into a completely different fabric first because I am not a plain type of girl.

So I made a decision, I was going to tie-dye the entire two yards and I challenged myself to choose a color I would probably never wear...PINK! This is now the first addition to my wardrobe that is entirely PINK. I know now you want to go out, buy muslin, tie dye it, and make this two piece set that can be worn like a romper... I bet you thought it was a romper!

I used three fuchsia dye packs in order to die the two yards which I purchased at Joann. I initially purchased a three pack with fuchsia, turquoise and purple and I decided on pink because it was my least favorite...haha.


The shorts were made using Simplicity 1165 with some slight modifications. I did view D and added two inches in height to the front and back pieces and then attached the waistband. For the waistband, I inserted elastic that was 1.5 inches instead of doing double elastic.


Then for the top, it was a simple rectangle cut twice on the fold for the front and back. I also used 1.5 inches wide elastic for the top. I then finished the look off using Simplicity's small pom pom trim to add some more pop to the muslin.

Marica from Overdrive - Life After 30

“Rockstar meets Class” - One Shoulder Classic White Peplum Top
As a sewist who hates to create non-wearable muslin, when I first received my package with 2 yards of it, I wasn’t quite sure what this white muslin was for. At first, I thought they will probably give us a challenge to create a muslim of a pattern and then use another fabric for the final project. When I read the challenge “A BLANK slate” I envisioned endless possibilities but one must be creative to bring it to life. I envisioned 2 different looks but the cotton would NOT work based on the style.

At first, I wanted to make a skirt lined with tulle but felt it would have been way too easy and would not take me out of my comfort level. I have made mainly skirts for almost 3 years and have mastered it. I went to the drawing board, Pinterest, magazines, window shopping and browsed photos of some of my favorite fashion icons including former first lady Michelle Obama. I spent a day in limbo but after sleeping on it, the year of the drama ruffle sleeves came to mind. After a day of planning, I knew exactly what I wanted to create. I wanted to create a fashionable piece that I can wear to classy dinner with a rockstar or an event at New York Fashion Week.
I wanted to bring out my creative juices and opted to use a 1 shoulder as my base or bodice and add drama to it. The pattern that I chose was Simplicity 8386 View B as I wanted a fitted look. I opted to use a piece of white jersey knit that matched perfectly with the muslin fabric.

This took strategic planning as I wanted the front to be appealing and eye catching and HAD to create a true muslin with some other cotton fabric from my stash to determine the length and placement of the ruffle.
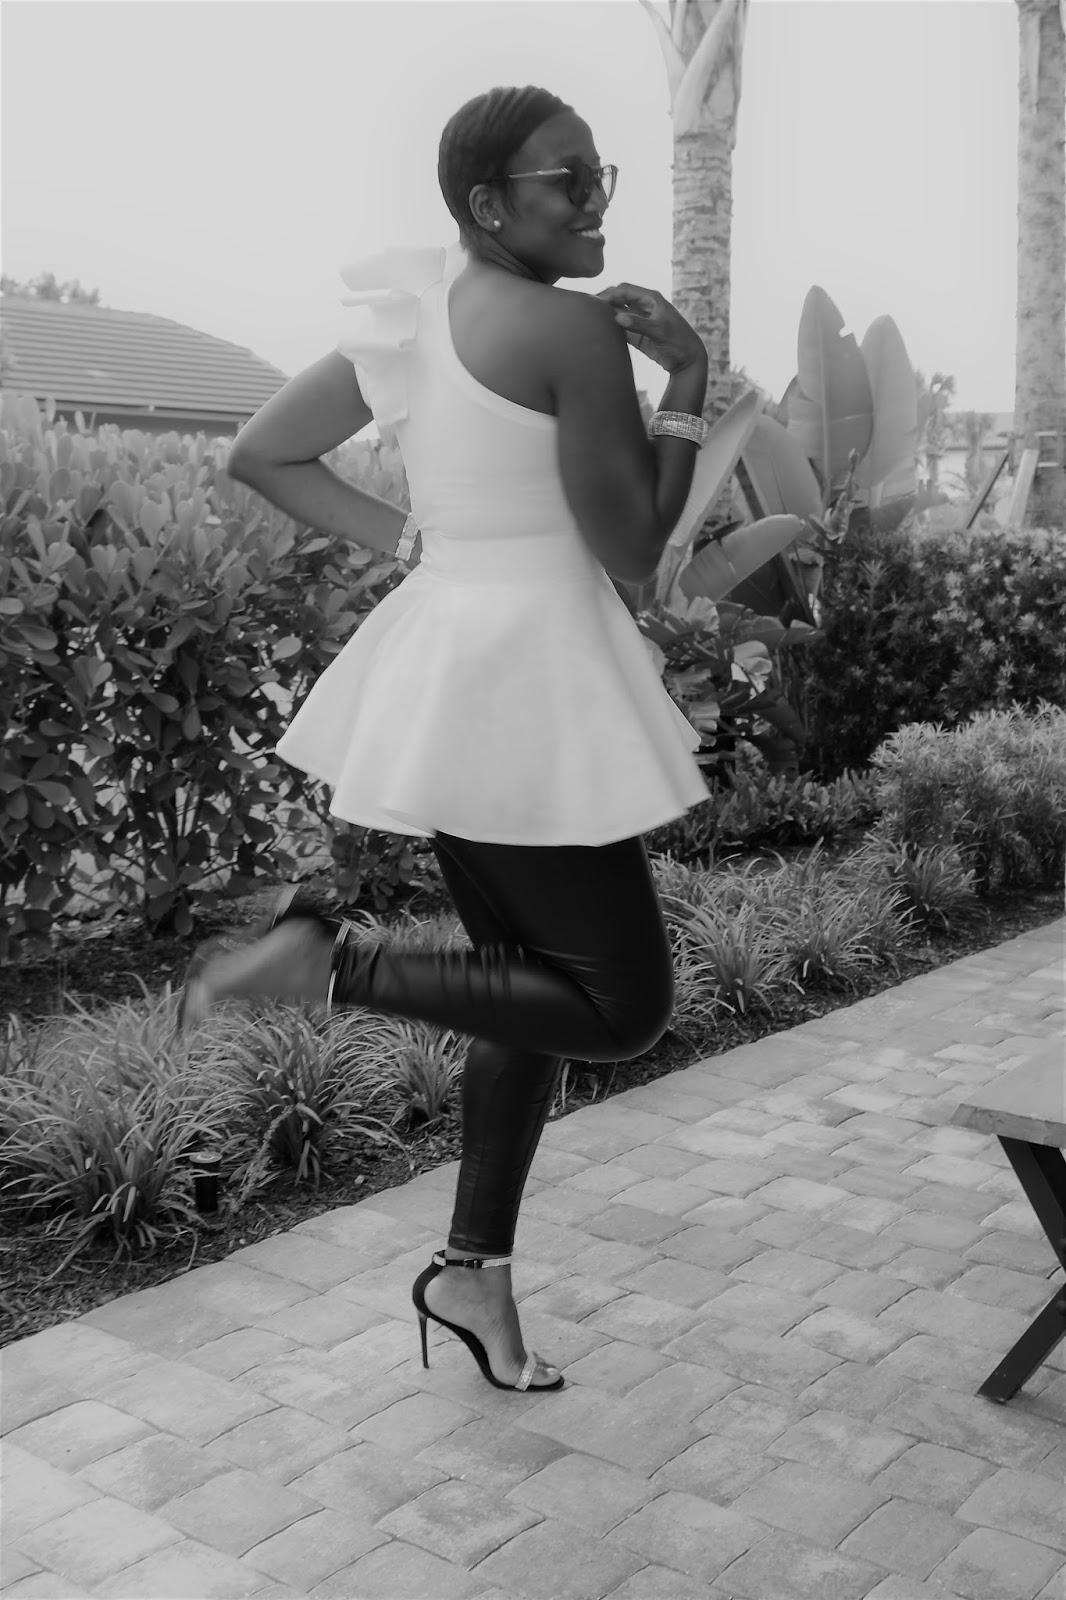

The peplum bottom was so much easier than the ruffles as I had a deeper understanding of making self-drafted circle skirt. I opted for mid hip and made a full circle skirt with a finished length of 13 inches. I first started out with the TUBE base with a one shoulder strap and wanted to see how it would look. For some reason, it did not bring out the statement of the ruffles the way I wanted it to fall. Again, I went back to the drawing board and I tested it on a different top and found that the asymmetrical worked out perfect.
Bottom Layer Ruffle
I drafted the ruffle pattern to get the right length to cover the shoulder area and leaving an opening for the armpit. I lucked out with my first attempt of 5 inches which sat well on the dress form. I first pinned the paper pattern on my dress form and tried different technique to create the ruffle. I played with it for at least 15 minutes until it was positioned correctly. My first attempt was to use one single layer of pellon light to mid weight and 1 layer of fabric, I did NOT get the effect that I envisioned and I then decided to add another layer of pellon and double the fabric for the bottom layer.


Top Layer Ruffle
I wanted it to be more lightweight to fall perfectly in place with the bottom so I decided on a single layer of fabric on each side and used the flower leftover lining from the peplum lining as my top layer. I knew at first it would work as the single layer of interface would have been perfect for the fall. I was amazed the minute I pinned it and definitely will be making another one or something similar for my next Diner En Blanc (all white event).


The Finish - Designer techniques
I ensured that I had a super clean finish by using my bias tape hem on the top layer rather than the serger. I went into a few top designer stores and checked out their stitching techniques before finishing my garment. I noticed that lining in most designer garments are common and wanted to make sure that my ruffles and peplum were lined.
I am truly happy with the way it turned out and will be taking more fashion risks during this Challenge and with my upcoming Fall Projects. Little did I know that “a blank slate” white garment can come to life as simple as it may look with a little bit of sleeve drama. I love the entire piece and the detachable peplum was just icing on the cake as I can wear the top without it. I will have multiple use and may use the peplum to jazz up a boring bodycon dress in the future. I plan to wear this again and again and can’t wait to make the black.

Our first challenge was quite the challenge, at least for me, because I usually work with knits. When thinking about what I wanted to sew I decided to pick a new-to-me pattern that would also ease me back into the woven world. The Florence Kimono by Sew Caroline paired perfectly with the bleached muslin that I received in the mail!

White is very sparse in my wardrobe, so I was tempted to leave the fabric as-is. Obviously that didn’t pan out because, for me at least, being a mom to an 18-month-old boy and wearing white don’t mix! I also wanted to try my hand at dyeing the muslin because I haven’t dyed anything since college (at least!). I couldn’t get my hands on indigo and go full Shibori, but My Florence Kimono ended up being inspired by the Japanese dyeing technique in the way I folded and tied off my muslin before dyeing it a denim color.

The result of my dye job turned out almost exactly like how I originally pictured it in my head--although it’s a little more muted in color than expected. I love it though, and it will certainly fare well in my wardrobe this early fall season.

What drew me to use this pattern (especially after dyeing my fabric and finding really cute fringe for the hems) was the versatility of being able to dress up jeans for a weekend date night or wear it for lounging before bed. It’s also great to throw over a cami and PJ pants for a quick late night ice cream run, and I can also see myself wearing it to the beach next summer as a cover-up. The possibilities are really endless here!


The construction was pretty straightforward. The seams are of the French variety, and I appreciated that extra touch even though I’m still easing back into working with wovens. The sleeves felt a little long for me, and since I was planning to add trim I decided to take an inch from the length of each sleeve. I hemmed everything up before adding a navy fringe at the end. When you put it all together it definitely gives off the vibe that Summer is passing the torch to Fall, and I’m ready. Bring on the pumpkin spice lattes!
Bianca from Thanks! I made them! Sew can you.
A dress called Harvey.
I was notified of this challenge's rules as Hurricane Harvey was a developing into a tropical storm in the Gulf of Mexico. I told Fabric Mart that I would participate in the challenge until I was unable to do so. The water rose, and my anxiety and fear rose alongside it. We were told not to leave our home, so I retreated to my sewing room. I chose to use the muslin as a canvas to focus some of my emotions (i.e., fear, gratitude, grief, and guilt) related to the storm and the aftermath.

I like my clothes to express elements of my personality or emotions. That usually results in happy-looking pieces. Sewing usually lifts my spirits and allows me to shift focus in moments of sadness. I currently feel broken. I am living in a broken city around broken friends and neighbors. With nowhere to go, I took to my sewing room. I contemplated how to show brokenness on fabric and to find a sewing pattern reflecting putting pieces back together.
Because of the storm, I was unable to shop for supplies to transform my fabric. I decided to use what I had on hand in my sewing space and pantry. It gave me a chance to try a "flour-resist" technique (detailed in my blogpost). A paste is applied to the base fabric. The fabric is dried overnight and cracked to expose the fabric beneath. Fabric paint is then applied, and it seeps between the cracks. After the paint dries overnight, the flour is removed to show the painted fabric beneath. This labor-intensive, slow process involves layering, saturating, breaking and cleansing; a metaphor for the storm.

The colors in the fabric are black, blue, and gold. Black and blue represents the devastation left by Harvey. The paint effect is stronger in some areas and varies in strength throughout the fabric. I did this to represent the wide continuum of impact of Harvey on people who have been affected. The crackle can be interpreted as rising water and escalating emotions during the slow progression of the storm. First responders and ordinary people with boats and trucks risked their lives to save people in immediate danger as the water rose. They are represented in a layer of gold painted directly on the muslin. A second layer of gold overlaps the blue and black to represent love and out-pouring of local, national, and global support. It recognizes those who provided food, shelter, clothing, and ongoing cleanup in the aftermath of Harvey.

The McCalls 6028 pattern does not reflect my everyday style, but it communicates what I feel. I wanted a pattern with multiple seam lines to represent separation, structure, connection, and regrouping.
The black piping represents the common thread we share, the boundaries of overrun banks, and released reservoirs. The piping also reflects the inaccessibility of streets and the need to feel supported in difficult times.
This fabric is unlike anything I have made before. It is chaotic. It is messy. It is confusing. It is hard to look at, but it has more to show. This dress is organised, structured, detailed, and precise. It is purposeful and serves to calm the disorder. This was a labor-intensive, slow process involving layering, saturating, breaking and cleansing. I thought it was an appropriate metaphor for my experience. This was a wonderfully therapeutic exercise for me. The waters are receding, schools and businesses are reopening and people are on the road to recovery. It will take time, but HoUSton is strong.


Lindsay from Lindsay Baker Co.

Hi friends! I am Lindsay Baker and I love to create things. Sewing is my favorite and I have a flair for vintage /retro patterns and fabrics. On my blog you can see lots of colorful projects from thrift store refashions to new fit and flare dresses.

Since you don’t really know me, you wouldn’t know I don’t own anything white. Not even my wedding dress was white, so I had to dye the fabric. I have been seeing Shibori dyed fabrics all over the place so I knew this would be the perfect project to give it a shot.
I folded it up and gave a light dye bath then used it like regular. Way back in the beginning of my blog I did a few tie-dye projects and it’s always so fun to open up a project and see the design after the dye bath!

The Details
I choose Simplicity 8417 because it didn’t have any zippers or hardware, which I find unique for cotton shirt patterns. I want a casual shirt I can through on and wear anywhere. Although the trade off is that it has to be loose enough to fit over your shoulders and bust.

I also love a good peplum especially because I find they are flattering on me. The gathered hem is very on trend right now in designer stores. I think the dropped waist style is also popular around stores for fall.

I love making my own bias tape and this shirt called for a bias tape neckline. This helps keep the shirt light and airy instead of interfacing. I choose the flutter sleeves, which were a new style to me. For a cotton fabric they were the best choice since the fabric has no give. It makes for a more comfortable shirt.

The Verdict
I’d love to make this shirt again with a more flowing fabric; this cotton is a little stiff right now but it will soften over time and wear. The dye job was really fun and I totally want to dye some bed sheets! I love how it turned out, a little hippy-flair, and hope you love it too!
Carmen from See Carmen Sew
Hi Fabricistas! I'm Carmen and I blog over at seecarmensew.com (@carmenross88). A blank slate is a perfect way to kick off the competition! I knew right away that I wanted to abstract paint on my muslin using acrylics and ink sprays. I also stamped on the dress using my favorite rubber stamp and I applied an image transfer technique that I learned in my mixed media arts class.

It was so fun to play with paint and let the creativity flow. Even though I've never experimented before with painting and designing my own fabric, I do believe that what I have created is a good representation of me. Recently, I've begun experimenting with mixed media techniques and I've been keeping an art journal. It was exhilarating to play with fabric the same way that I love to play with paper, paints, and stamps.

The vintage image that I applied to the front of the dress was created by using matte medium, an acrylic adhesive like substance. To create a transparency, you put multiple layers of matte medium on your image and wait for it to dry. Once it's dry, you can use a wet sponge to begin to peel away at the paper backing. Eventually you will be left with a transparency. I applied the image to my fabric using both a fabric adhesive and matte medium. I think it's a cool pop-art detail. Of course, you could probably achieve a similar effect by printing your image on iron-on paper, but that would be too easy, right?


The pattern I chose is New Look 6509. I went with view B, a playful dress with flirty cut outs, which I thought would complement the fabric I created. Construction was straight-forward. I've never sewn a cut out design before, but it turned out to be much easier than I thought.

I like to use bias binding a lot in my garments. In this dress, I've used bias tape to hem my dress and conceal the seam where the bodice and waistband meet. This keeps the inside of the dress looking neat and tidy. I also used bias tape to finish the seam where my zipper sits. For the side seams and pockets, I simply used pinking shears.


Fall is right around the corner, but I hope to get a couple of wears in before the season changes. I photographed her out in the lovely sun this afternoon, but to my surprise the bright sunlight seems to have washed the colors out, even though I thought I was being heavy-handed with the paint. Please see my detail photos to see all of the bright beautiful paint on this dress.


Vote for who you think made the best garment! Voting ends Friday, Sept 8 at 7:30am. Winner will be announced shortly afterward.
VOTE NOW!!
REMINDER!!
Don't forget to get your Reader Participation entries in! They are due Friday, Sept 8 by 7:30am ET. Click HERE for details.
Awesome job, ladies! I'm super impressed. Looks like I need to step it up for next week :)
ReplyDeleteYou did great! I think everyone did something unique that kind of resembles their personality!
DeleteI agree with Carmen! Everyone did such a fantastic job. It makes it hard to pick my fave!
ReplyDeleteAwesome job to all the ladies!
ReplyDeleteThat is a great looking first round!
ReplyDeleteI love love love the symbolism in Bianca's Harvey dress. As a Texan lucky enough to be outside of Harvey's reach, I find her dress to be a great tribute to all those who endured the storm.
ReplyDeleteWow! These are all pretty amazing, ladies. I wouldn't have known what to do with muslin, so I doff my hat to you all - choosing a favourite is going to prove very difficult!
ReplyDeleteLee
Great job everyone, I LOVE following this contest and seeing each persons interpretation of the challenge. Thanks for all your hard work and for inspiring!!
ReplyDeleteI loved the Harvey dress. So much thought went into the creation of the fabric. It is a tribute to your creative spirit and it is a true work of art. This style of the dress looks wonderful on you.
ReplyDelete