
I did it! I finally did it! I made JEANS! This was my first time ever for making real 100% cotton non stretch jeans! Did it take some time? Yes. Did I have to seam rip a lot? Yes. Was it worth it? A thousand times yes!
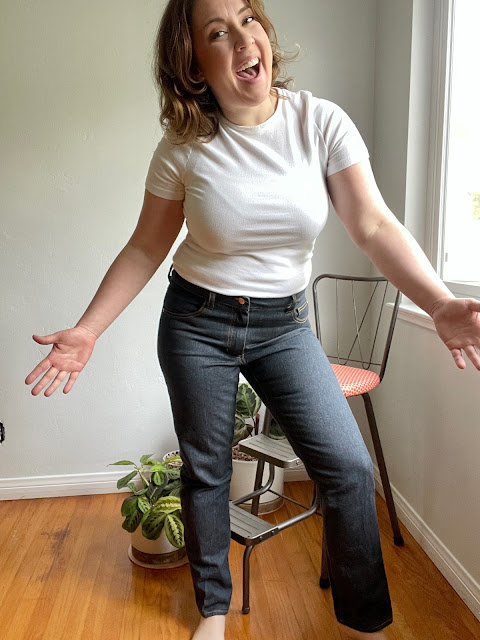
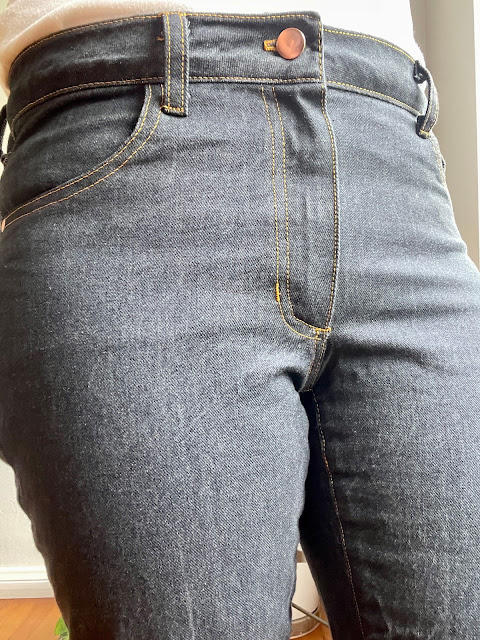
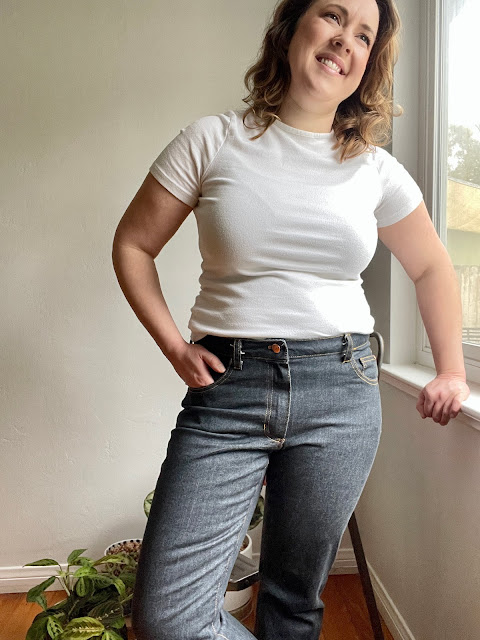
My jeans were made of Fabric Mart's dark denim fabric. It was the perfect weight and I love the dark color. It is totally non stretch which was perfect for the pattern I used. I sewed up the Morgan Jeans from Closet Core Patterns (my favorite pattern company of all time). They are a boyfriend fit so they are drafted to be a little loose. This pattern helps you get all the features of ready to wear jeans. Top stitching with gold thread, back pocket detail, rivets and button fly closure. I did accidentally buy a zipper fly kit so mine has that instead of a button fly closure.
It is really recommended to do a muslin to get the right fit. Closet Core drafts a slightly longer crotch seam so did have to shorten mine. I did adjust the waistband to fit the back better but I will have to contour the waistband a little bit more on my next pair. These gape slightly still. For mine I adjusted the pattern so that I had a snug fit through the hip and thigh. I did that by sewing the side seams at 1 inch in order to get the fit that I wanted. When I finished the side seams I trimmed that 1 inch down. Closet Core has a detailed booklet on their resources page about doing pants and jeans fitting. Do not be nervous to try fitting! Closet Core has got you covered!
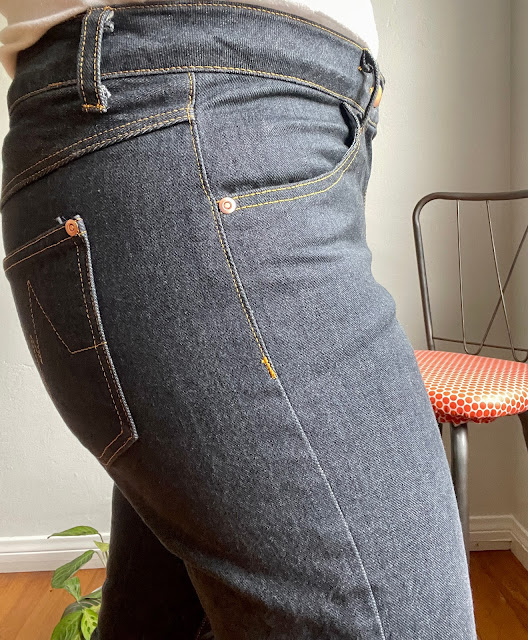
Oh! And one other thing I loved was that Closet Core has a little library of back pocket designs! You can download them and pick which one you like. They tell you exactly how to do it. And they turned out great!
I learned some newish techniques for sewing jeans as well:
1) You might need to really play around with your tension to get the gold topstitching right. That is normally something I never change on my machine but my last two Fabric Mart projects had me change the tension. So you might need to adjust that and adjust the stitch length before you start sewing, work with scraps of fabric first.
2) I learned how to make a true flat felled seam on my domestic machine. When jeans are made in a factory they have special machines that help join different parts of the pants together. Check my Instagram account for a video on how I did that.
3) I learned how to sew bar tacks with my machine. There is a setting on my Brother so it really did it for me but I hadn’t ever had a project where I really needed to use them. I did have to rip one or two out. That part I did not enjoy as the bar tack creates a very short stitch length.
4) I worked with rivets. Now this isn’t really new for me but it might be for you. I work with rivets on bags that I make for my shop regularly. There is a learning curve with rivets and some tools you will need in order to get them attached correctly. You will need an awl, hammer, an anvil and a rivet setter. These really add to the true jeans look.
I plan on adding a couple of short videos to my Instagram account over the next couple of weeks to show you some of the above techniques that I learned.

At this point now that I made jeans, I really think I’m capable of making anything. So are jeans gonna be on your list of things to make this year?? I sure hope so! They will take your skills to the next level. It's a true confidence builder. Just go slow and take your time, the rewards are great in the end!
Great work.
ReplyDeleteCongratulations! They are Beautiful. Great Job.
ReplyDeleteStitching and fit is so on point. Excellent job!
ReplyDeleteThose look great. You did a wonderful job. I just purchased a couple of closet core patterns from Fabric Mart and I'm looking forward to trying them. Based on your post, I think I try the pants first.
ReplyDeletePerfect fit!! Especially since it's a non-stretch fabric. Excellent!!
ReplyDeleteAmazing fit and techniques. You should be super proud. Nice denim too!
ReplyDeleteYour jeans look ah-maze-ing! LOL I'm inspired to sew up a pair for myself!
ReplyDeleteAmazing! I've always wanted to make jeans but it makes me nervous just to think about it. I love all your tips and with this I may give it a try.
ReplyDeleteI made jeans using the Closet Core pattern, but I bought their video course to go with it and it was worth every penny. No muslin needed as she goes deep into the fitting and breaks the steps down for even a beginner. I have now made a second pair and these are the best fitting jeans of my life. I would have my computer by my machine and watch for a bit, then do that step, in small increments. I did the Ginger Jeans and I love them. She also includes links to places to buy top stitching thread and such. I am convinced anyone could make these using the video. I only jumped in after my friend took the class and convinced me and I saw how her jeans looked.
ReplyDeleteThank you for your reply. Sounds like I should give it a try.
Delete