Made By A Fabricista: Playing with Stripes

Have you ever made a garment that you concluded was a skill builder?  The pattern, the fabric, the technique all taught you something?  Well this post is all about the skills I learned or improved on with this dress.  
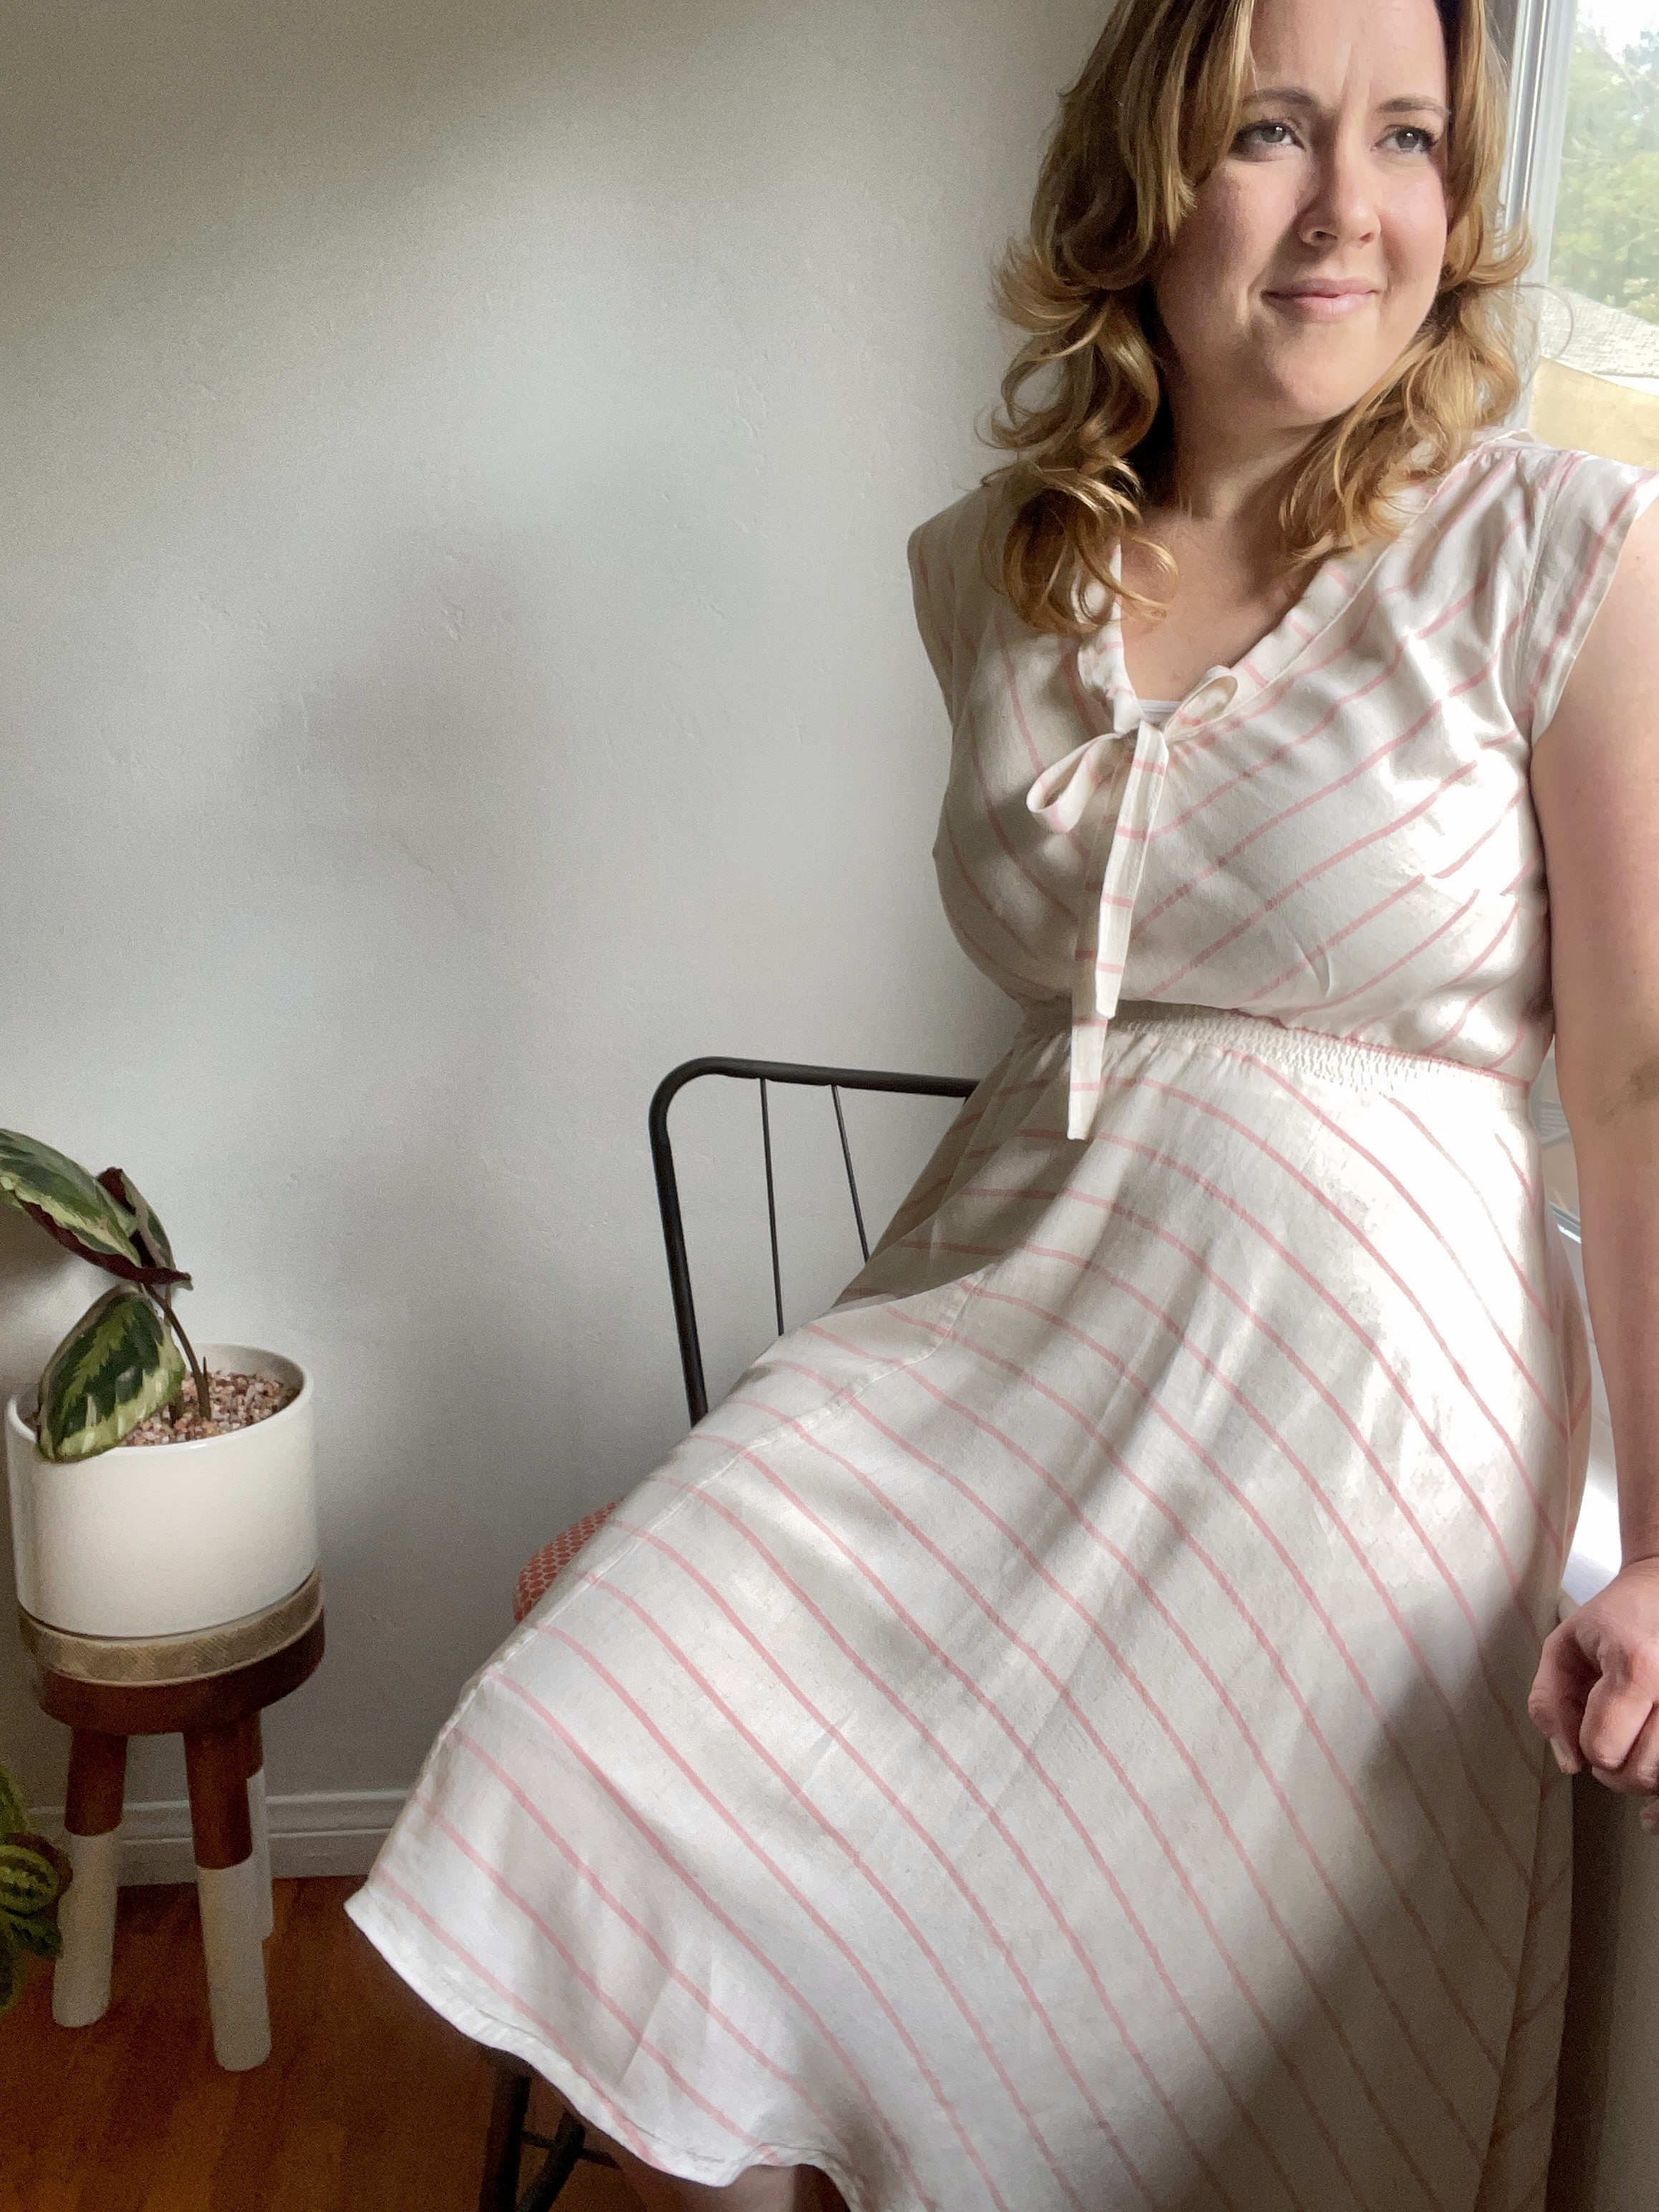
First let’s start with the fabric.  We got stripes.  Stripes can be used in fun ways to create a lot of visual effects.  When I got this rayon challis from Fabric Mart I didn’t really know what exactly I was going to do with it.  I ran through a list of patterns I already had and none of them quite fit.  I knew going in I was going to have to match up the stripes at least on the sides of whatever I made but I did quite know what was in store for me with the pattern I ended up picking out.  Now let's get to the pattern.

Deer and Doe is one of my favorite pattern companies.  They have nice classic silhouettes that I feel work well with my body and frame.  I wanted a new pattern though so I went on the hunt for what I thought would be a simple design.  Boy was I surprised.  I chose the Reglisse dress version A with the tie front.  It looked so simple from the line drawing.  I did not realize the bodice was cut on the bias, also the skirt was a circle skirt.  This posed a challenge for me because I chose a striped fabric!  However I was going to make this work and by some miracle I had enough fabric to make AND modify some of the dress. Also there was the shirred waist band, I had experience with that but if you are looking to build your skills this dress has a lot of options for learning something new!

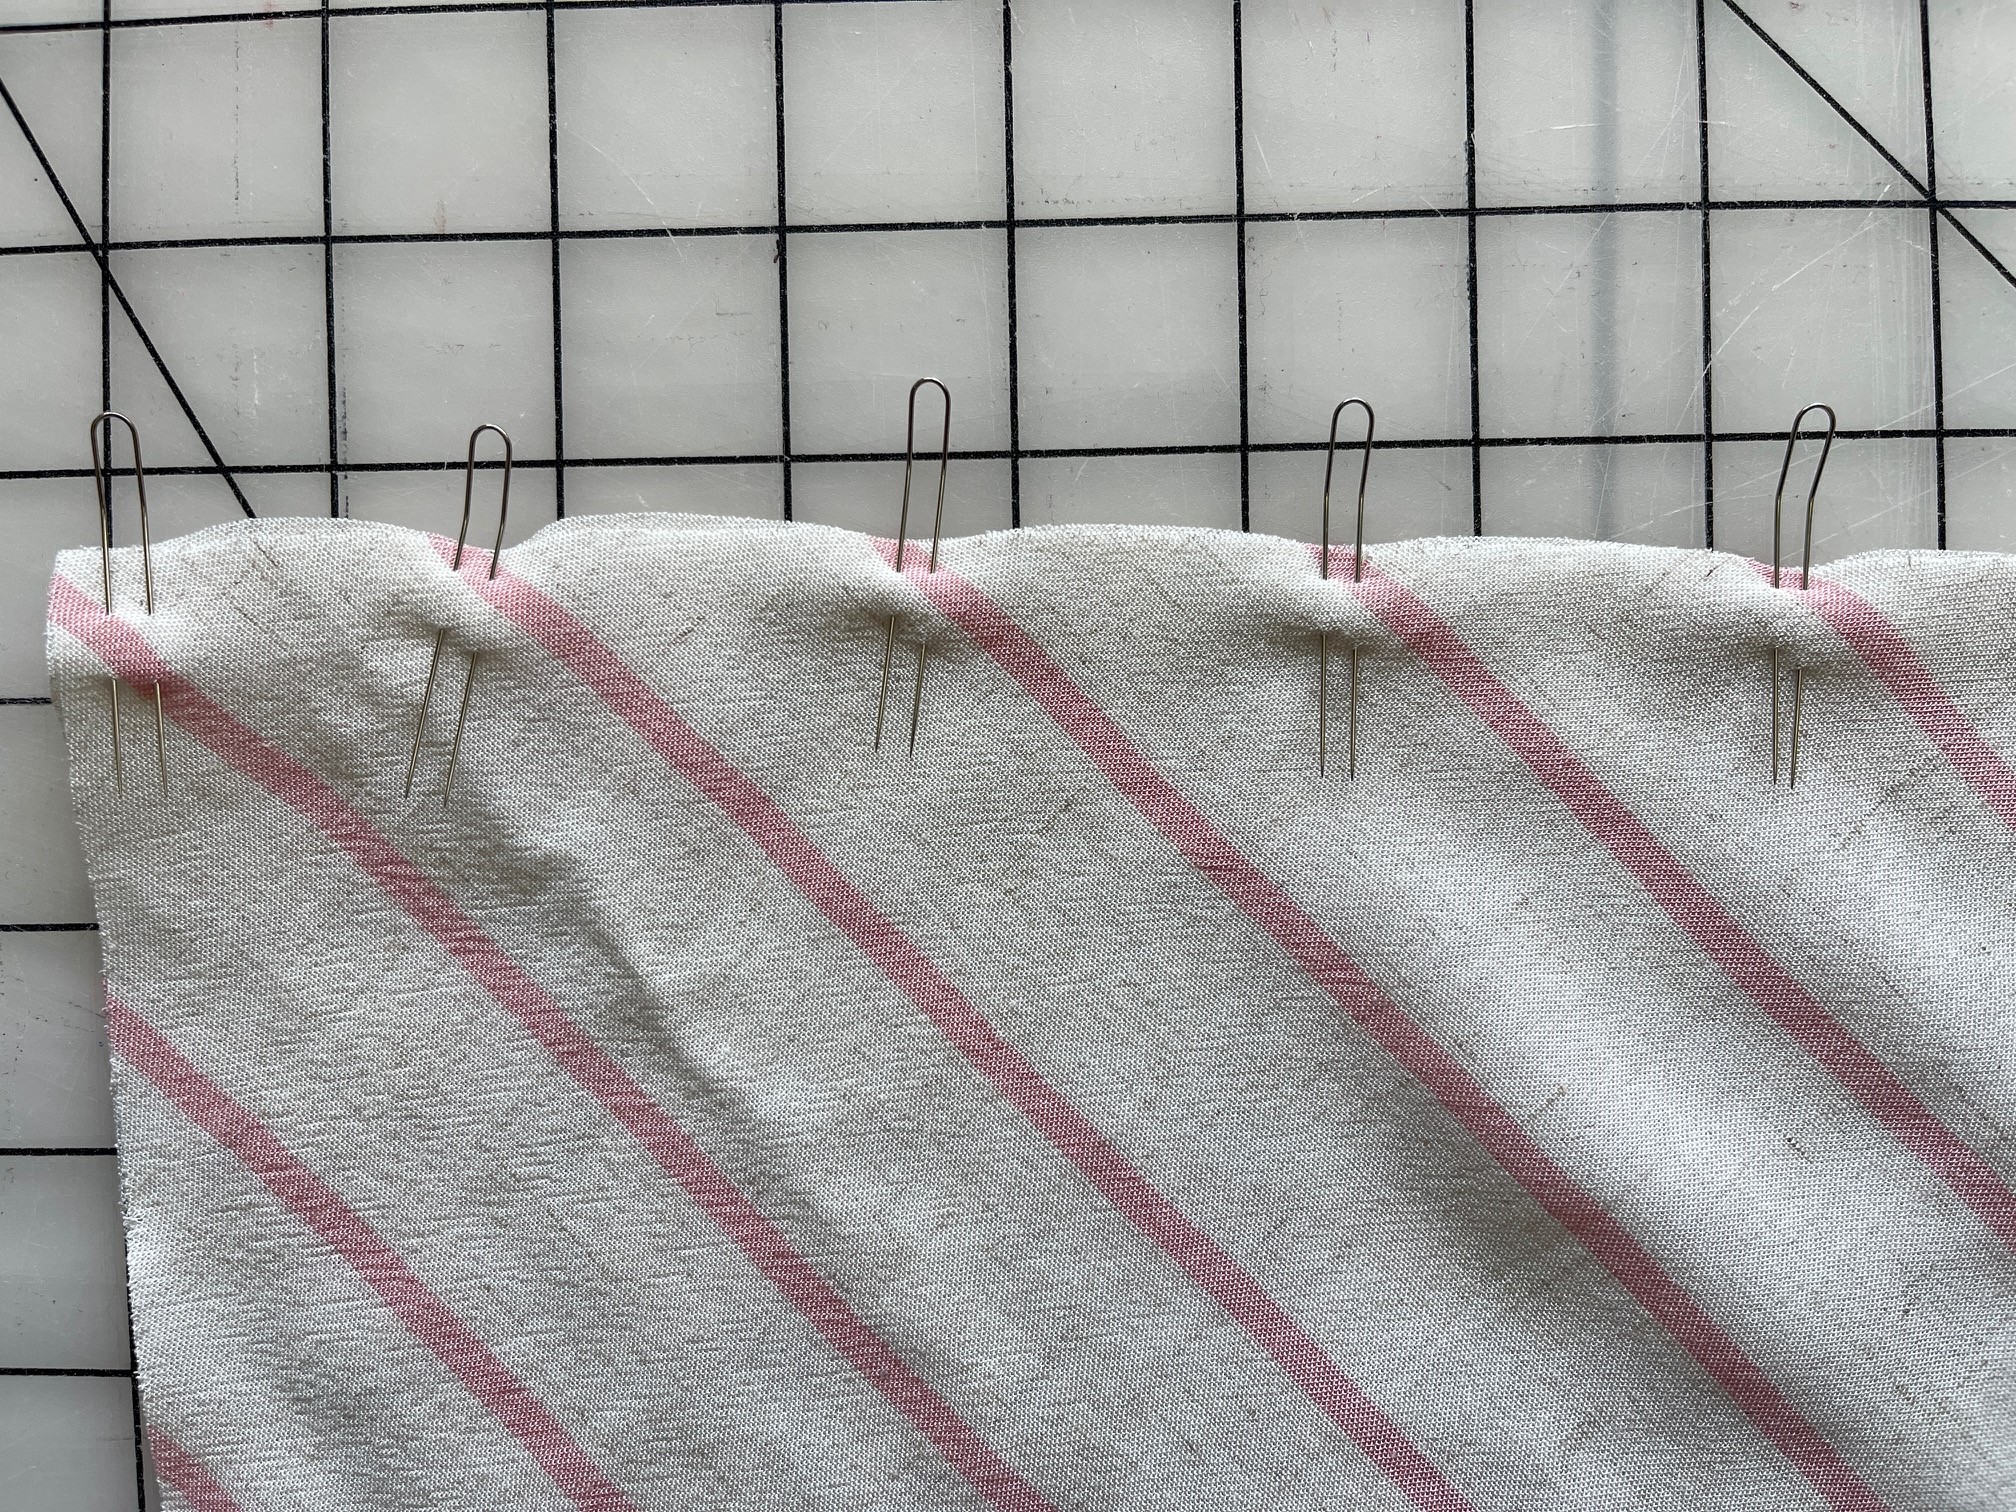
So I had to match up the stripe in the bodice to create this V look.  I did have to change the grainline to get the stripes to matching in a downward motion.  When I got to the skirt there was another challenge, cutting the skirt the way the pattern instruction said would make the skirt too short for me.  So I had to modify how I cut it out so that I could add the length I needed. I added seam allowance to the fold edge and I cut four separate pieces.  Then I had to stitch them together right down the front and back of the skirt.  In order to get really matched stripes I did two things. 1) I marked where the stripes hit on the first pattern piece I cut.  Then when I had to cut a mirror image I used those lines to make sure I was cutting the next piece in a way that would match when sown.  2) I used fork pins to help keep everything lined up when I started sewing everything.  I am so glad I discovered fork pins.  They really help when you want to get anything precisely matched up.  You can see in the photo what they look like and how I used them to match up the stripes.  Over all I am really happy with all my stripe placements.  I do think I will take a break from stripes though for a while.  It was a lot of mental energy! 

I will say the neckline on this dress was somewhat confusing and I did have a hard time getting the bias tape into place.  Also the pattern does not specify the width of bias tape you need.  So I think that was the biggest challenge.  For the skirt one inch wide bias tape worked but for the neckline I had to enlarge it to get enough room to fold it.  Once I got it in I was fine with how it looked on the inside because well I just didn’t have it in me again to seam rip it again.  

Overall this is a pretty flirty little dress perfect for summer.  It has an old time feel that is popular right now.  It’s worth trying if you want to work on some new skills to try.  Also the circle skirt makes its a great twirling dress!!  I have a feeling I will get a lot of wear for this dress this summer.  


HANNAH   | @modistrasews


Unfortunately Fabric Mart Fabrics sell out quickly!
You can find similar fabrics by shopping the following category CHALLIS.

Comments

  1. You are a brave little cutie. I agree the trouble was worth it. Very lovely dress and you look lovely in it. Well done.

    ReplyDelete
  2. I’m going to have to check out Deer &Doe...that’s so cute! Nice stripes matching!😎

    ReplyDelete
  3. You did a beautiful job!!! Love the dress on you, the fabric is light and airy..Well done! 😊

    ReplyDelete

Post a Comment

Thanks for leaving a comment! All comments are reviewed before posting to help us eliminate spam. Your comment will be posted within 24 hours.

Recent Posts You Might Like

Sewing With Intention: New Look 6106 and a More Coordinated Wardrobe

Sometimes a sewing project begins with a beautiful piece of fabric or a pattern you just have to make. This one began with my closet. Recently, I did a major closet purge. I took a good look at what I actually wear, what I kept reaching for, and—maybe more importantly—what was missing. Once the pieces I no longer loved or wore were gone, something became very clear: I want to be more intentional about what I sew next. Instead of sewing individual pieces that I love but don't necessarily wear together, I want to build a wardrobe where my handmade garments coordinate with the clothes I already own—and with the pieces I'm planning to sew next. For this month's Fabricista project, this beautiful lightweight shirting from Fabric Mart turned out to be a wonderful place to start. The Fabric That Started It All Fabric Mart provided this beautiful oatmeal and black heathered shirting , along with the matching thread for my project. One of the things I love most about this fabric is ...

The Perfect Plan for this Linen Blend! Until I Changed My Mind.

Hello Sewing Friends!  It’s Sharon from Sharon Sews with another Fabricista make.  When I saw this linen blend designer fabric on the Fabric Mart Fabrics website, I was intrigued.  After all, I, like many of you, love to find designer fabrics at an affordable price. It is a linen/nylon/rayon/Lycra blend, and I wondered what the designer had created with the fabric as I wasn’t familiar with that combination of fibers.  Surprisingly, I discovered a sleeveless, lined, mid-length vest in the same color with an almost identical fabric composition. Perfect! I’ve been wanting to sew a longer vest with matching pants, and that discovery confirmed this fabric would work beautifully for the look I had in mind.  The vest I’m wearing, from the June 2026 Burda Style magazine, it is not what I was originally going to make.  You see when I found the designer’s vest, I remembered seeing a Butterick pattern that was almost identical.  I ordered the pattern excited to...

Meeting Endless Summer Energy with a Maxi Dress

How are the temps still so hot?! I’m trying to make the best out of a blazing situation with a gorgeous swishy dress made in a splendid graphic print in an attempt to keep my cool when I am very much not. The heat persists, but so do I (while wearing sundresses)!  I really wanted a full length, all-fancy-design-details-included version of the new Chalk & Notch Noe Tank Dress since testing the pattern. This is View C. This version features a beautiful open back with a tie closure and the long gathered hem for maximum impact.  I chose the higher of two necklines. The pattern features full lining and I used the same fabric for both. I prefer to avoid any peeking-issues the easy way.  As I was scrolling through the challis options on the Fabric Mart site, this one stood out immediately, a beautiful kelly green with big abstract swipes of aqua. Simple, bold, (non-directional!), all of my favorite characteristics necessary for a showstopping dress. I wanted something very ...

Fall + Flannel = Shacket

If there is one piece that transitions easily between crisp fall mornings, mid-day warmth, and chilly autumn nights, it’s a shacket. Today, I’m excited to share my latest Fabric Mart make: the Ellie and Mac Patterns Connie Casual Shacket, sewn in a dreamy plaid flannel coating fabric . Here’s a glimpse at how it came together, along with a few construction tips for planning your own version! The Ellie and Mac Patterns Connie Casual Shacket pattern offers plenty of options needed to make the perfect transitional top layer for fall. With a relaxed body, oversized sleeves, three lengths, and a curved or straight hem option, you can make your dream shacket a reality.  For this sew, I selected a plaid flannel coating fabric with a soft blend of sage green and cream tones from the Fabric Mart website. Heavyweight flannel is ideal for a shacket because it provides structure and added warmth. As a bonus, this particular fabric is extra soft and snuggly, which I love. In addition to the fa...