

By the time this post comes out, it will officially be my birthday month! Yes, the entire month of April is my birthday month. Every year I always say that I’m going to make something fabulous to celebrate in and I never do. Well, I decided to change that this year. I made a birthday dress!
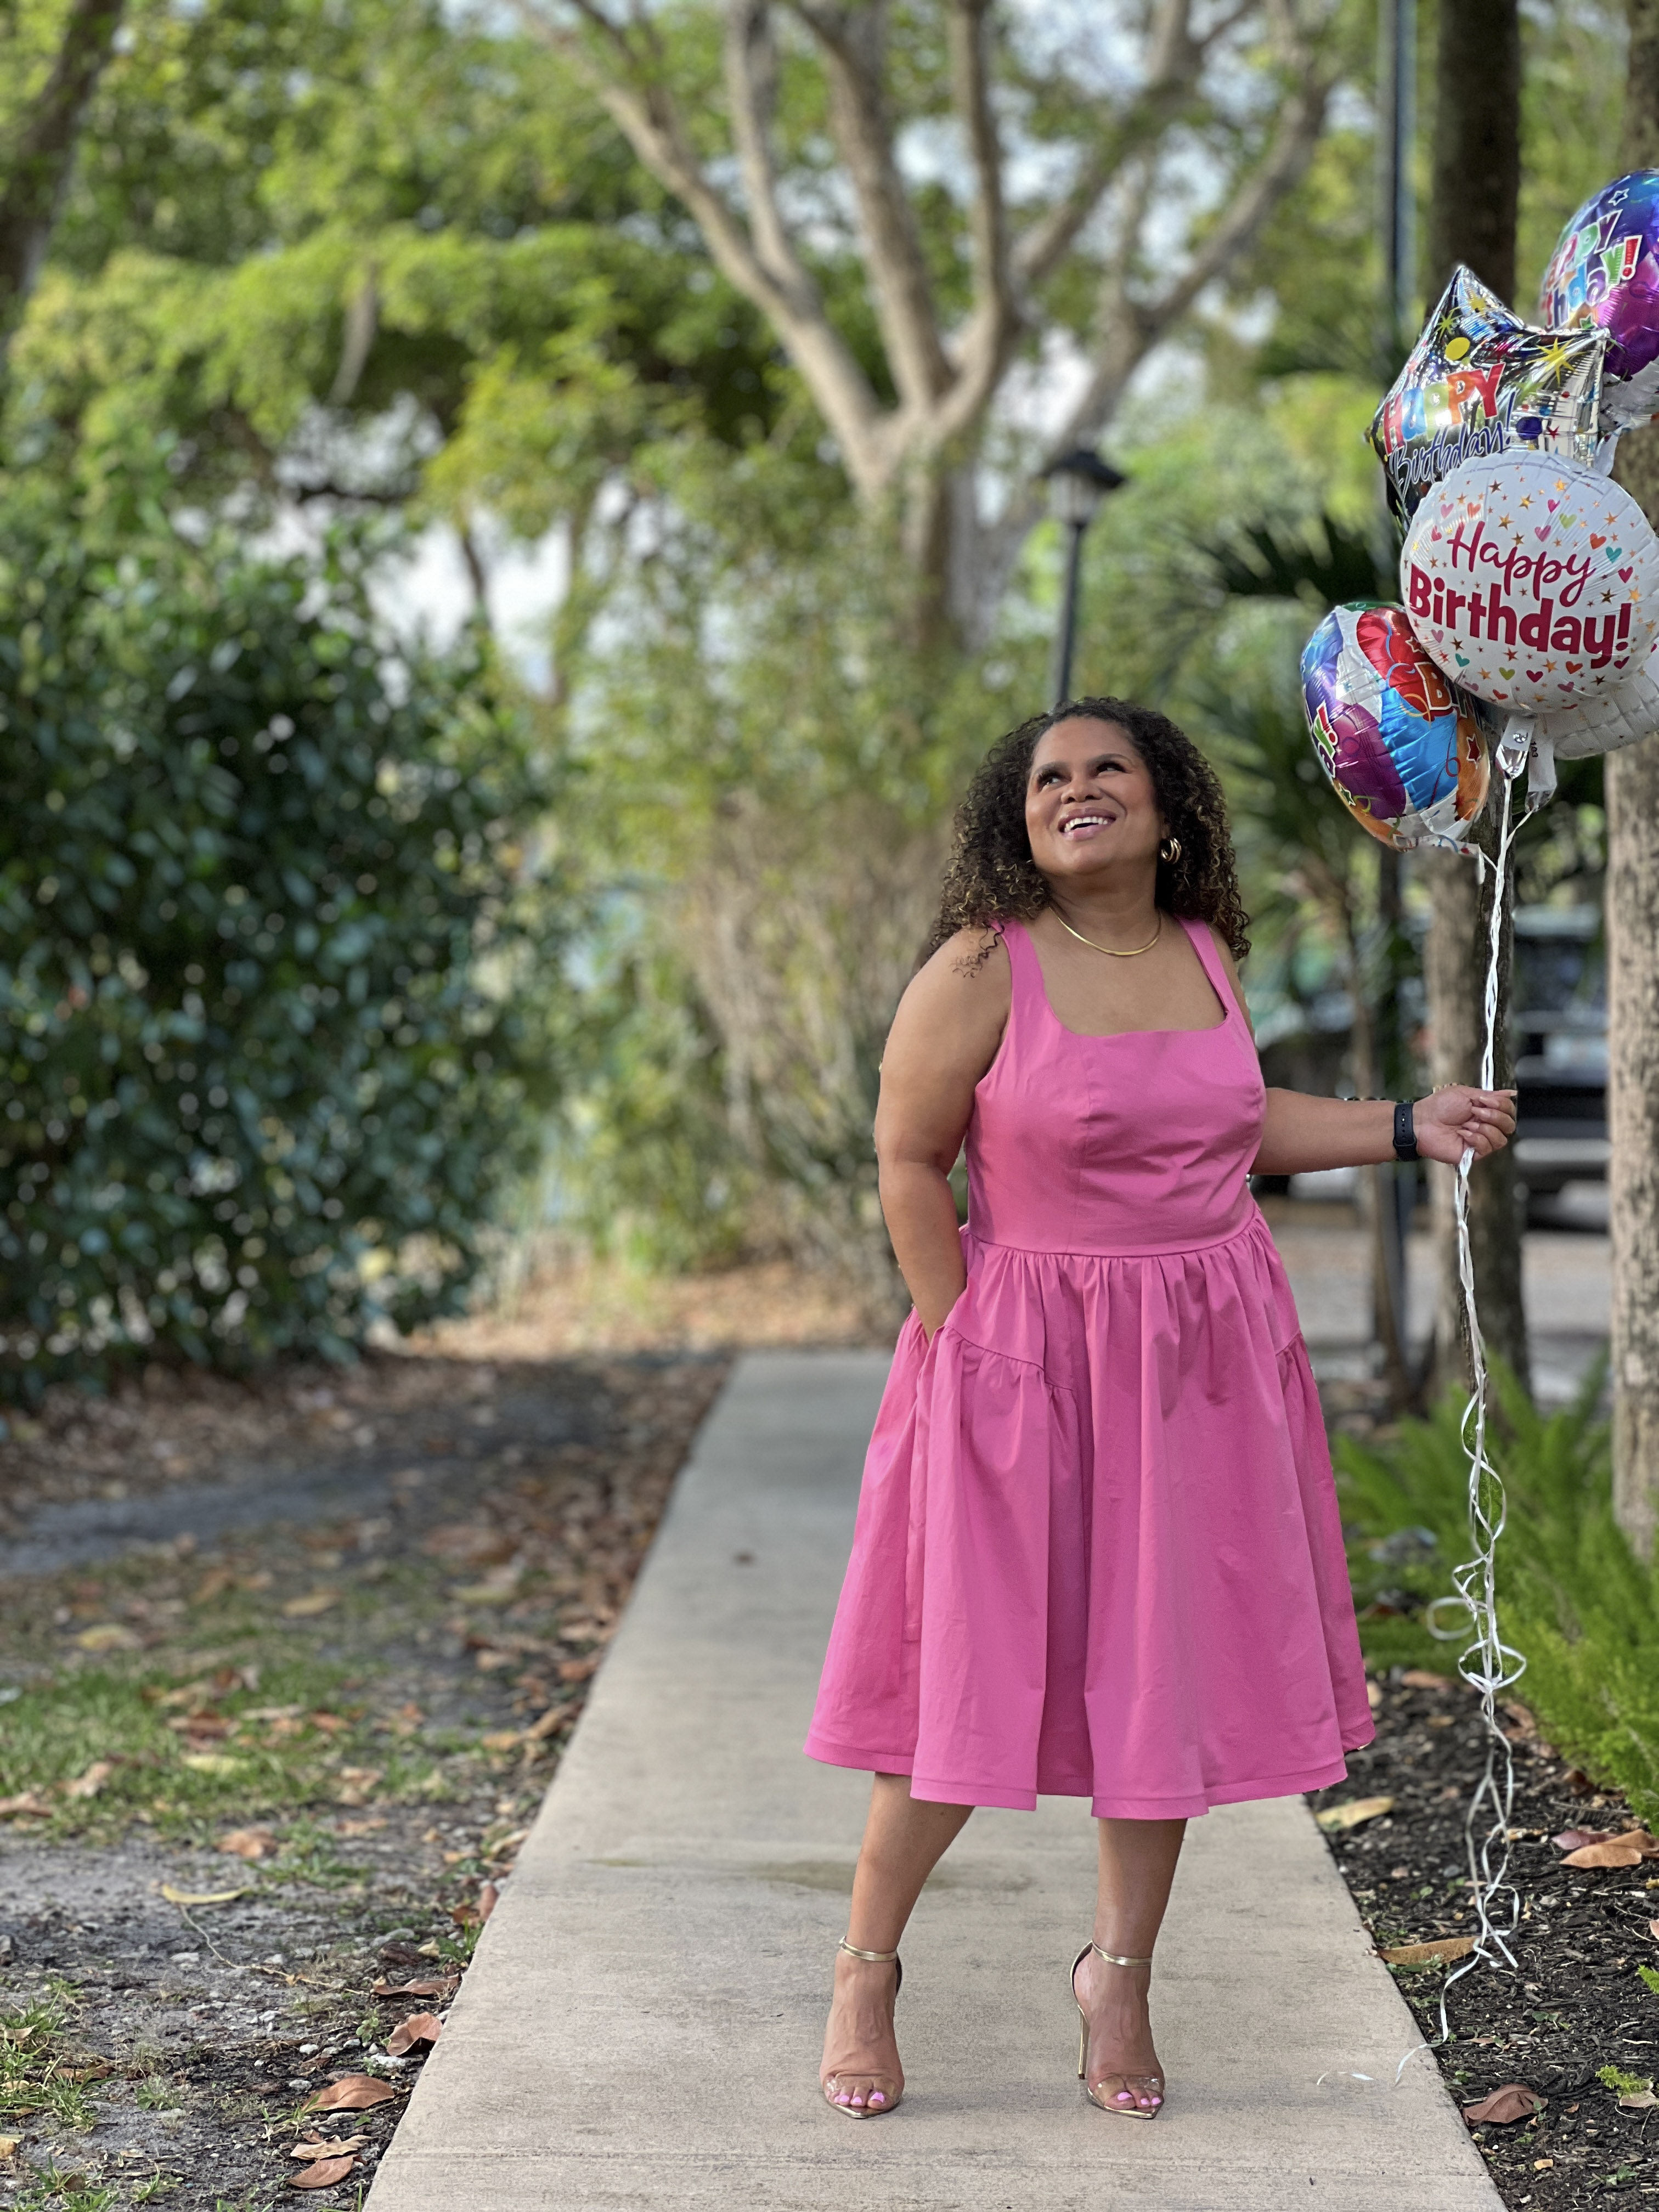
When I started looking for fabric for this post, I knew it had to be something beautiful. As I mentioned, I knew I would be making a dress, so I started looking for something with some sort of drape to it. I started looking at the sateen fabric because I’ve purchased other sateen fabric from Fabric Mart in the past and loved it. Well, I landed on this Fandango Pink Cotton/Lycra Stretch Sateen which I fell in love with as soon as I saw it. I was very excited when I received my fabric and opened it. First of all, I requested 4 yards and the fabric had a cute sticker on it telling me I received more than I requested because it was the end of the bolt. This fabric has a pretty sheen and the fact that it’s a cotton/lycra stretch is even better because it has a nice stretch to it.

My process in picking a pattern to make is that I start looking through my stash and pick out a few that I like and then I narrow down my selections until I narrow it down to 1 pattern. I know, such a scientific process. This time I actually posted a poll on my Instagram stories asking my followers which pattern I should make. Vogue V1884 was the winner.

I usually make a muslin before I cut into my pretty fabric, and this was not an exception. I have a confession. Since I’m in between sizes, I had to grade out at the waist. I’m a 14 at the bust and a 22 at the waist. When I initially made my muslin, the bodice fit just a tad tight. When I made the 16 to 22, it was just a little bit too loose. Since this pattern has a princess seam, it was a little difficult to pin it myself. I had my friend pin and fit the pattern to me, and I was good to go. Well, it dawned on me that my muslin was made from a woven fabric and the fabric I was using had a little stretch to it. Long story short, I ended up making the 14 graded out to the 22 at the waist. I pinned and sewed up the bodice and the lining at the same time to try and save some time.


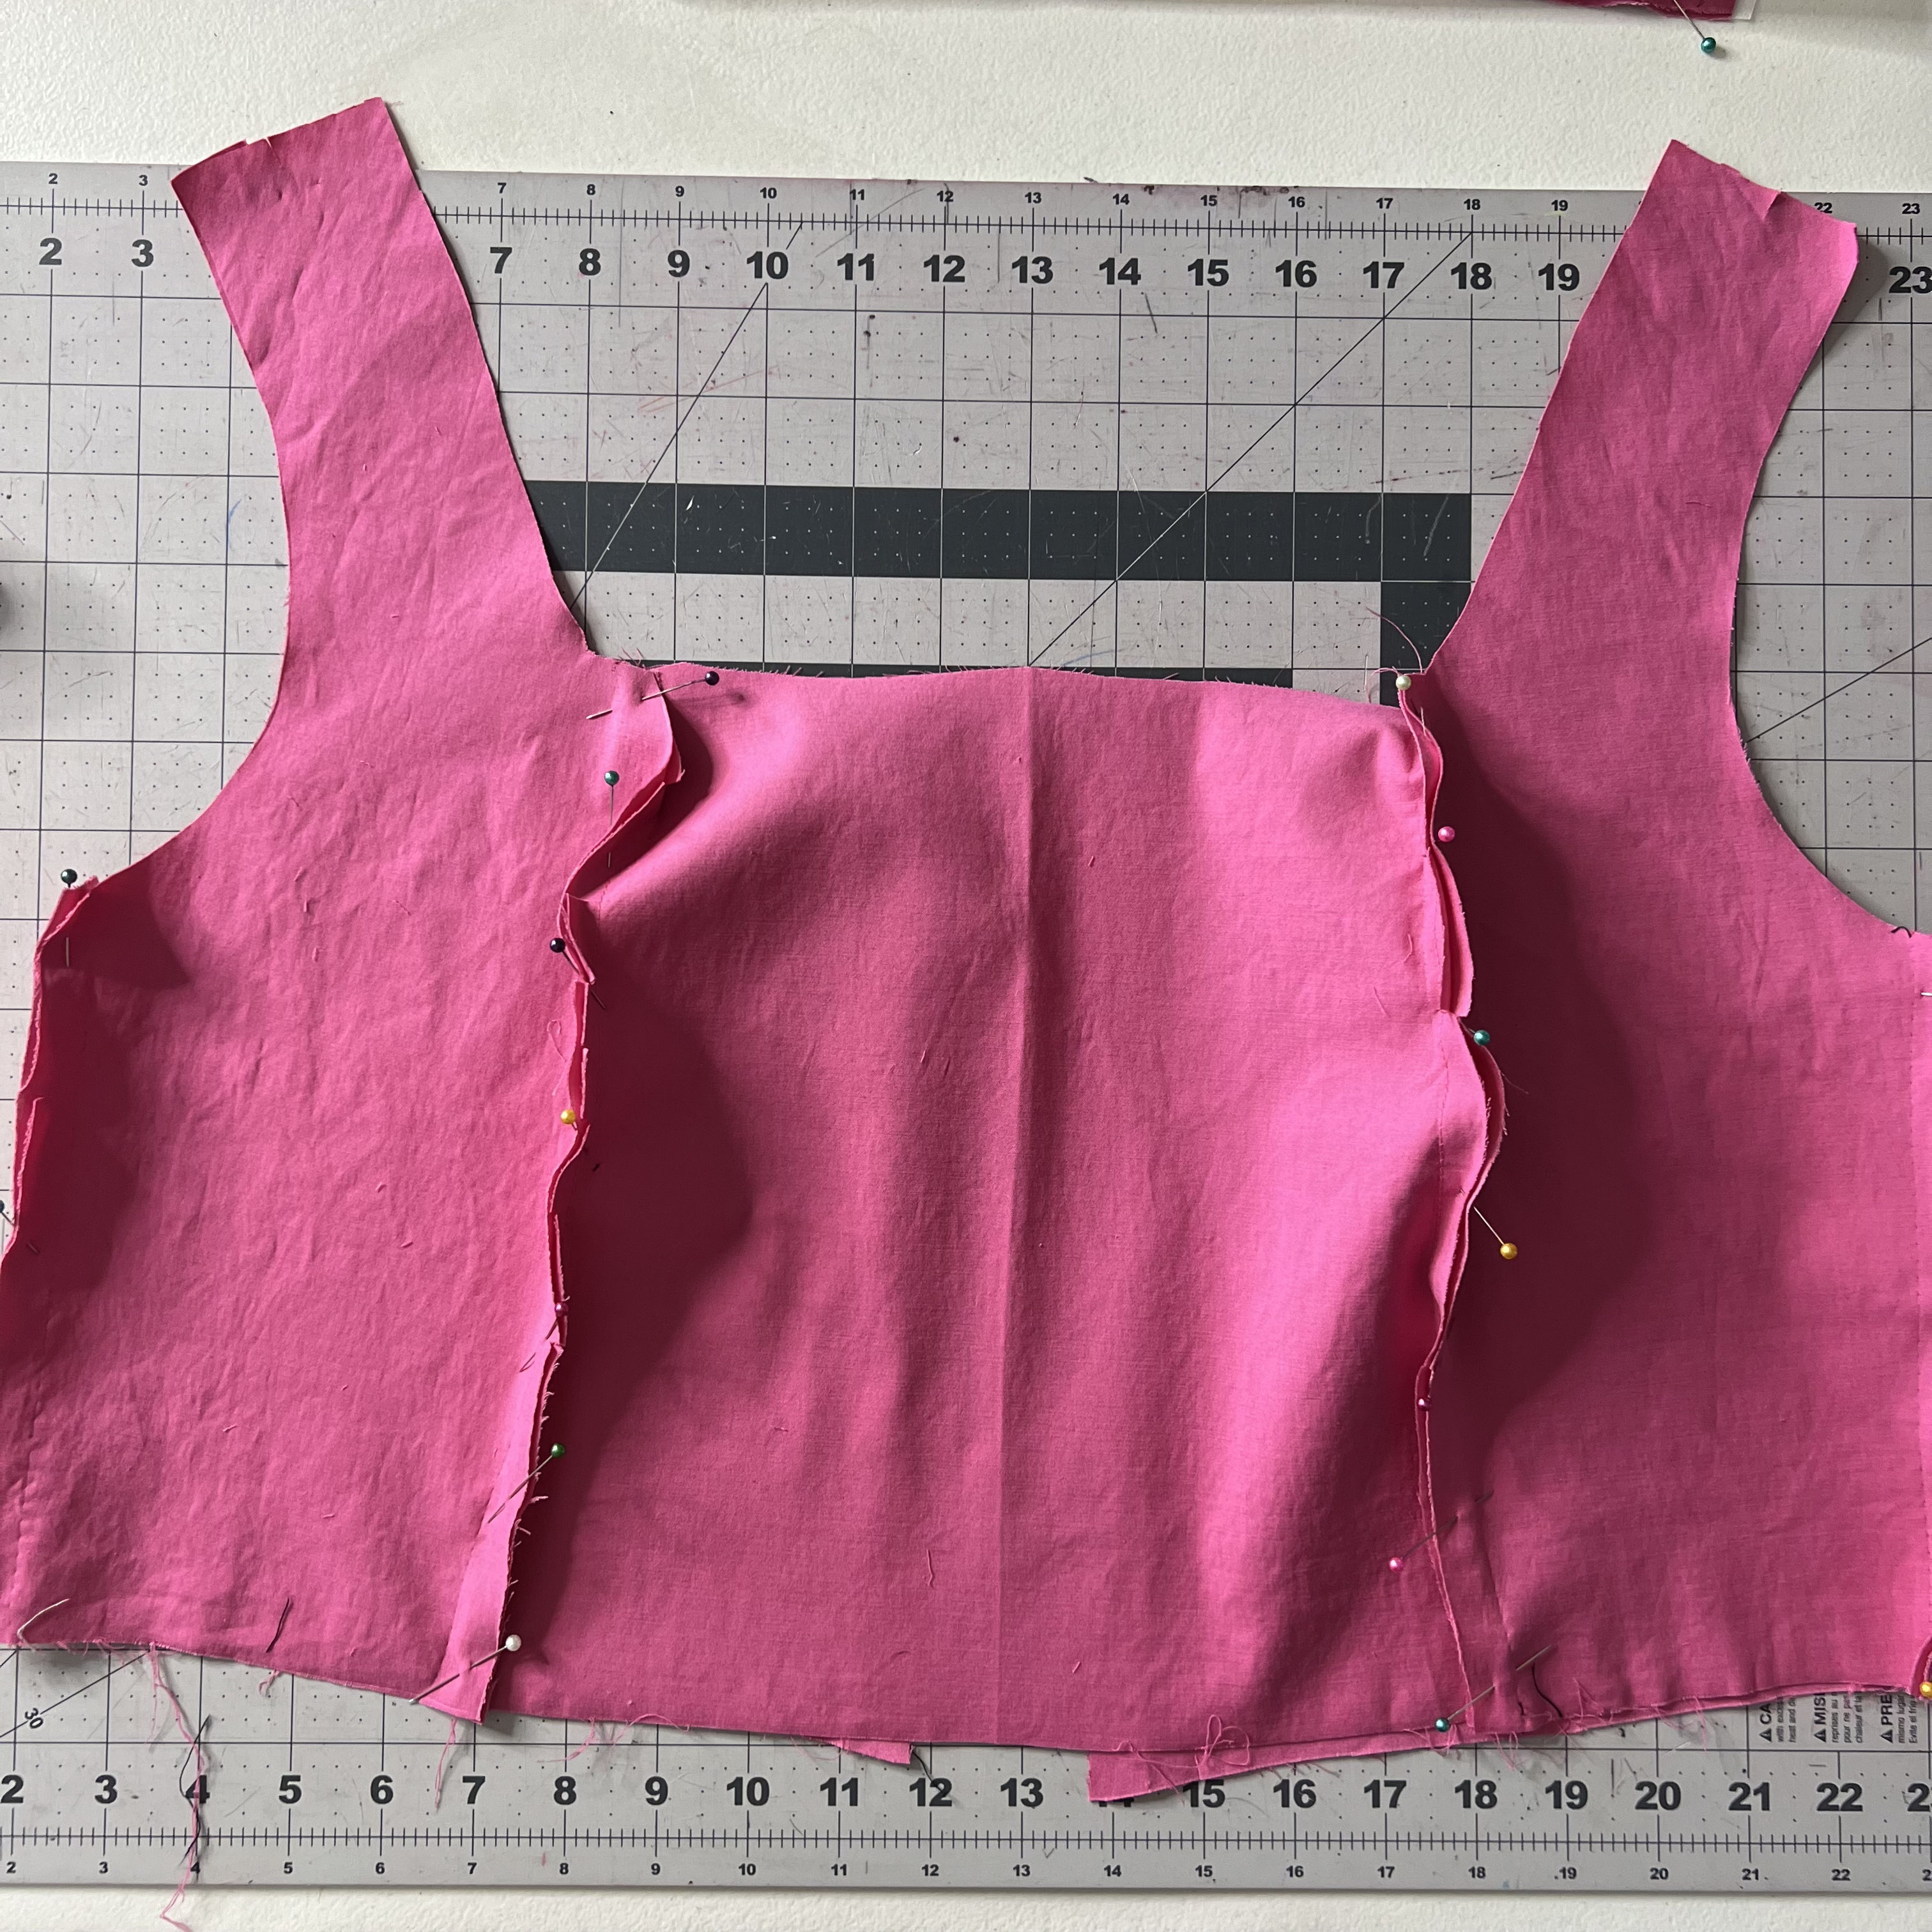

While sewing, I didn’t make any modifications to the pattern at all. I sewed it up according to the pattern instructions. The only modification I made was using 1” horsehair braid instead of the 2” the pattern called for. I didn’t have enough of the 2” to go all around the hem, but I had lots of the 1” so I used that. I love a hem with horsehair braid. I think it makes the hem so much prettier and it also gives it a bit more body. Adding horsehair braid to a hem a very easy.
1. First you want to pin or clip the horsehair braid all around the right side of the hem of what you are sewing. Also fold over the edge of the horsehair so it doesn’t scratch your skin.


2. Next you want to sew down the horsehair braid using a 1/4” seam allowance.
Photo 11
3. Next you want to press under the horsehair, so you have a clean finish when you sew it down.
4. Next you want to sew close to the other edge of the horsehair braid. Press again and you’re done!

The only other change I made was not include the skirt lining. This fabric is opaque, and I didn’t see a need for it. I am head over heels about my dress and I plan on wearing it out in the wild during my birthday month. In case you were wondering; my actual birthday is April 10th. I’m really hoping I can squeeze another dress in before my actual birthday. You’ll have to check my Instagram to see if I’m successful or not.
Until next time!
JOHANNA | @soveryjo


Unfortunately Fabric Mart Fabrics sell out quickly!
You can find similar fabrics by shopping the following categories: SATEEN & COTTON.
Happy Birthday!
ReplyDeleteSharon Sews
Thank you Sharon!!
DeleteHappy Birthday. Very pretty.
ReplyDeleteThank you so much! I love this dress!
DeleteHappy birthday. Love your dress.
ReplyDeleteThank you!
Delete