

With the holidays fast approaching, it is time to start thinking about gifts for the holidays! Velvet is a popular fabric around the holidays and there is a really fun project you can make with velvet and rubber stamps. It is super easy and a lot of fun.

You will need:
- Velvet (Silk/Rayon, Rayon/ Acetate or 100% Acetate Velvet with a nap)
- Rubber stamp of your choice
- Iron
- Ironing board
- Water spritzer bottle
1) Preheat your iron to the cotton/ wool setting. Iron any creases out of the velvet.
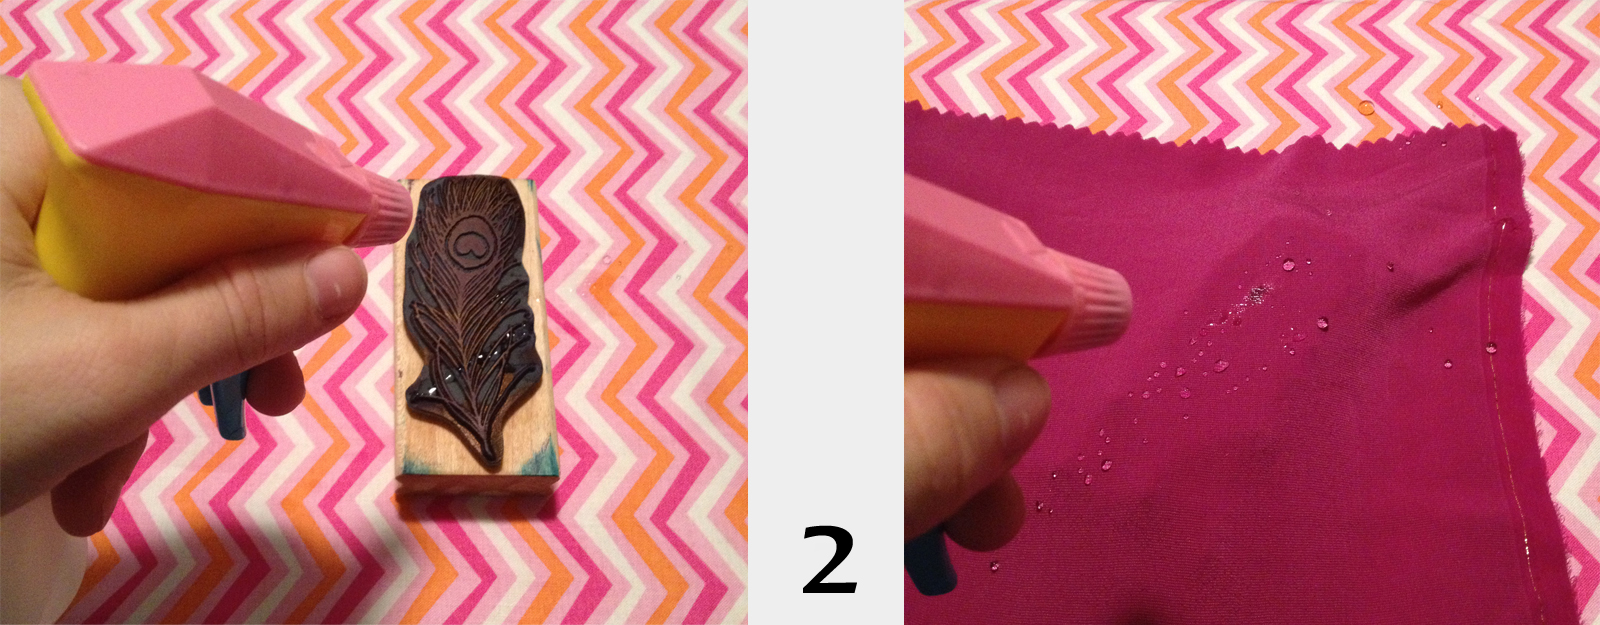
2) Place the rubber stamp face up on the ironing board. Spritz the rubber stamp with water. It should just be damp. Pat with a paper towel to remove any beaded water from stamp. Lay the velvet, right side down, onto the stamp making sure it is in the place you want it. Spritz some water on the velvet. Do not saturate it.

3) Place the iron on the fabric/stamp, holding it in place for about 10-20 seconds. Hold the iron as flat as possible. Try not to teeter the iron back and forth, otherwise you will get imprints from the edges of the mounting block.
4) Lift up your iron. If you see a faint imprint of the stamp on the back side of the fabric, it is finished! Another way to tell that it is finished is you should not see water residue on the back of the fabric. If you see some, place the iron back on the stamp for about 5 more seconds.

5) Now it is time to reveal the magic! Carefully pull up the fabric from the stamp. You should see an iridescent imprint on the velvet!

Few Tips:
- It is best to use a new, clean rubber stamp. I really wanted to use the peacock feather stamp, and only had a used one. If you want to use a used stamp, clean it thoroughly. Otherwise when you spritz it with water, the dye will come off on your velvet.
- Other types of stamps can be used, but test on scrap velvet first. Unmounted rubber stamps will work well. The foam stamps shown in the supplies picture can be used, but use with care, as you do not want them to melt onto the velvet.
I was curious to see how velveteen and stretch velvet (polyester/ lycra) would work out with this technique.
Here is what I found:
Embossing on Velveteen (100% Cotton)

The embossed area turned out nice, but there is not as much of a sheen. The left picture, the holly berries, also shows an imprint of the mounting block. This is why I would not recommend the foam stamps, unless you are going to hold your iron straight when pressing on the stamp. The peacock stamp turned out nicely.
Embossing on Stretch Velvet (Polyester/ Lycra)

I did not personally like the way the design turned out on the stretch velvet. Some of the design showed up, but the eye of the peacock was not defined. I would not recommend using stretch velvet.
Once you found the stamp and fabric you want to use, think of all the gifts you can make using this technique. Imagine a beautiful scarf with embossing all-over. Make a velvet blouse and adorn the bottom of the sleeves with embossing. Or try the same thing on the bottom of a skirt! And one last idea---make a Christmas stocking with embossed velvet. The possibilities are endless. How are you going to use this for the holidays?

You will need:
- Velvet (Silk/Rayon, Rayon/ Acetate or 100% Acetate Velvet with a nap)
- Rubber stamp of your choice
- Iron
- Ironing board
- Water spritzer bottle
1) Preheat your iron to the cotton/ wool setting. Iron any creases out of the velvet.
2) Place the rubber stamp face up on the ironing board. Spritz the rubber stamp with water. It should just be damp. Pat with a paper towel to remove any beaded water from stamp. Lay the velvet, right side down, onto the stamp making sure it is in the place you want it. Spritz some water on the velvet. Do not saturate it.
4) Lift up your iron. If you see a faint imprint of the stamp on the back side of the fabric, it is finished! Another way to tell that it is finished is you should not see water residue on the back of the fabric. If you see some, place the iron back on the stamp for about 5 more seconds.

5) Now it is time to reveal the magic! Carefully pull up the fabric from the stamp. You should see an iridescent imprint on the velvet!

Few Tips:
- It is best to use a new, clean rubber stamp. I really wanted to use the peacock feather stamp, and only had a used one. If you want to use a used stamp, clean it thoroughly. Otherwise when you spritz it with water, the dye will come off on your velvet.
- Other types of stamps can be used, but test on scrap velvet first. Unmounted rubber stamps will work well. The foam stamps shown in the supplies picture can be used, but use with care, as you do not want them to melt onto the velvet.
I was curious to see how velveteen and stretch velvet (polyester/ lycra) would work out with this technique.
Here is what I found:
Embossing on Velveteen (100% Cotton)

The embossed area turned out nice, but there is not as much of a sheen. The left picture, the holly berries, also shows an imprint of the mounting block. This is why I would not recommend the foam stamps, unless you are going to hold your iron straight when pressing on the stamp. The peacock stamp turned out nicely.
Embossing on Stretch Velvet (Polyester/ Lycra)

I did not personally like the way the design turned out on the stretch velvet. Some of the design showed up, but the eye of the peacock was not defined. I would not recommend using stretch velvet.
Once you found the stamp and fabric you want to use, think of all the gifts you can make using this technique. Imagine a beautiful scarf with embossing all-over. Make a velvet blouse and adorn the bottom of the sleeves with embossing. Or try the same thing on the bottom of a skirt! And one last idea---make a Christmas stocking with embossed velvet. The possibilities are endless. How are you going to use this for the holidays?
~ Julie
How cool!
ReplyDeleteThis is really neat
ReplyDeleteWhat a fun thing to do. Did this years ago & had forgotton how much fun it is till I saw this. Thank You for posting !!
ReplyDeleteI really like this technique. I will be perfect for crazy quilting! Thank You so much for taking the time to post this.
ReplyDeleteI can't wait to try this. Love it!
ReplyDeleteThis is a really amazing technique! Thanks Julie for sharing this great post. I'm so much eager to try this. I believe that velvet fabric is one of the best fabrics. Feel on the skin is amazingly soft. I'm so much likely to wear velvet dresses whenever there is a party or any special occasion within my family. Where ever you use velvet, it's just amazing. Use it as bed sheets, furniture or anywhere. I've decided to get velvet fabric for our furniture this year.
ReplyDeleteI have a 90% polyester, 10% spandex dress I want to emboss. Is the process the same? Will the image hold? Thanks for your help, great tutorial!
ReplyDeleteI'm not sure the answer because I've never tried. But I feel like it may not work because the nap of the velvet is what makes the design in the velvet possible. Good luck!
Deletecan you use this process on fleece?
ReplyDeleteI'm not sure, I've never tried it. If you try, let me know how it goes.
Deleteso crafty. I am sure the fabric has so many choices of fabric for this kind of project.
ReplyDeleteBeautiful! But I'm guessing that it's not permanent?
ReplyDeleteIt's absolutely permanent!
Delete