
My birthday is at the very beginning of July, and to celebrate my birthday this year, I made myself a crop top/full skirt combo out of a gorgeous floral cotton sateen from Fabric Mart. You can see that project here over at my blog. I tell you all of this with a reason, of course. When I was asked what I wanted to do for my July make for Fabric Mart, I decided I really wanted to try another version of the crop top/full skirt silhouette, but this time in a bit more of an exaggerated way.
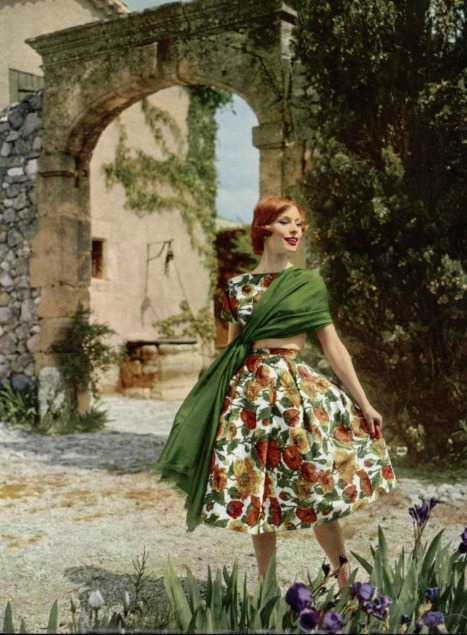
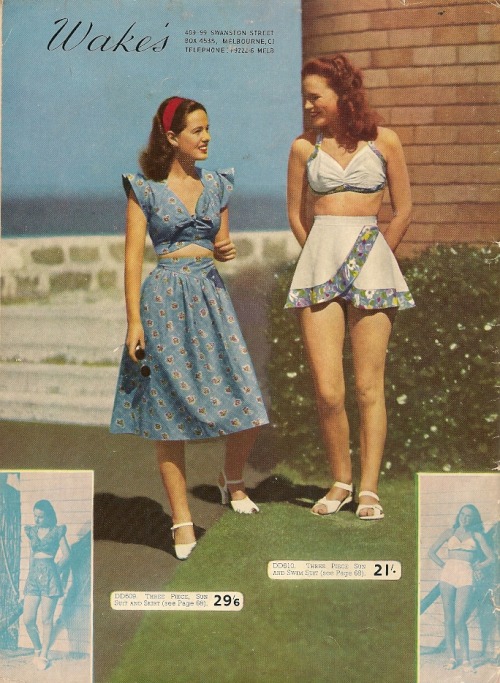
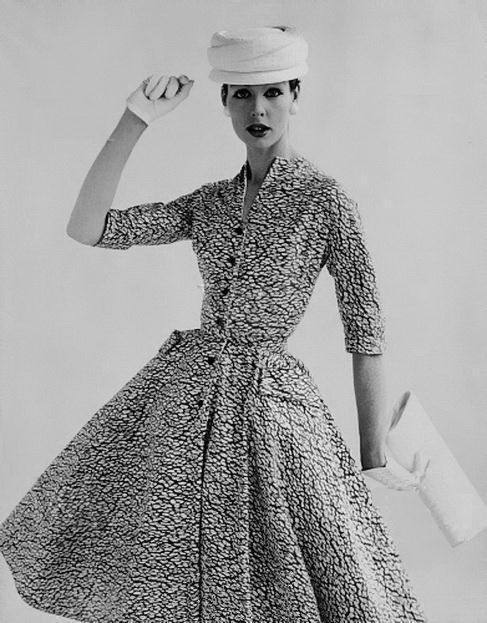
Right now this particular kind of outfit is very trendy, as you can see in these examples (one from Michael Kors, two from J. Crew--this was the one that inspired my look, three on Hailee Steinfeld in Suno). What is key for a lot of these outfits (and in mine) is the matching top to bottom. It was out of favor for a long time to do this, often being equated with too formal, too frumpy, or too mumsy. By using a crop top (and showing a bare amount of skin--or none at all if the hem falls at the skirt waistband) this look became the look to try for a lot of women. This may be a current look, but this was a commonplace look in the 1940s-1950s, with many women wearing very short tops with very full skirts, see these examples (one, two, three). While there are definite differences in styling from the mid-century to now, the idea is the same.

I wanted to really go out of my comfort zone for this blog post so I decided to use this Medallion Stripe Jacquard Suiting that was a Julie's pick for July 2015. It is a lot of design, a lot of color, very stiff, and a very frayable fabric. It would be a bit of challenge, but I saw a vision of a very unique outfit in my mind's eye, so I went with it. Because the folks at Fabric Mart know just how much fabric is needed for a full skirt (plus the width of this fabric is narrow at 45"), they sent me five yards! And I nearly used all of it! But the end result was worth it. :-)
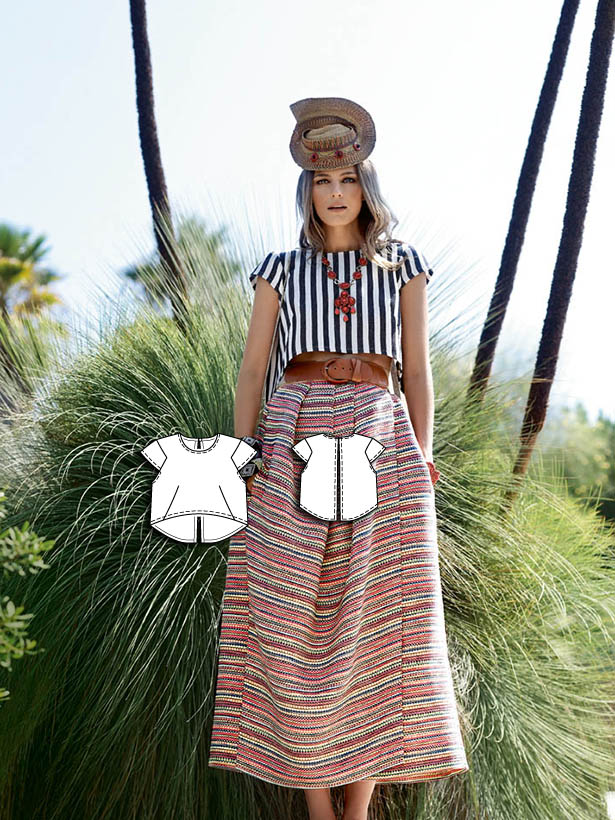
 To execute my vision, I used two Burda magazine patterns, since Burda seems to carry the most "fashion forward" patterns in its magazines. The crop top is from the February 2015 magazine (02-2015 #127) and the skirt is from the October 2010 magazine (10-2010 #117). In fact, the Feb 2015 magazine shows off their crop top paired with a very full, maxi skirt. I almost went with that pattern for my skirt, but decided I wanted a more traditional hem and closure, so I settled in on making the Oct 2010 one instead.
I did make a couple of changes to both patterns that are worth noting if you want to try a similar look. Instead of keeping the crop top at the very short length, I added an inch to the very bottom of the hem at the VERY FRONT CENTER. I did not lengthen beyond the darts, and after adding the length, blended the new hem length to the original dart and side length. So what you see is a less exaggerated curve on the front of my top. I actually am a petite in my torso (even though I am 5'8", I have a freaky short body length for my height), so the petite sizing was fine on me, but I am still a bit bashful about too much skin exposure, so I added the length for a touch more modesty. This version, btw, is a size 18, which is equal to a size 36 (or a bust of around 33"). The darts and shoulders and ease were great for my frame.

I also added a button placket to my top in back since the original design called for a single closure at the top, which allowed for the back to be fully exposed. I really wanted my version to be as wearable as possible (with higher waisted pants and skirts--I can wear this out and about no problem). I didn't want to have to wear a cami every single time I wore it (although for anything lower waisted, I will have to). Anyhow, the placket is a grown on facing that measured an additional 1 3/8", added by drawing that amount to the center back section of the pattern piece. I could have finished at the neckline more cleanly, but it's fine and does it's job. :-) I will remember that for future projects and try to get it properly finished. The button placket is my favorite part of the whole outfit, btw. I was so excited to see how neat it all looks, the frosted clear/gold buttons and the precise lining up of the stripes and medallions. Sewing nerd success!
The skirt, as drafted, would have required almost four full yards of fabric, especially after accounting for pattern matching, etc. Yikes. No! Plus the fabric is not super drapey! I knew that if I cut the pattern out exactly as I was instructed, I would have ended up with this kind of full skirt instead of the one I wanted. I took out a full four inches from the side front pattern piece (at the center, not at the side) for a total of eight inches from the front (I left the center front panel alone, though). I also took out three inches from the back skirt piece (again at the center not the side) for a total of six inches lost from the back. That means I took out fourteen full inches from the entire skirt. And it's still super full and voluminous. I think I would only ever use the whole pattern as is with a cotton voile or a rayon challis.
Another change I made to the skirt was to hem at the border of the big medallion strip since I really liked the way that looked. I was worried it would look off and it turned out fine, so I will definitely be trying that again in the future. Though it felt like I was a seamstress from the Civil War era with all the fabric underneath me while hemming, it was a lot easier to hem when you have a visual clue if you are doing it correctly.
 You can see that when I place my hands at my waist, the barest amount of midriff is exposed. If you decide to make this top, and you don't have a petite torso length, or you are full-busted, you absolutely need to account for those things in order for the length to hit right at the upper waist. It is very possible to have this top end up too short. Burda was fearless when drafting it, they went for full on crop top when they planned it.
I want to quickly point out that the in my skirt's front center panel there is a crease. That was from me forgetting to steam it out, like I did with the rest of the creases. It is very easy to miss something in that skirt, lol. So much fabric. To get the fabric to "stay," like a good dog, I pressed the top bit of the gathering and pleats and then steamed gently the rest of the bits of the skirt that had excess fullness. It kept the idea of "big" without being ridiculous.
 When I first tried this skirt on and took photos of it, my hubby was like, "why would you want a skirt that big?" I told him I wanted to live like it was 1859. ;-) But I said to have some patience and he would see the result, and when he did, he was a fan.
It is very important if you choose to work with this jacquard that you buy enough to pattern match at all the seaming. You can't "fake it" and hope no one will notice if it is off a bit. The stripes are very evident and the color switch from one stripe to the next is so different (aqua to gold to a deep pinky red to light pink) you have to plan very precisely. I would say a quarter of my time on the project was stripe matching. It was so worth it!
The stripes don't match up at the dart, but that's okay. Burda's striped top doesn't match up at the dart, either, so I am in good company. ;-)
 It looks so conservative from the back.
I mentioned above the tendency of this fabric to fray. It is a tightly woven jacquard, but the moment you cut into it, it starts to fray. It is a lot like the boucle fabrics that are used in the "little French jackets," which have to be immediately sewn to a backing fabric of some sort to keep it stable. You don't have to line or underline this fabric (it is opaque) but you ABSOLUTELY and IMMEDIATELY have to serge all seams, even before sewing. I serged all my seams, with the exception of three waistband edges, and let me tell you, by the end I was regretting my decision to not serge those seams. Because I had serged one waistband edge, I saw what a big difference it made to the stability there versus the unserged edges. Eventually after gathering all the waistband up to the correct length (what a chore that was, especially with fraying fabric), I went to the serger and serged the ENTIRE length of the waistband so I didn't have to deal with the fraying anymore and to keep the gathers exactly as they need to be.
If you don't have a serger, I recommend using some kind of finish, and in this case, maybe encasing all the seams in a thin bias binding may work best. It will be a lot of extra work, but take my word on the necessity of doing so.
 The skirt has pockets, and the ones they drafted are nice and deep. I have to hand it to Burda...I always think the project won't be nearly as cute as they look in the magazines because tracing patterns from their crazy pattern inserts makes me think I will fail miserably, but every single time, everything matches up exactly as it should, and everything fits so well. I have patterns ready to go from the other companies that don't work as well for me as these do.
 I truly believe that while you can make projects that can be for a specific function or outing, I really prefer to have pieces that can be easily integrated in my wardrobe for multiple occasions. I knew the crop top/full skirt look is cute, but less everyday wearable, so I figured I would show you how I could wear this to a "normal" outing like church or teaching. Adding a solid colored top, cute golden heels, and the same necklace keeps the look more traditional. And with all those colors in the skirt, it will be super easy to match up with many pieces in my closet. When it gets colder, I can slip on a thin sweater and tuck it in and put on some tights (the skirt is so full there is no way the tights will stick to the fabric).
Okay, that's all for me for now. I am so glad I got to share this project with you all! Enjoy your own jacquard journey if you choose to take it!
~Dina of My Superfluities.
Right now this particular kind of outfit is very trendy, as you can see in these examples (one from Michael Kors, two from J. Crew--this was the one that inspired my look, three on Hailee Steinfeld in Suno). What is key for a lot of these outfits (and in mine) is the matching top to bottom. It was out of favor for a long time to do this, often being equated with too formal, too frumpy, or too mumsy. By using a crop top (and showing a bare amount of skin--or none at all if the hem falls at the skirt waistband) this look became the look to try for a lot of women. This may be a current look, but this was a commonplace look in the 1940s-1950s, with many women wearing very short tops with very full skirts, see these examples (one, two, three). While there are definite differences in styling from the mid-century to now, the idea is the same.



I wanted to really go out of my comfort zone for this blog post so I decided to use this Medallion Stripe Jacquard Suiting that was a Julie's pick for July 2015. It is a lot of design, a lot of color, very stiff, and a very frayable fabric. It would be a bit of challenge, but I saw a vision of a very unique outfit in my mind's eye, so I went with it. Because the folks at Fabric Mart know just how much fabric is needed for a full skirt (plus the width of this fabric is narrow at 45"), they sent me five yards! And I nearly used all of it! But the end result was worth it. :-)

I did make a couple of changes to both patterns that are worth noting if you want to try a similar look. Instead of keeping the crop top at the very short length, I added an inch to the very bottom of the hem at the VERY FRONT CENTER. I did not lengthen beyond the darts, and after adding the length, blended the new hem length to the original dart and side length. So what you see is a less exaggerated curve on the front of my top. I actually am a petite in my torso (even though I am 5'8", I have a freaky short body length for my height), so the petite sizing was fine on me, but I am still a bit bashful about too much skin exposure, so I added the length for a touch more modesty. This version, btw, is a size 18, which is equal to a size 36 (or a bust of around 33"). The darts and shoulders and ease were great for my frame.

I also added a button placket to my top in back since the original design called for a single closure at the top, which allowed for the back to be fully exposed. I really wanted my version to be as wearable as possible (with higher waisted pants and skirts--I can wear this out and about no problem). I didn't want to have to wear a cami every single time I wore it (although for anything lower waisted, I will have to). Anyhow, the placket is a grown on facing that measured an additional 1 3/8", added by drawing that amount to the center back section of the pattern piece. I could have finished at the neckline more cleanly, but it's fine and does it's job. :-) I will remember that for future projects and try to get it properly finished. The button placket is my favorite part of the whole outfit, btw. I was so excited to see how neat it all looks, the frosted clear/gold buttons and the precise lining up of the stripes and medallions. Sewing nerd success!
 |
| Detail of front side piece over front center panel piece, it's a very deep pleat even after altering pattern. |
The skirt, as drafted, would have required almost four full yards of fabric, especially after accounting for pattern matching, etc. Yikes. No! Plus the fabric is not super drapey! I knew that if I cut the pattern out exactly as I was instructed, I would have ended up with this kind of full skirt instead of the one I wanted. I took out a full four inches from the side front pattern piece (at the center, not at the side) for a total of eight inches from the front (I left the center front panel alone, though). I also took out three inches from the back skirt piece (again at the center not the side) for a total of six inches lost from the back. That means I took out fourteen full inches from the entire skirt. And it's still super full and voluminous. I think I would only ever use the whole pattern as is with a cotton voile or a rayon challis.
Another change I made to the skirt was to hem at the border of the big medallion strip since I really liked the way that looked. I was worried it would look off and it turned out fine, so I will definitely be trying that again in the future. Though it felt like I was a seamstress from the Civil War era with all the fabric underneath me while hemming, it was a lot easier to hem when you have a visual clue if you are doing it correctly.


I want to quickly point out that the in my skirt's front center panel there is a crease. That was from me forgetting to steam it out, like I did with the rest of the creases. It is very easy to miss something in that skirt, lol. So much fabric. To get the fabric to "stay," like a good dog, I pressed the top bit of the gathering and pleats and then steamed gently the rest of the bits of the skirt that had excess fullness. It kept the idea of "big" without being ridiculous.

It is very important if you choose to work with this jacquard that you buy enough to pattern match at all the seaming. You can't "fake it" and hope no one will notice if it is off a bit. The stripes are very evident and the color switch from one stripe to the next is so different (aqua to gold to a deep pinky red to light pink) you have to plan very precisely. I would say a quarter of my time on the project was stripe matching. It was so worth it!
The stripes don't match up at the dart, but that's okay. Burda's striped top doesn't match up at the dart, either, so I am in good company. ;-)

I mentioned above the tendency of this fabric to fray. It is a tightly woven jacquard, but the moment you cut into it, it starts to fray. It is a lot like the boucle fabrics that are used in the "little French jackets," which have to be immediately sewn to a backing fabric of some sort to keep it stable. You don't have to line or underline this fabric (it is opaque) but you ABSOLUTELY and IMMEDIATELY have to serge all seams, even before sewing. I serged all my seams, with the exception of three waistband edges, and let me tell you, by the end I was regretting my decision to not serge those seams. Because I had serged one waistband edge, I saw what a big difference it made to the stability there versus the unserged edges. Eventually after gathering all the waistband up to the correct length (what a chore that was, especially with fraying fabric), I went to the serger and serged the ENTIRE length of the waistband so I didn't have to deal with the fraying anymore and to keep the gathers exactly as they need to be.
If you don't have a serger, I recommend using some kind of finish, and in this case, maybe encasing all the seams in a thin bias binding may work best. It will be a lot of extra work, but take my word on the necessity of doing so.


Okay, that's all for me for now. I am so glad I got to share this project with you all! Enjoy your own jacquard journey if you choose to take it!
~Dina of My Superfluities.
Dina, this is adorable on you! I really love it and thanks for all the details of your journey with this fabric! I purchased it too, isn't it just so pretty! I can't wait to make a jacket out of it!
ReplyDeleteSue
Dina, this is adorable on you! I really love it and thanks for all the details of your journey with this fabric! I purchased it too, isn't it just so pretty! I can't wait to make a jacket out of it!
ReplyDeleteSue
Dina, that was so interesting. You are relighting my desire to sew for myself after 30 years off doing other things. Your outfit is too cute. I remember drawing off a blouse pattern from a German pattern magazine in the 90's - what a nightmare, but Teenage daughter was thrilled with it.
ReplyDeleteI absolutely love your top and skirt! So kicky and fun. And the fabric is fantastic!
ReplyDeleteI love this set. It is adorable and so worth the effort, no!? Annette (my birthday is in August, the 18th, so it is nice to see that you also have a Summer birthday!) Happy belated, BTW.
ReplyDeleteBeautiful outfit. I love that it is a two piece. The crop top is worn tastefully. Great look on you!
ReplyDelete