
Made by a Fabricista: Quickie Stretch Velvet Cocktail Dress!


Hi, all! Happy New Year (well, almost)!

I know that for many of us getting together at the holidays is so important, and fun parties are always part of the offerings of festivities. That said, at the same time, we are always stuffed to the gills with things to get done before the festivities start, buying presents, getting cards mailed, shopping for pounds and pounds of groceries, and continuing with daily life, too.

But because we are all a bit ambitious (I know this, it seems to be a hallmark of sewers in general), we also want to make our own party wardrobe each year (in addition to a coat, a pair of pants, a jacket, some gifts, etc.). When I was presented with my December make, I knew immediately that I wanted to make a cocktail dress in under a couple of days and from a stretch velvet. The cocktail dress was because I always try to find an excuse to dress up in shiny, blingy things at this time of year, but I know that a full-length gown isn't really practical. The stretch velvet was a no-brainer, it's gorgeous and shiny and soft, and it stretches so no matter what kind of eating is done over the festive season, the velvet will stretch right over any weight gain. ;-) 
Last year I had found a pretty little pattern in a Burda magazine I had purchased from ebay.  It was done in a velvet and looked exactly right for so many occasions. It is very boringly named the "Knit Dress" and can be found in the August 2009 issue. (For you all who use Dr. Google, you can search 08 2009 113 Burda to see more on it.There are a ton of gorgeous versions of it over at the Burda Russian site, as well. 

This year I found the amazing Maple Sugar Crushed Velvet at Fabric Mart and scooped it up right away. I bought around 2 yards and it was more than enough for this project (even accounting for keeping all the pattern pieces in the same direction so the nap of the fabric will be down). I loved the color the most, it is a perfect shade of dark gold with a hint of rust and light brown. It literally sparkles in the sunlight, and inside, it takes on a more subtle dramatic sheen. I figure what could be more festive than a color like this? And since it isn't green or red, it really does work well for other occasions that are throughout the rest of the year.

I have worked with velvet before, for this blog, here at my March make. The difference with that one is that it was a woven velvet and so I had to handle it differently. I still think I could have made this dress from a woven velvet, but I would have for sure had to size up.

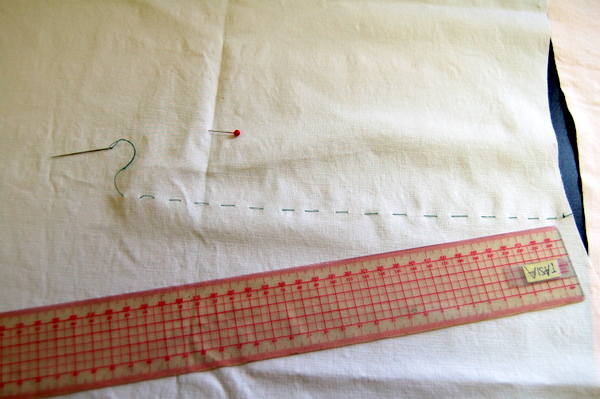
The project pattern pieces had to be traced by me and that took a little while, but no more than an hour. Once the pattern pieces were traced, I carefully laid out my pieces on the folded velvet. It is possible to fold the velvet and cut the pieces, but you MUST pin the fabric to the cutting board (I have a cardboard one that looks like this) to ensure the fabric doesn't slip and move. The cutting portion took about an hour, but the process was worth it since the pieces stayed fully on grain, with the nap running down (by this I mean that if my hand smooths the fabric from top to bottom, the nap will go down to the fabric base, not lift up away from the fabric base).

Once the pieces were cut and I had marked all the places that needed marking (there weren't many on this pattern, but for any that needed it, I thread-marked them), I sewed up the garment.  About half of the garment was sewn on the serger, and about half on the sewing machine.  Any time I used the sewing machine I used my walking foot to keep the pieces in line and then made sure to pin the heck out of the bit I was sewing.  Some places say to spray baste the seams, and while I like that idea, I didn't have any spray baste, so I just pinned like my life depended on it.  :-)  One thing I did do that really made my life easier was to interface the hem, just like I do on most of my knit garments. I use Knit-N-Stable tape which has a bit of stretch to it, and can be fused to fabric. The width is one inch, so it is perfect for hems (most of my hems end up one inch because of my height).  I find that the interfaced hem holds stitches better, and when done, the garment always falls better with the interfacing in it. 

I found the pieces went together well in the process, but I just detested the way the neckline looked and since I had chosen not to make a lining bit so the front self-facing could attach to it (there was only one lining piece, btw, the rest is unlined), I had a dangling front self-facing that even if I had hand-stitched to the velvet wouldn't have laid right.  I could take out the neckline I ended up creating (a tucked/pleated neckline) and add some kind of weight to the front self-facing (a chain or some small washers) and then hand-stitched it, the neckline might lay better, but to be honest, I don't love the way it looks on 90% of the garments (including the one Burda made), so I probably won't.  For any future dresses I will be altering this pattern piece to make it have a proper facing and will switch up what the neckline does (it could be gathering, but I will move the gathering to the neckline itself instead of at the facing edge).

I am not saying I don't love my dress, I am just not super-enamored with the neckline.  It's close to what I want, but knowing  me, I'll be tinkering some more over the next few months.  :-)

I sewed up the size 36 which was graded out to a 40 at the hips and hem.  I thought I was sewing the 38 and grading to a 42, but this dress is made from 34-42 and not 36-44 (as most of the patterns are), so I made a mistake that turned out fine.  I think the 38 bodice would have been large on me.  As it was, I had to take out 3/4" horizontally from the bodice front and back so it wouldn't blouse to much on my short torso. 

I added pockets!  Given the choice, I will always add pockets.  The pockets I used were the same ones I used on this skirt I sewed up for Fabric Mart in August.

In general this dress can be worn on its own, but adding a belt to cover up the elastic waistband may be a preference for you, so I styled it with a belt I have had for years and love to bits.  Why not add a little extra bling?  (And red lipstick, natch.

I would say the process of creating this dress took around six to eight hours.  Definitely doable in a day, but it took me around two days because I take breaks and have three ridiculously active children.  :-)  So very much a "quickie" cocktail dress!

I even had some extra fabric left over.  Most of it will go to making a skirt for my daughter but the rest I crafted into a small pillow.  I needed to test the serger settings so I sewed this up with the serger before I started in on my dress. 

I hope you all have a wonderful start to your new year.  Happy sewing!

~Dina, My Superfluities

Comments

  1. I LOVE this. I have plans for crushed velvet in my future. Tell me - why did you choose having the nap face down? Is this standard?

    ReplyDelete
    Replies
    1. I have no real reason for choosing it other than I wanted to smooth out the fabric when I wore it. I am very tactile. You know the people that walk into a store and have to touch EVERYTHING? That's me. I am sure it drives the people I am with crazy. :-) So when presented with an opportunity to wear something so soft, especially if it is smooth when running down the dress, that's what I decided.

      Funny story--when I made my daughter's Rapunzel costume a few years back, I didn't realize I had made the skirt portion (in velvet) with the nap going side to side. I had accidentally cut the pattern's skirt with the selveges at the top and bottom instead of at the sides. Oops! The costume turned out fine, but you can definitely feel what I did when you brush it with your hand!

      Delete
  2. Gorgeous dress and you will look lovely for New Year's parties!

    ReplyDelete
    Replies
    1. I am so excited to wear it on New Year's day! Thank you, Linda!

      Delete
  3. Beautiful! I loved this fabric when I saw it on the FabricMart site and it makes a wonderful dress! The color is so unique too!

    ReplyDelete
    Replies
    1. Thank you, Elizabeth! The color is so insane, the way it shifts and shines. I described it as feeling like a walking Oscar statue over at my blog. :)

      Delete
  4. Nice dress! I love the color! It looks to have two different colors.

    ReplyDelete
  5. Very lovely. I wonder how loose leg pants would look? Pull on, no zipper or buttons. Just very comfortable. Aunt Judy.

    ReplyDelete

Post a Comment

Thanks for leaving a comment! All comments are reviewed before posting to help us eliminate spam. Your comment will be posted within 24 hours.

Popular Posts You Might Like

Made By A Fabricista: A Denim Set for Spring

Happy Friday All! I am ecstatic to share my latest make that I had on my to make list for a while.  My goal for the month of February was to sew a mini vacation capsule for a trip, but unfortunately I did not get a chance to. I was able to make 3 of the 6 pieces including this denim set. When this beautiful denim fabric arrived, I knew exactly what I wanted to make. I have been wanting to recreate a linen look I made a few years ago using the Montoya coat pattern with a few adjustments.  I created VIEW A without the peplum and lengthened it by 6 inches. Instead of sewing the tie inside the seam of the top like I did here, I wanted to make it separate so that it looks like a jumpsuit. (Read the blogpost here ). Moreover, my body has changed and I needed to cut a size larger so that I can rock it as an open vest or a top tucked in. I love the way it turned out but wish I had extended it by 8 inches instead of 6. For the pants, I went to my tried and true simplicity 8605 pants pattern and

Made By A Fabricista: Three Spring Basics – With a Twist

Hello Sewing Friends! By the time spring rolls around I am ready to pack away my winter wardrobe and wear my warm weather clothes. Since I don’t go into an office setting – and I like to be comfortable - basic essentials in my wardrobe include t-shirts, cardigans and knit dresses. The Cardigan The idea of sewing elevated basics came about when I spotted this fabulous FTY knit with a sequin floral and scrolls pattern.  With sequins for daytime being a spring 2023 trend, I decided to use the fabric to sew a cardigan. This is not your typical cardigan. Not only did I choose a sequin knit, but I chose what I consider to be a unique pattern, the Cascade Dress from The Sewing Workshop (now out of print). I have sewn it a few times but never with sequin fabric. My cardigan is actually a top that is designed to button down the front but I made a few small changes to the pattern. I lengthened the front by four inches, removed the front plackets, and added a button and fabric loop at the front n

Made By A Fabricista: Start Summer Sewing Now!

Hello fellow Fabric Mart lovers! It’s March and spring and summer will be here before you know it!  We need to get prepared for warmer weather. Fabric Mart is the place to get started with your warmer weather must haves, whether it's patterns or fabric. As you know they got it all.   I got my hands on an amazing oatmeal colored linen and it was the most perfect fabric for a vacation I took in February.  For a while we (myself and my family) had been planning a trip to Maui!  We finally got to see this beautiful place.  It was mid 70s everyday with just the right amount of humidity.  The sun shined most days and we got sprinkled on by the Hawaiian showers that pop up.  We saw rainbows, whales, turtles and all the lush beauty Maui had to offer us.  It was an amazing trip and this amazing trip needed the right wardrobe.  I took so many of my Fabric Mart Fabric makes with me!! But before I went you know I had to get some more sewing in. Easy and fast was the plan. Also I really wanted