


As a young adult, I never worked on my birthday (even though I was a mom already!). And I did (and still do!) consider it "my own personal holiday" :)
Since learning to sew, and now that I do work on my birthday, I make myself a new dress for the day! The last couple of years, my bday falls on a weekday; so my birthday dress has to be work appropriate. Last year I made a knit shirtdress (still a closet favorite!) and this year, the moment I laid eyes on this button front sheath in the June Burda I knew this was it!

Doesn't she look so happy in her dress?! It could totally be her birthday!
I knew I needed something with some body but not too heavy since my birthday IS in July after all. I went straight to a couple of my favorite groups on Fabric Mart - cotton sateen and cotton twill and found this.
I LOVE this print! It works well as 'work-appropriate' animal print - light colored, small scale, neutral - it's cotton with a touch of Lycra, and is completely opaque - Win!

The description says it's semi-stiff which it is. The hand is similar to a lightweight denim or a heavy chambray (note: denim is a twill weave...chambray is a plain weave). I'm not normally a huge fan of A-line shapes but on this dress, it just works. I felt the stiffer fabric would work well with the dress silhouette.
It washed up well and takes a hot iron like a champ. It did get more wrinkled during construction than I expected but is easy to press.
There are a lot of pieces to trace. But oh-so-worth it.

Love nice, clean interiors!
I made my standard Burda adjustments:
- Traced a 40 neckline with 42 for the rest
- 5/8" swayback adjustment
- Removed 3/8" from center back tapering to nothing at the waist
- Removed some of the curvature from the side seams. Basically connected a straight line from above the curve to below. I'm not actually sure it was at the hip, as it seems a bit low...but it stuck out in the way that skirts and dresses with hip curvature because I don't have what I call "sticky-outy" hips.
I also did a 3/4" full seat adjustment on the back skirt and sewed the center back seam at 3/8" instead of the 5/8" seam allowance I added. Some time ago, I realized I got a much better fit on skirts if I traced a 16(42) front and 18(44) back. Because this pattern only goes up to size 42, I improvised.
I don't need to lower the bust point or do an FBA with Burda patterns <3

I really love the overall fit of this dress and want another in a solid color!!!
Now, do you sew Burda? Do you ignore their instructions? If you don't sew Burda do you often read about sewers lamenting the instructions? Do you plan to make this dress?
Follow the instructions!
Or at the least, remember that the button bands go on at the end especially if you're attaching the belt! DO NOT ask me how I know! :)
Okay fine! I skipped ahead and had to do a bunch of unpicking AND reaching out for help (Thanks Beth!). I ended up having to pull a Tim Gunn but it does in fact WORK!

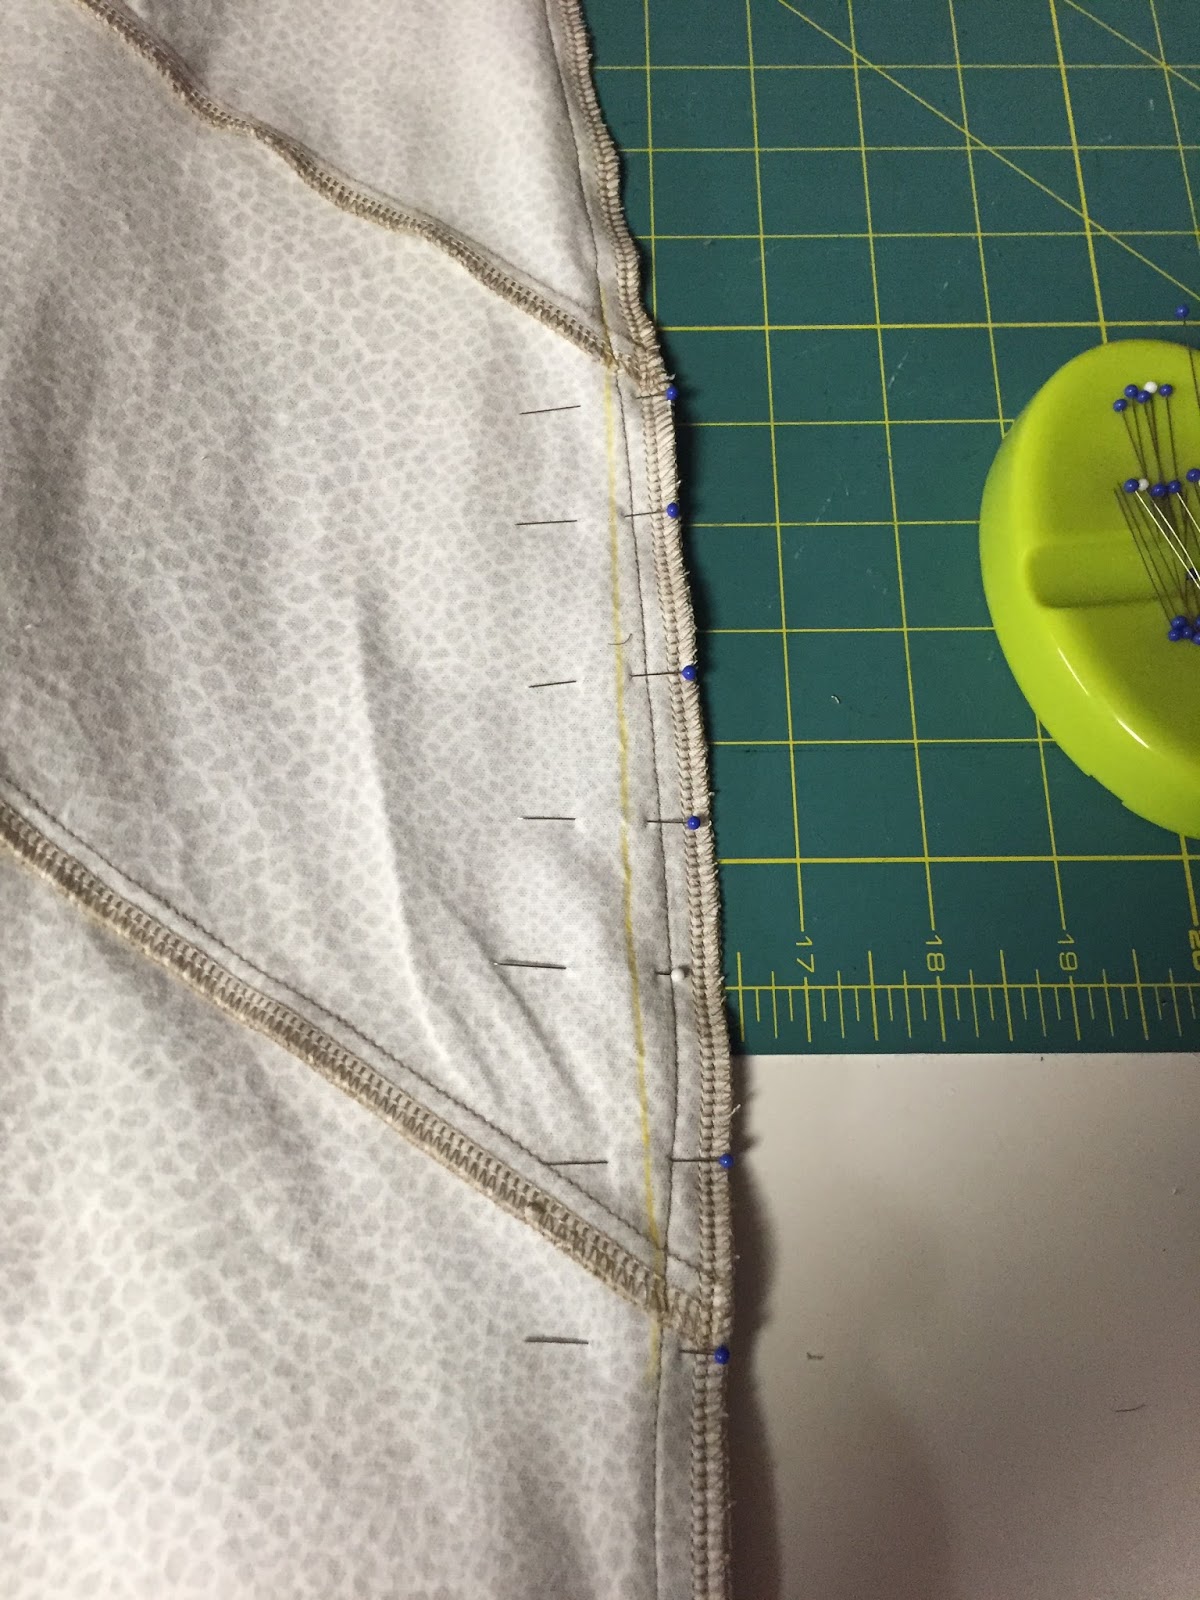
The chalk line is the button band seam line

Then I sewed the top of the button band. I had to turn it and decide where to clip, etc but it works
I am quickly becoming a fan of these all-in-one clean finish facings. Such a lovely finish.

Burda didn't call for the facings to be interfaced - I did it anyway. And, because it can be hard to understitch this assembly, I trimmed my facings down 3/16" at the armhole to encourage the seam to roll to the inside. It generally works very well and especially so with lining fabrics. I ended up going back and understitching at the underarm seam and for about 2" on either side of it. It was bulky and I didn't want it flipping up/out.
Other notes:
I used 2-inch slides (I accidentally ordered slides with a center bar. I was disappointed but they work just fine!) and 5/8" buttons. The pattern appears to use larger buttons, but Burda does not specify. I had buttons that were almost the same bronze as the slides but only had 9 of them and I like to space buttons this size or smaller no more than 3" apart.

They don't match but they go :)
I used my walking foot for the entire dress except for the princess seams. I sewed those first to allow the convex side front piece to feed on bottom; helping the easing along.
It was a lot of work but I absolutely love it!

I have to point out:
1) That's not actual bust gape. That is me being SO focused on having a button at the waist level because of the belt that I started there and then spaced out my buttons. For many of us full-busted ladies, we start with the button at the bust line and space out. Because we need to really lock-and-load! I'll sew in a hidden snap there.
2) That's not actual neckline gaping. It fit fine. But I have a penchant for trying things on again and again and again...and I rarely staystitch so my neckline stretched out just a little.

I am so excited to wear my new address for my Birthday!
Nakisha
It's SO good! So glad I ordered some of this :)
ReplyDeleteLovely! It's very classy and classic. :D I like that you gave the details of the fabric properties.
ReplyDeleteSuper ka-yute! Love your inside finishing. That dress is lovely on you.
ReplyDeleteIt's beautiful! You did a great job!
ReplyDeleteBurda instructions confuse me. And I'm not a fan of tracing. But, they have such cute designs, I sometimes brave them anyway.
ReplyDeleteYour dress is so cute!
I love your dress--perfect for a July birthday. Happy Birthday!
ReplyDeleteOMG! Your dress looks amazing! You chose the perfect fabric for it and it suits you so well. Happy Birthday!
ReplyDeleteBeautiful work!! Happy Birthday to YOU! Mine is June 29th!
ReplyDeleteCancer! <3 Happy early birthday!
DeleteWhat a great pairing of pattern and fabric. Enjoy wearing it on your birthday, and I hope your day is as fabulous as your dress!
ReplyDeleteThank you so much everyone!!
ReplyDeleteCute dress and a wonderful fit!
ReplyDeleteWhat a wonderful dress- I love every detail! Hope you have a fantastic birthday!
ReplyDeleteIt's a lovely dress that fits you to a T! Congratulations and early wishes for a happy birthday!
ReplyDeletewell Happy Birthday!!! and now I want to make one!
ReplyDeletePor favor , cual es numero del patrón
ReplyDeleteIt is from Burda Patterns June Magazine, Burda 06-2016-105
Deletehttp://www.burdastyle.co.uk/
you're like me always trying to move faster that the instructions and end up looking for my seam ripper! Patience is a virtue! This is a super nice birthday dress.
ReplyDelete