


Hi!
Is it just me or do you find it almost impossible to pronounce
most of the famous fashion designer names or labels? When Fabric Mart
received an inventory of Thakoon fabric, I was super excited, because I have
seen beautiful makes by this designer! However, when I attempted to share
this great news with one of my new sewing pals, I realized, I don't even know
how "Thakoon" is pronounced. So I pointed it out to her on the
screen instead, lol! Luckily, she is also familiar with this designer and
was able to tell me how to pronounce it correctly and I confirmed on
you-tube..."tuh-koon". Now if you are like me, and struggle
with saying fancy designer names or labels, check out this cool you-tube video I found for a little help.
Okay, let's get into this month's DIY look!

This is a beautiful double-faced 100% silk satin. Very
luxurious sounding, huh? Well it is. The colorful print is gorgeous
and I love the contrast black and white design on the other side. It is
very seldom that I feel overwhelmed by a busy print or fabric like this. When making clothes with bold fabric, it is just a matter of knowing
how to balance it out to create an interesting, but comprehensive and stylish
look. I could not wait to get my hands on this fabric to have some fun
with it. Julie from Fabric Mart did a little research and discovered that
this fabric was used to make garments for Thakoon's 2015 pre-fall fashion show.
Guess what, there is still some of this fabric left, click here to get yours. I also picked up a
couple yards of the silk chiffon version (see here) and a different Thakoon lawn jacquard fabric (see here) during a sale. Both are beautiful! You all PAY ATTENTION to Fabric Mart sales, I have purchased really cool designer fabric for super deals!

Now we all know that sometimes things do not go as planned.
Well, I planned on making McCall's M7537, view C. As I started stitching
together the garment, I did not care for how the dress was looking. I did not see the look I had envisioned for this fabric coming together. Therefore, I stopped halfway through (as you can see below) to figure out a look I truly wanted to wear. I was too excited about this fabric to continue making a garment I was not sure I loved. I will probably re-visit M7537 with different fabric, because the pattern is very cute.


I took a little care in matching up the print on the wrong side. I cut out one piece at a time. Slippery fabric like this is prone to slide around when folded, which means it is harder to keep print lined up when cutting pieces on the fold. So for cut-on-the fold pattern pieces, I cut one side, then flipped the pattern piece to cut the other side. This gave me control over how the print was cut.


McCall's M7537, view C, is designed in a way that two contrasting pieces of fabric are sewn together to create a gathered bottom for the dress. I had already stitched the bottom of the dress together and I wanted to continue with the contrasting look; however, I did not want to make a gathered bottom. The fabric is too stiff for a gathered bottom, plus I could tell it would not hang correctly. Therefore, I chose to make more of an A-line structured skirt.


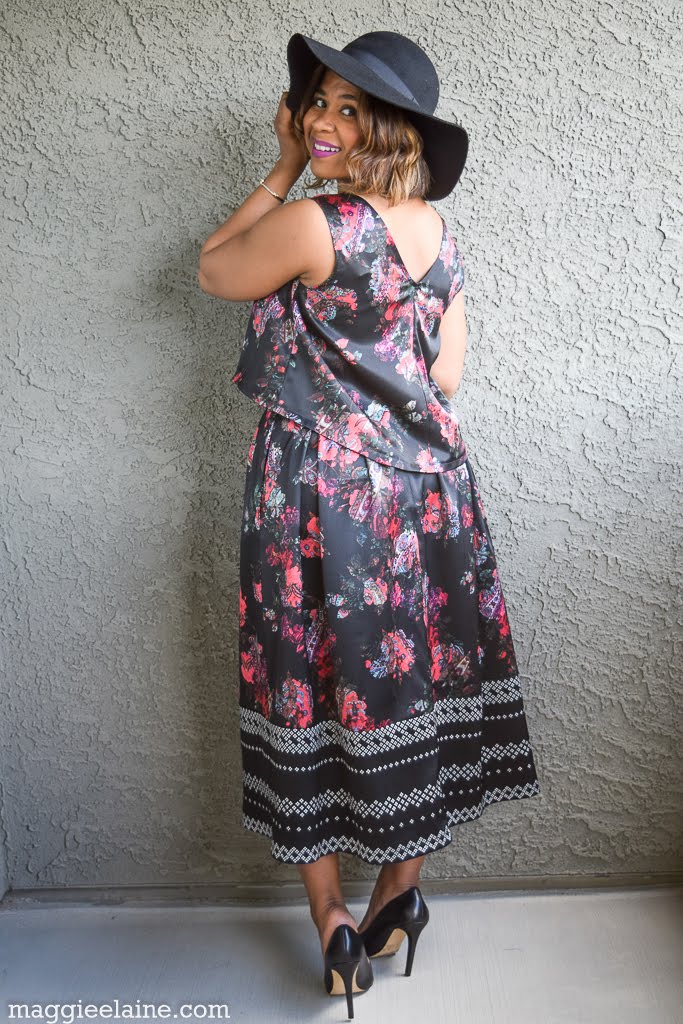
I split the center back of the previously constructed bottom and added an invisible zipper. I opened up the side seams and added contrasting pockets and attached a waistband. I made slight pleats to fit the skirt within the boundaries of the waistband. Notice that I cut my waistband with the contrasting print running in the vertical direction vs. the horizontal direction of the bottom of the skirt. I thought it added a cool element to the look.


This is my first time making a garment in silk and/or satin. I stitched this with a 60 sharp needle, which worked out well. Here are pictures of the insides.


I hope you enjoyed, until next time...have a great month!
Yours truly, Tee
from Maggie Elaine blog


I hope you enjoyed, until next time...have a great month!
Yours truly, Tee
from Maggie Elaine blog
Oh my goodness you are talented! It is amazing how you can change a pattern design and make a completely different look. I agree the fabric is beautiful....You look fantastic Tee!
ReplyDeleteThank you bpatricia74!! The fabric is so gorgeous and I am thrilled that I made something out of it that I really love!
DeleteBeautiful outfit! I like how it looks on the reverse side too. Glad that you were able to switch gears in the middle and create something that was suited more to you.
ReplyDeleteThank you Ann! So glad I was able to re-work the look!
ReplyDeleteLovely as usual!!! It looks so comfortable ... FIESTA :)
ReplyDeleteHi Monica! Thank you so much! Yes, it is very comfy! One of the things I love about it, the fabric is so silky against the skin. FIESTA!
DeleteFabulous outfit. I love the way you used both sides. I also purchased some of this fabric and it is really special I have washed it several times to reduce the shine and soften it up.
ReplyDeleteThank you so much! Oh, good to know about washing it. I gave it a good steam and I was planning on dry cleaning. However, I think I may try handwashing when needed. Thanks for the info.
DeleteThis is stunning on you; I love it. And your workmanship, creativity and spunk are pretty darned cool, too. I especially love the bottom of the skirt where you used the underside of the fabric. It's a very rich look.
ReplyDeleteI really appreciate your comment Tacomapat! I love the bottom of the skirt as well, I think it really brought the look out. I was so happy that the lines flowed well once it was stitched together!
DeleteGood job - you're my inspiration...
ReplyDelete