
Hey there fabric lovers! You've seen my toddler, Cheeks, around here a few times, but I may not be as familiar. Well, I've got another little muffin in the hopper and I've got nothing to wear: and so I've been sewing up some maternity goodness!

This dress is a great one: it's Simplicity 1469, and is great for both mamas-to-be and mamas-to-new-babies because it has both belly room AND nursing access. Win-win! The Simplicity version is out-of-print now, but never fear: it was a reissue of Megan Nielsen's Amber dress and top.

I swore when I received this fabric that I had specifically ordered it (I really thought it had the typical Fabric Mart order sticker on it), but I could not find any mention of it on my recent invoices. Since then I have sussed out that this magical panel ITY poly knit was part of a fabric bundle I'd received. Yes, I got something in a random bundle that I liked so much I was sure I'd ordered it. Thumbs up!

If you want to purposely order something similar, instead of relying on delicious chance, there are a few nice looking ITY chevron knits on the site, such as: this one, this one, and this one. I actually used that last one in a different colorway to make this dress years ago, which both my husband and I thought of immediately when I completed the dress I'm showing you today.

Planning a dress with a panel, border print, or very large repeat is definitely a different animal than an allover print. I really had to think about where I wanted each color and engineer the placement of the print. Even now that I'm done I think I would've done things a bit differently. For instance, perhaps not placing the lightest part of the fabric at what is currently the largest circumference of my body.


When using these kinds of prints, I love putting my favorite part of the repeat on either the top and bottom of a dress, or all at the middle of the dress, radiating out. I really loved the blue and purple chevron section, so that became my hem and the top back of my dress.


I always enjoy playing with stripes and chevrons directionally, so I cut the bodice pieces so the chevron traveled along the bodice neckline (which is no problem with you have plenty of vertical stretch to go with your horizontal stretch!).


I would have preferred to cut the sleeves starting with the purple and blue chevron at the cap, but I just didn't have enough fabric. So, I did my best to match up via eyeball where the white chevrons on the sleeve would lay in relation to the white chevrons on the skirt. I didn't want any plain navy showing at the top of the sleeve, so I didn't quite match it up, but it's close enough for me.

I didn't want the nursing panel and midriff to compete with the rest of the dress, so I cut them from the solid navy parts of the fabric. This was easy with the midriff, but the solid part of the fabric was not quite long enough for the entire nursing panel, so I had to figure out how much of the panel would be hidden. Turns out, that was about 4", and I was able to cut it so only about 2 1/2" of the repeat was on the bottom of the panel, thus completely hiding the print in the finished garment.


The breastfeeding access is really what makes this dress shine. You can add a few inches onto the front skirt of many an empire waist dress to make it work for pregnancy, but covert ways to feed a baby without exposing too much skin are much fewer and far between. Here's a little peek at how it works, and the innards of the dress in general.


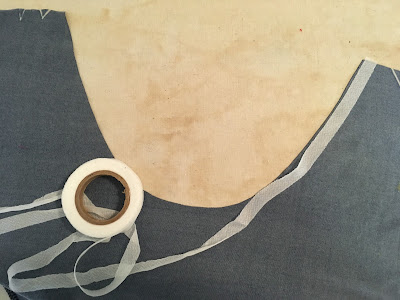
Construction-wise, this dress is a pretty easy breeze. It definitely helps that I've made this twice before (a shirt and a dress) but it's pretty straight forward regardless. I'd be remiss if I didn't mention one of my favorite notions, which I was happy to see Fabric Mart started carrying a few months ago: SewKeysE fusible stay tape. I used the 1/2" fusible knit version to stabilize the neckline, to give it some stability but still a bit of give; they just seem to have the woven version currently on the site.
I measured into a medium, but made a small with 3/8" instead of 5/8" side seams per my last pregnancy and I'm happy with the fit. The only thing I'm thinking about tweaking would be the sleeves: they could be about an inch shorter and a tad slimmer, but overall I'd feel fine with leaving them as is.

And there it is! A dress for cool weather that will take me through the Winter and into the Spring with my newborn babe. Now if only choosing a name were this easy.
Thanks for reading! Until our next sewing adventure...

This dress is a great one: it's Simplicity 1469, and is great for both mamas-to-be and mamas-to-new-babies because it has both belly room AND nursing access. Win-win! The Simplicity version is out-of-print now, but never fear: it was a reissue of Megan Nielsen's Amber dress and top.


Planning a dress with a panel, border print, or very large repeat is definitely a different animal than an allover print. I really had to think about where I wanted each color and engineer the placement of the print. Even now that I'm done I think I would've done things a bit differently. For instance, perhaps not placing the lightest part of the fabric at what is currently the largest circumference of my body.


When using these kinds of prints, I love putting my favorite part of the repeat on either the top and bottom of a dress, or all at the middle of the dress, radiating out. I really loved the blue and purple chevron section, so that became my hem and the top back of my dress.


I always enjoy playing with stripes and chevrons directionally, so I cut the bodice pieces so the chevron traveled along the bodice neckline (which is no problem with you have plenty of vertical stretch to go with your horizontal stretch!).


I would have preferred to cut the sleeves starting with the purple and blue chevron at the cap, but I just didn't have enough fabric. So, I did my best to match up via eyeball where the white chevrons on the sleeve would lay in relation to the white chevrons on the skirt. I didn't want any plain navy showing at the top of the sleeve, so I didn't quite match it up, but it's close enough for me.


The breastfeeding access is really what makes this dress shine. You can add a few inches onto the front skirt of many an empire waist dress to make it work for pregnancy, but covert ways to feed a baby without exposing too much skin are much fewer and far between. Here's a little peek at how it works, and the innards of the dress in general.


Construction-wise, this dress is a pretty easy breeze. It definitely helps that I've made this twice before (a shirt and a dress) but it's pretty straight forward regardless. I'd be remiss if I didn't mention one of my favorite notions, which I was happy to see Fabric Mart started carrying a few months ago: SewKeysE fusible stay tape. I used the 1/2" fusible knit version to stabilize the neckline, to give it some stability but still a bit of give; they just seem to have the woven version currently on the site.

I measured into a medium, but made a small with 3/8" instead of 5/8" side seams per my last pregnancy and I'm happy with the fit. The only thing I'm thinking about tweaking would be the sleeves: they could be about an inch shorter and a tad slimmer, but overall I'd feel fine with leaving them as is.

Thanks for reading! Until our next sewing adventure...
Jess
Nice flattering dress! It fits great and only you would notice that the sleeves are not just the way you'd like. Congratulations to you and your family on the new baby...yes, naming is the hard part!
ReplyDeleteVery cute maternity dress, wish I'd known about it back when I had mine! You did a great job with the placement of the pattern too! I give you extra points for making this while caring for a small one and growing another.
ReplyDeleteThis looks great on you and also looks very comfy and pretty too!
ReplyDelete