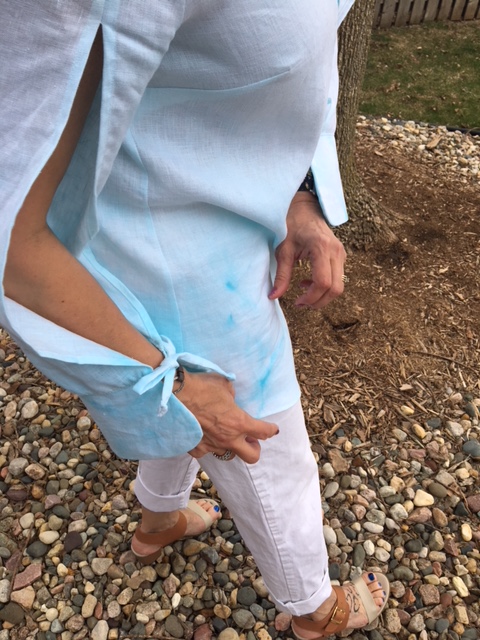
Spring sewing is happening everywhere and I have finally broke out the linen to make what I think is a fun top.
Have you checked out FM's fantastic linen selection? It is such nice quality and I have made numerous garments from it. This time, however, I wanted to start with simple white and see what happened when I used a process of ice dying.
Do you try embellishing fabric? I like to but hesitate so much. I've done some ice-dying before and decided that linen is perfect because it is a natural fiber and I just love linen.
So, I deviated from the instructions, slightly. You should wet your fabric prior to the process, however since I wanted to use just one color of dye, I thought I would try putting the fabric in dry. Had the weather been much, much warmer, this might have worked.
Let's back up a bit. The directions don't mention this, but honestly if you are relying on the ice melt as a means to dye your fabric, it is best to ice dye when the weather is warm outside. I was rather ambitious and tried this at the beginning of April on a day when it was about 50 degrees. Not ideal, but hey, it's been a very long winter in the northern plains of North America and I needed some creative mo-jo.
Use some quality fiber reactive dyes. I like this brand: Dharma Trading Co. I decided early on that I was going for subtle. I used a turquoise dye and a lot of ice with two laundry baskets in our whopping 50ish degree weather....I mean, the ice will melt in a few hours, right?
Not really...don't laugh at my positive thinking. I really hoped it would melt over the course of 6 or so hours in the sun.
Well, it didn't so I did what any seamstress would do and pulled out a hair dryer, sat on my front steps and melted the ice with some hot air. And guess what, the hot air worked! Remember, I was going for subtly with my embellishment.
Next, after completing the steps to set the dye, I knew I wanted something with statement sleeves. I did a hack of two patterns from two very different companies. The sleeves are a Simplicity pattern see it Simplicity 8415 and the body of the garment is a StyleArc pattern StyleArc . When I finally decided to frankenpattern these two, I walked the sleeves to make sure they'd fit the armsyces of the blouse. Lol and behold, it was a great fit with zero alterations!
I so love this linen from FM. I've sewn so many garments with it. I always test drive it by washing in a gentle wash cycle with warm water and also in the dryer. My hubby helps with laundry and does a great job. I never want to have him feel bad if a garment shrinks so I prewash everything. This linen for me, has always behaved beautifully and gets better and better with every wash and dry.
You can see below how I decided to finish off the inside sleeves. I used a flat-felled foot, just for fun and what a nice edge finish I got!
You can see below how I decided to finish off the inside sleeves. I used a flat-felled foot, just for fun and what a nice edge finish I got!
I highly recommend this fabric and I hope you'll use it! I hope your spring has arrived like ours finally did.
Thanks for reading!
Sue from Ilove2sew!


BEAUTIFUL !!! I love how you combined the two patterns. I am going to try the ice dye in the southern heat.
ReplyDeleteFM's linen is truly lovely stuff indeed! I love the subtlety of the ice dyeing. I laughed over the 50 degrees--I've tried ice dyeing with snow on the ground too! I kept it in my garage which is a bit warmer--I'll remember the hair dryer the next time!
ReplyDelete