
Summer is so close I can taste it! With hot weather on the way, I need to get my sleeveless wardrobe up to date and stocked. I love to pair a breezy tank with shorts, and nothing is easier than throwing on a simple dress and heading out the door to drop off kids at camp or cruise to the beach. When the heat is up, the easier for me to get dressed the better.
With this in mind, I chose to add more woven tanks to my closet. They are cool to wear and not clingy like a knit top can often be. I looked through the ever-growing pattern section of the site, and the dartless aspect of the Megan Nielsen Eucalypt Tank was especially appealing to me. No darts makes this a rather quick sewing project. The color blocking instructions are great, plus a basic tank is endlessly hackable and thus incredibly useful. I sewed a quick muslin, and then cropped it several inches with a straight hem, and that version is stylish and easy to wear, so there you go! Hack one done.
I wanted to try out a couple of different bases and styles, so I chose two different natural fiber woven fabrics to play with, one a stunning floral cotton and the other a linen blend, with the intention of sewing two of the four views included in the pattern.


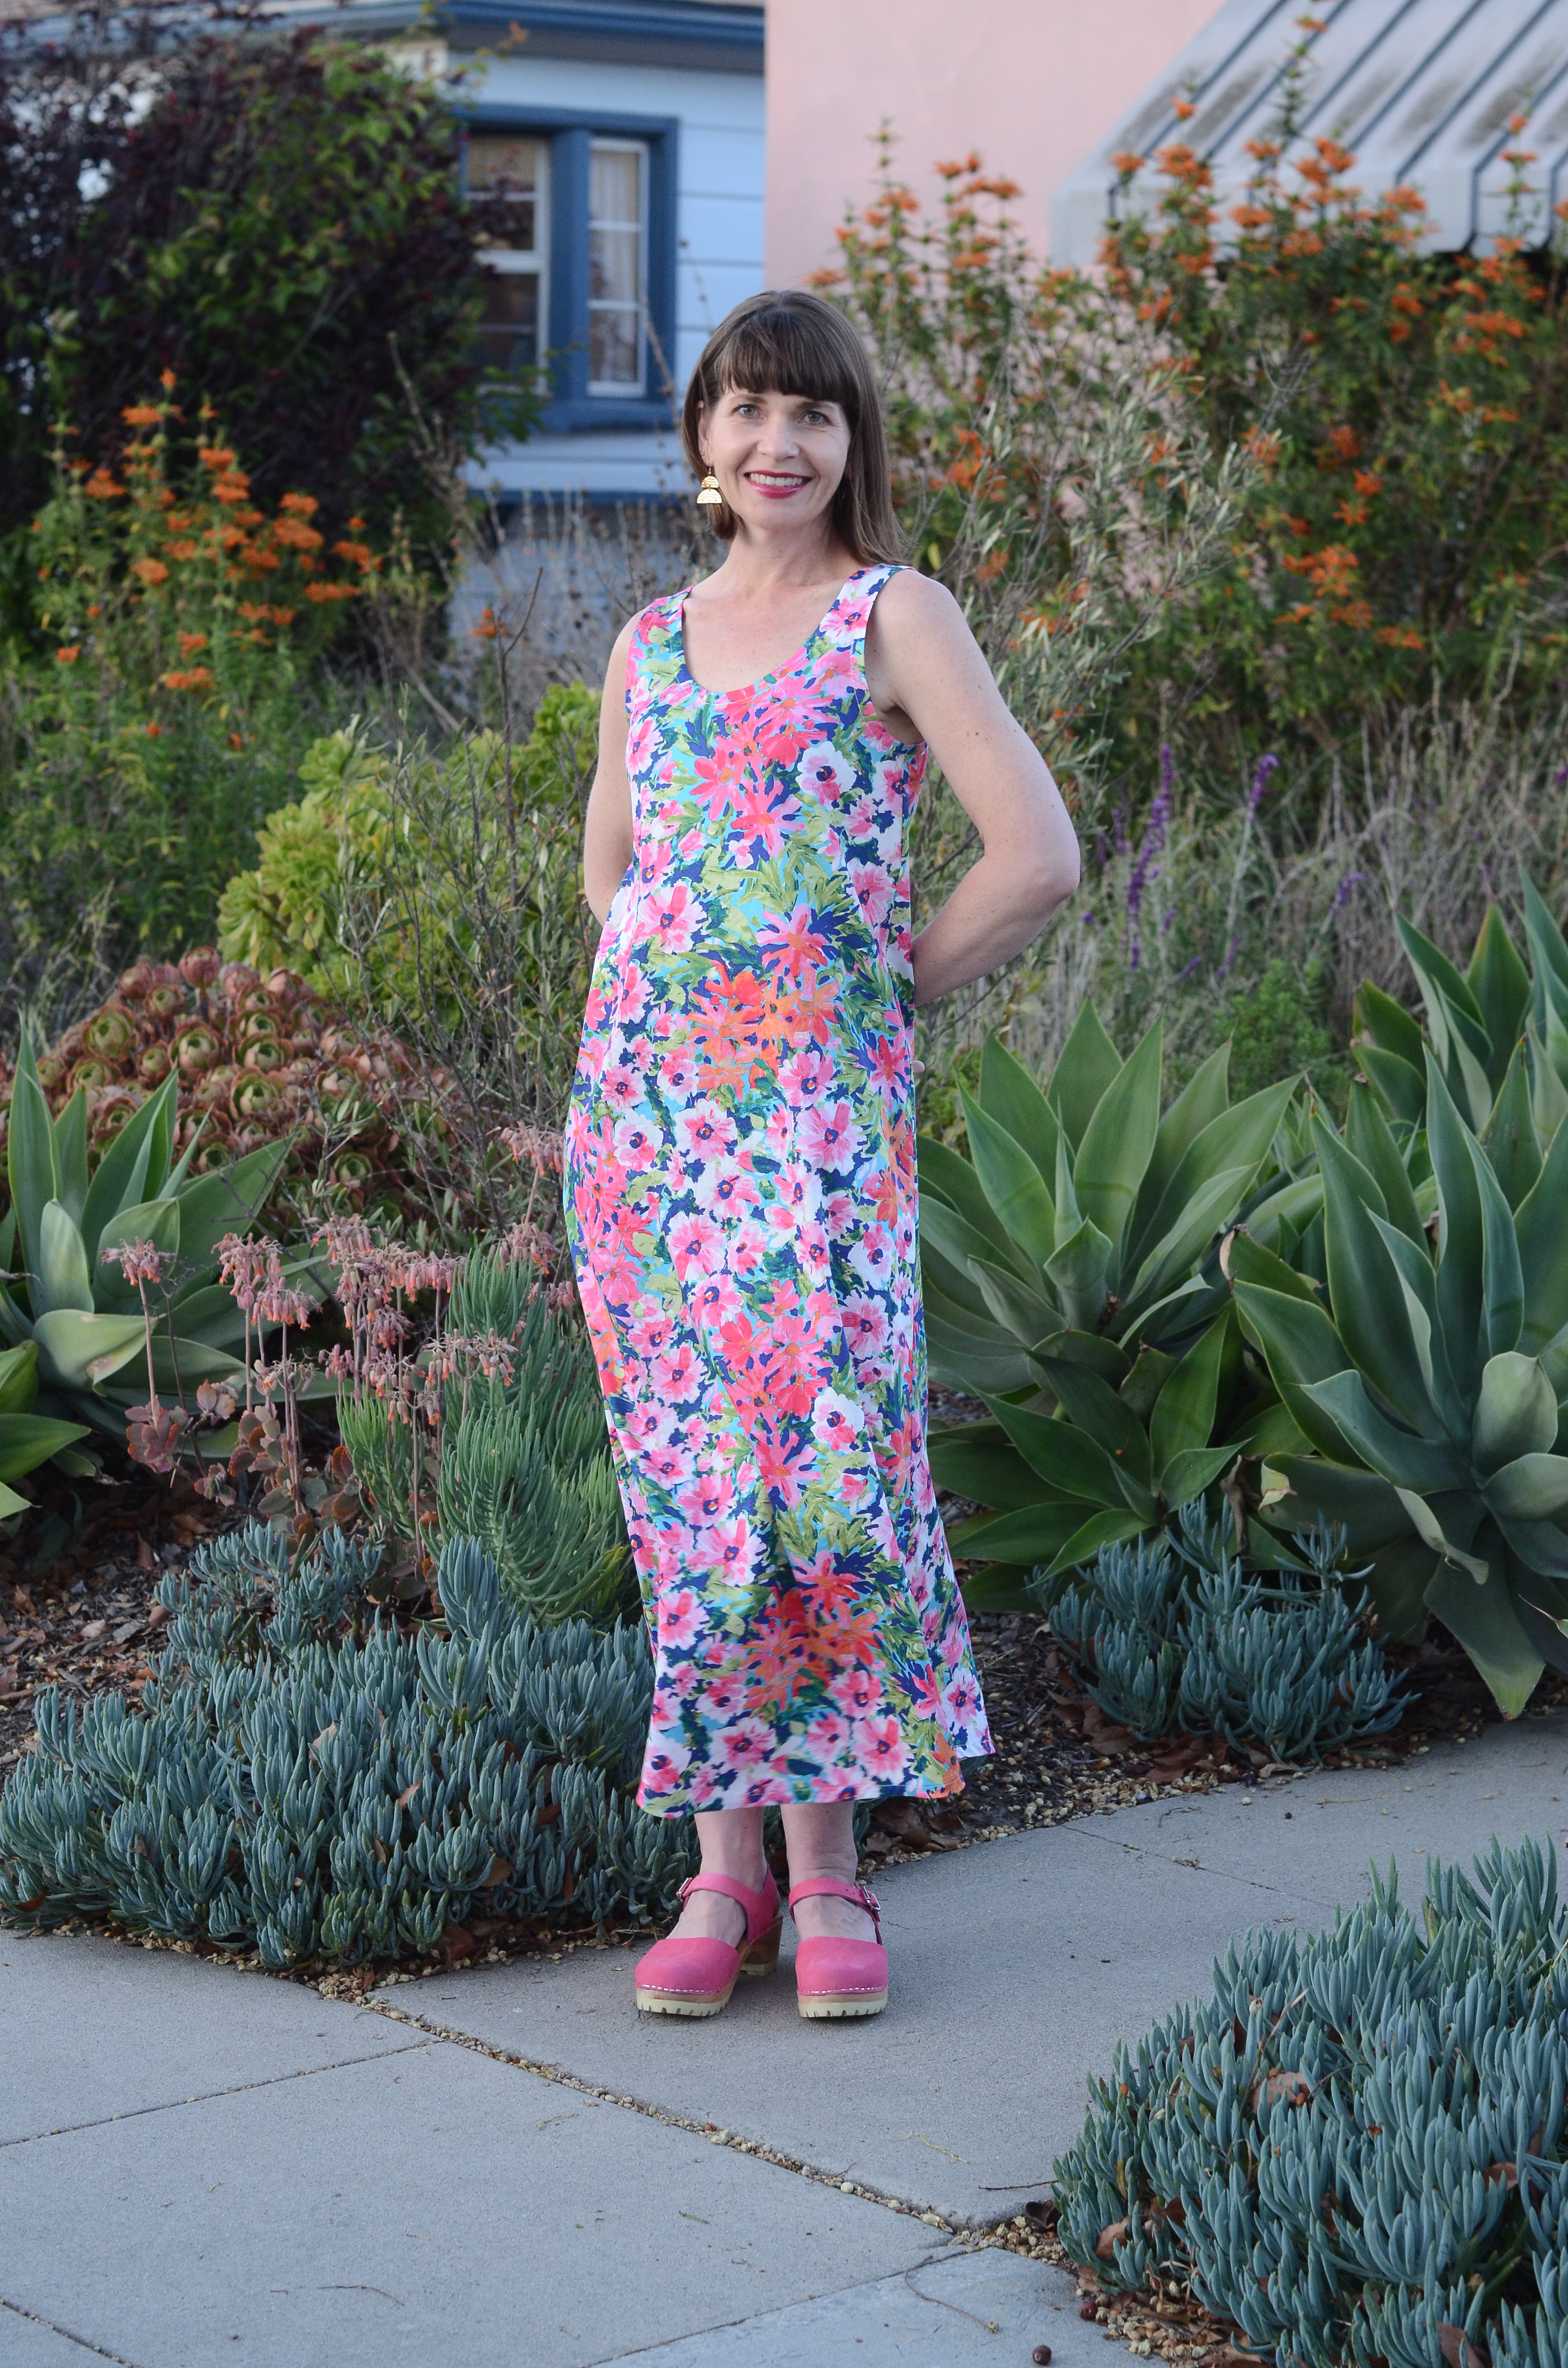
Cotton sateen is fantastic. If you're new to sewing woven, I would suggest this base as a starting point over cotton poplin because it's equally stable, but so much softer and features a more gentle and forgiving drape, which I find a lot more comfortable and cooler to wear. This fabric is very lightweight and not very translucent due to the busy floral pattern. The hand is very smooth and the print colors are intense.

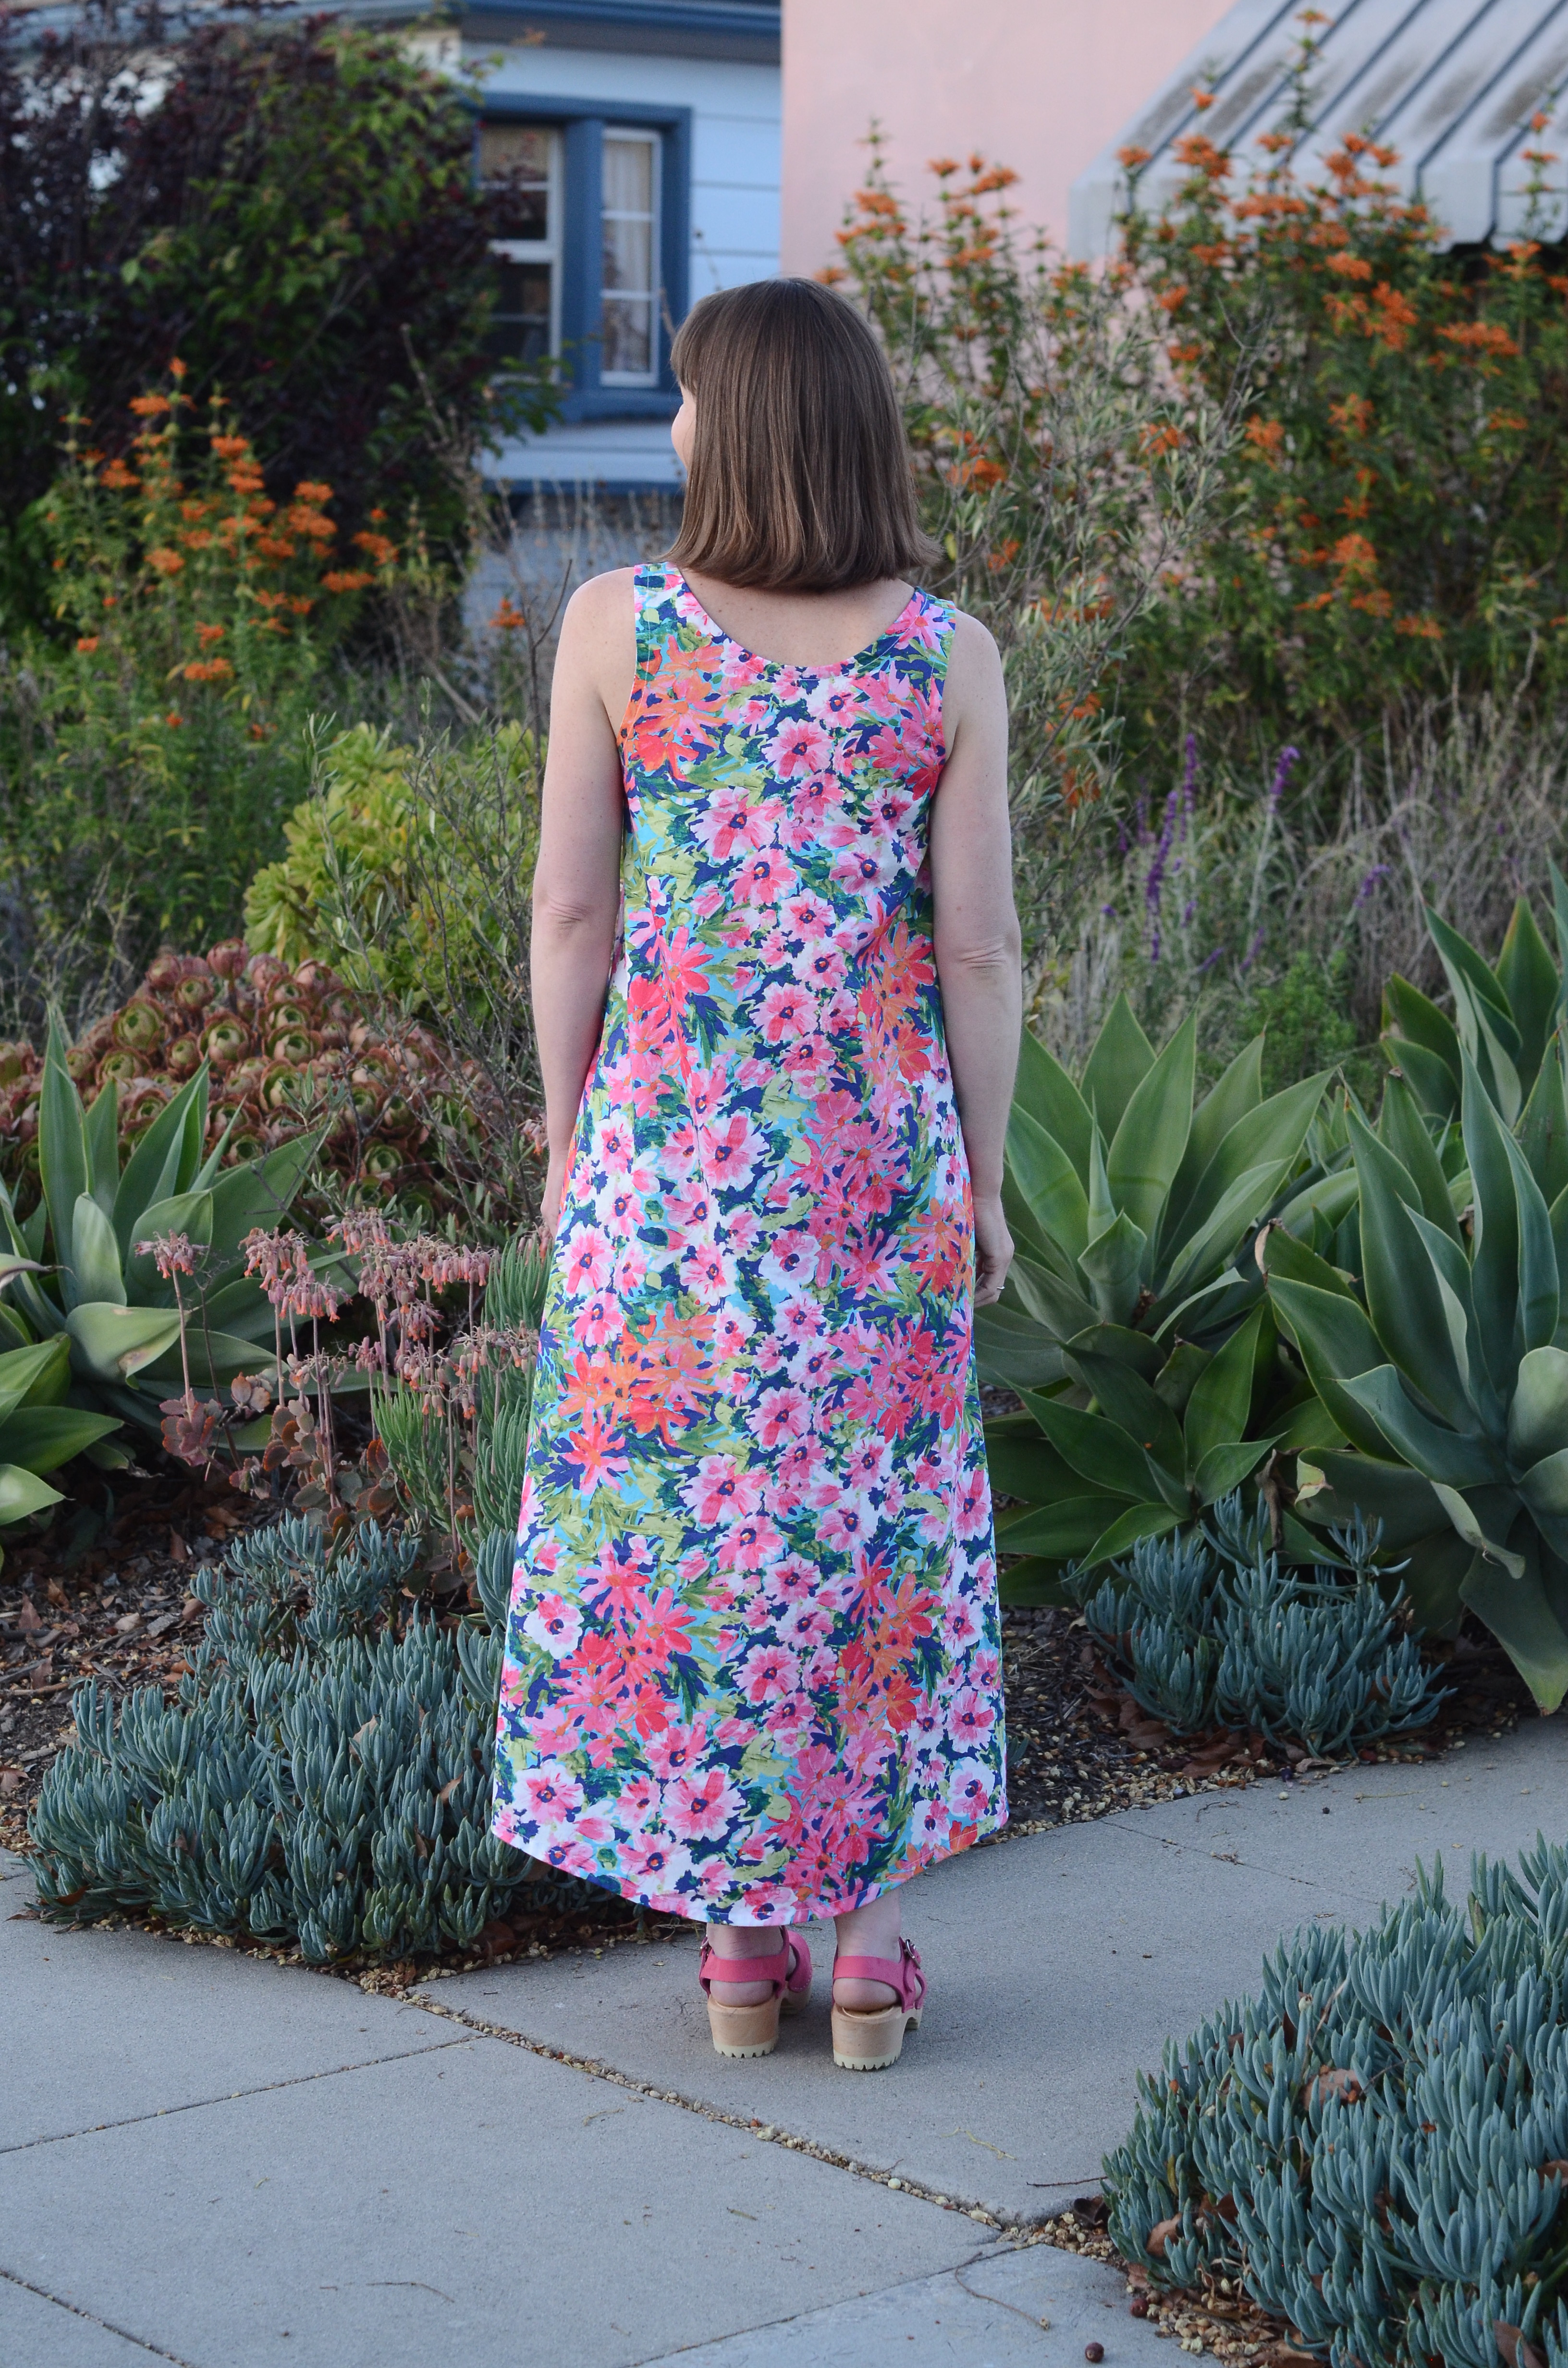
I love the bright, bold flowers! They look so gorgeous in full sunshine and just wearing this print makes me happy. To make this as much of a statement dress as possible, I lengthened the plain View C dress as far as I could and since this print isn't directional, I was almost able to almost lengthen it to a maxi by cutting the front and back facing opposite directions. When I'm checking to see how much length is possible to add on a given pattern, I first fold my yardage in half, selvage to selvage and mark the center, and then fold over just one side to the center fold to roughly access how much more room I have for the added length. For this dress, I ended up nearly folding the fabric in thirds and positioned the skirt hems toward the outer raw cut edges and the shoulders in toward the center. Then I opted to use the front hem curve for both the front and back to ensure the hem didn't dip too low. The French seams look amazing and I know this dress is darn near indestructible.

I actually wore this dress on my birthday with my new Mother's Day pink clogs. I felt fantastic!

My second Eucalypt is the color blocked View B so I could turn the stripes both ways. These stripes are fairly neutral and will pair beautifully with a few pairs of my existing linen pants and jeans. This fabric is a linen/viscose blend and features a looser weave with more drape than the cotton. I adore this blend and how it feels kind of worn in already without looking at all worn out.


Because the linen frayed more easily and is a little heavier weight, I chose to use my serger to finish the inner seams rather than sew French seams again. I was also worried about bulk, particularly on the front center seam.

My hot tip for very curved hems such as this one is to finish them with a bias tape facing rather than trying to manipulate the raw edges into a smooth hem. Even when I baste first to pull in the curve, I inevitably get some little tucks on the inside which really bothers me, and this finished technique looks so perfect and professional! To add the bias tape, sew it just like you would the neckline and arm holes; attach the bias tape to the right side of the hem, then flip it up and to the inside before stitching the final seam. I recommend rolling the tape inward just a bit so that the right side of the fabric shows just a teeny amount, in the 1/8" range, on the inside of the garment. That way your facing is completely hidden.

Cheers to changing weather and sewing wardrobes to beat the heat!


Happy summer sewing!
KATIE | @kak513
Unfortunately Fabric Mart Fabrics sell out quickly!
You can find similar fabrics by shopping the following categories LINEN, SATEEN, & SHIRTING.
You can also shop our entire collection of MEGAN NIELSEN PATTERNS.
Love the fabrics you chose--so summery!
ReplyDeleteSo very cute. The fabric choice for the dress is perfect.
ReplyDeleteBeautiful summer garments. I love the idea of using bias binding on the curved hem. I think I'll give that a try.
ReplyDeleteLove your makes. They are so fresh looking and look so lovely on you. Your summer wardrobe is off to a great start. Enjoy!
ReplyDeleteThose are both great! I also am impressed by the textures and colors of the garden behind you.
ReplyDeleteReally enjoyed this post.
ReplyDeleteThese are lovely and fresh looking! I haven't worn a dress in ages but this looks so nice!
ReplyDelete