

I'm happy to share that my husband and I are expecting our first baby in November! I know every sewist approaches a changing body differently, but my goal for this season of life is to make clothing that not only makes me feel comfortable but is also wearable during pregnancy and after.

With these criteria in mind, I hit the Fabric Mart website to shop for a couple of new fabrics. It just so happened that Fabric Mart was running a sale on Rayon Challis, which is one of my favorite fabrics to sew! It's hard to beat the comfort, softness, and drape of a Rayon Challis! I knew I had to get in on this sale for some summer makes!

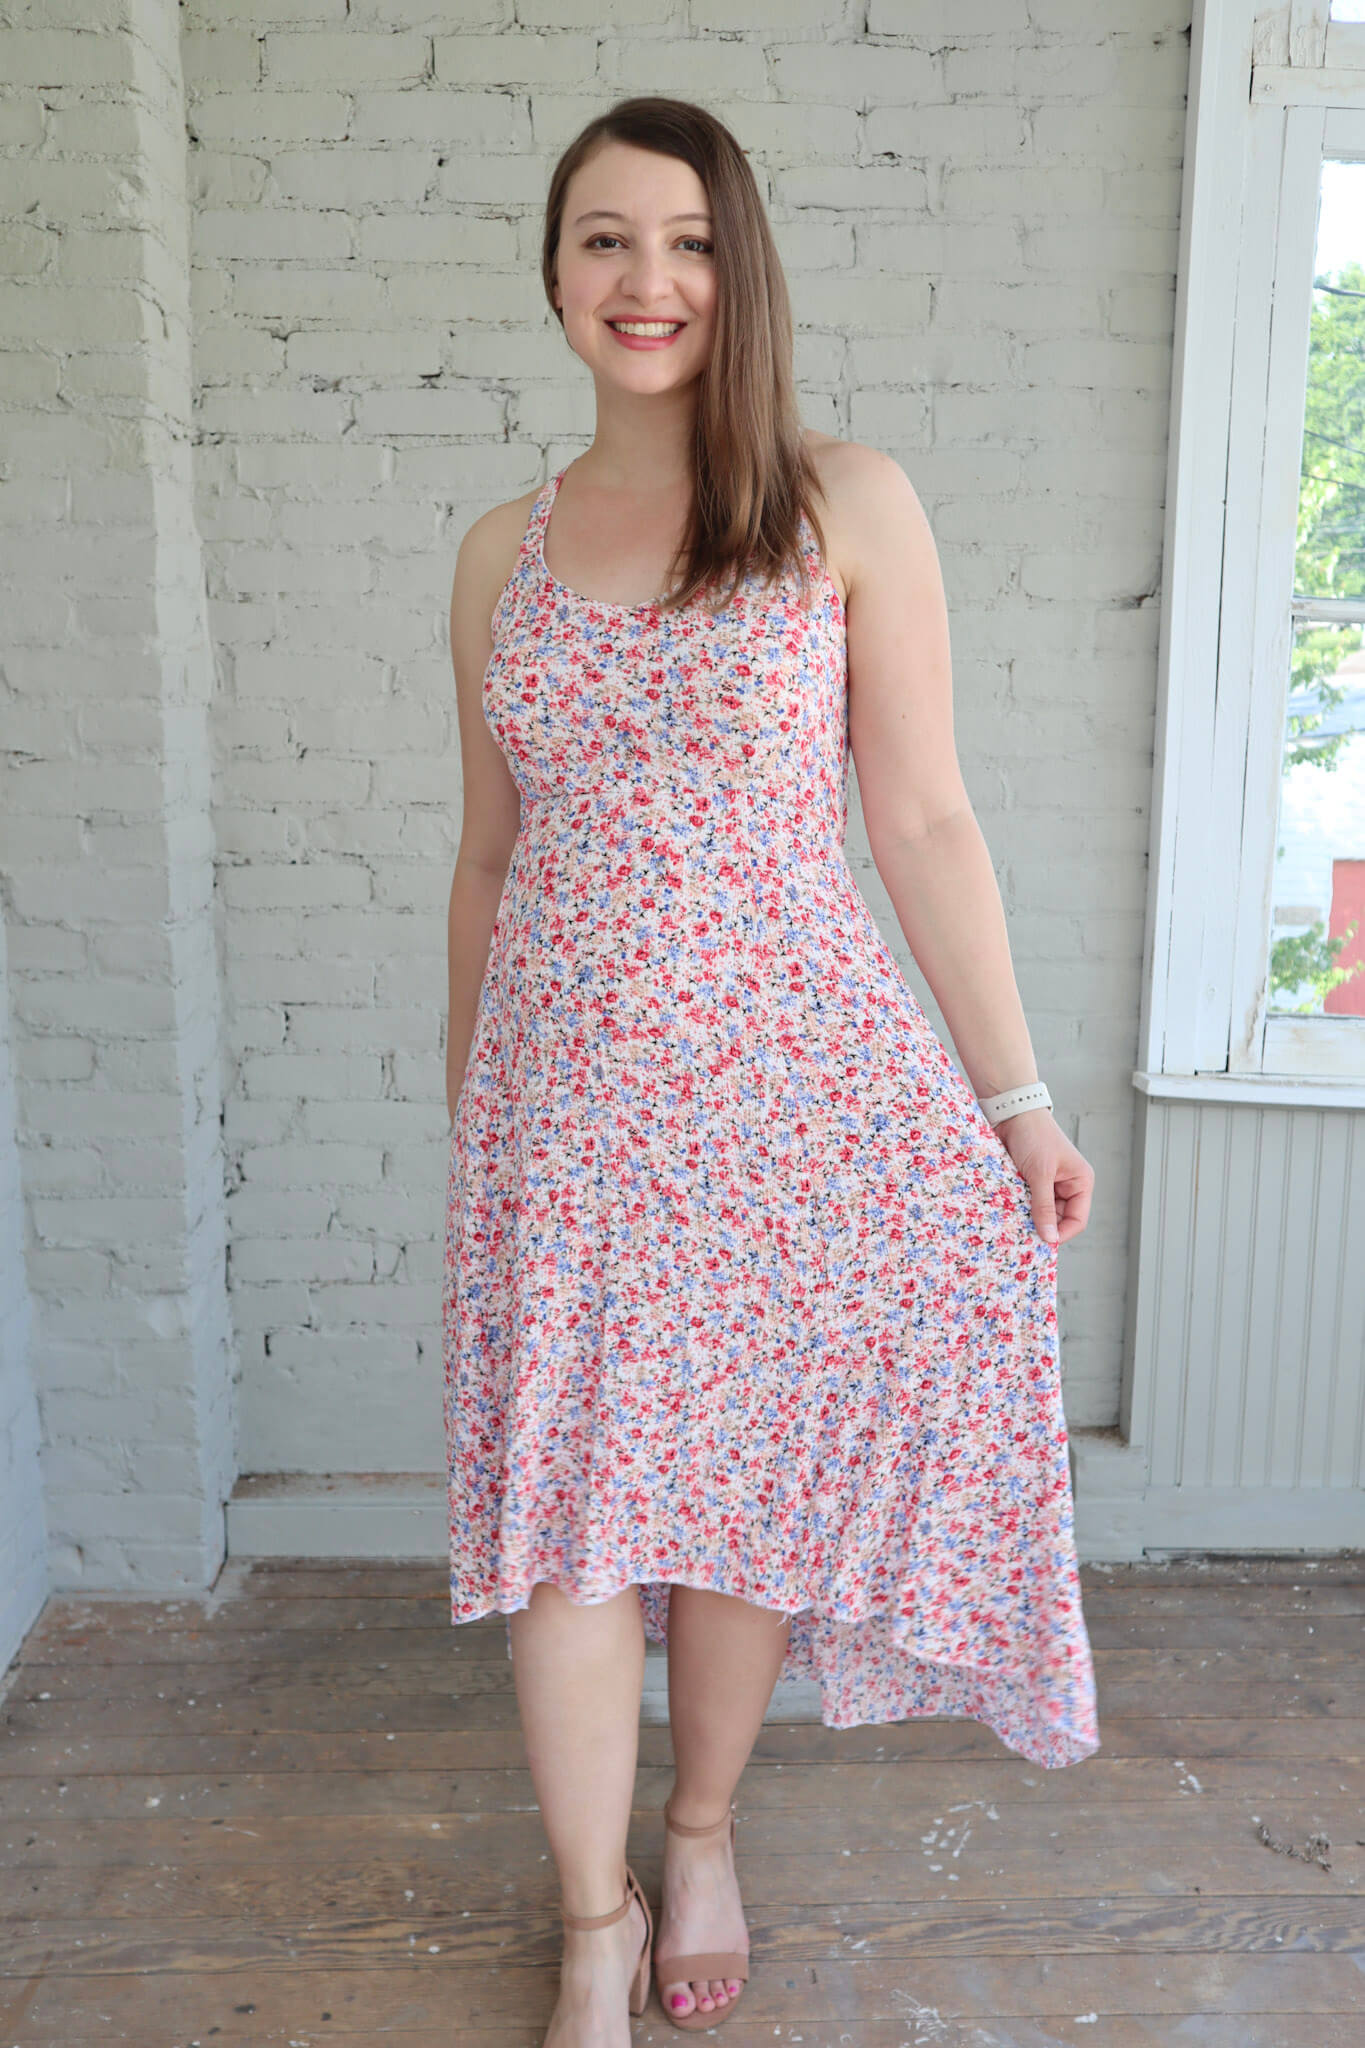
I found two beautiful Rayon Challis fabrics that I just had to have! The first was a lovely 100% Rayon Floral Print Crinkle Challis in blue, red, and khaki. The second was a lovely Pearl White 100% Rayon Challis. For the floral crinkle challis, I wanted to make a Rebecca Page Back Tie Dress.
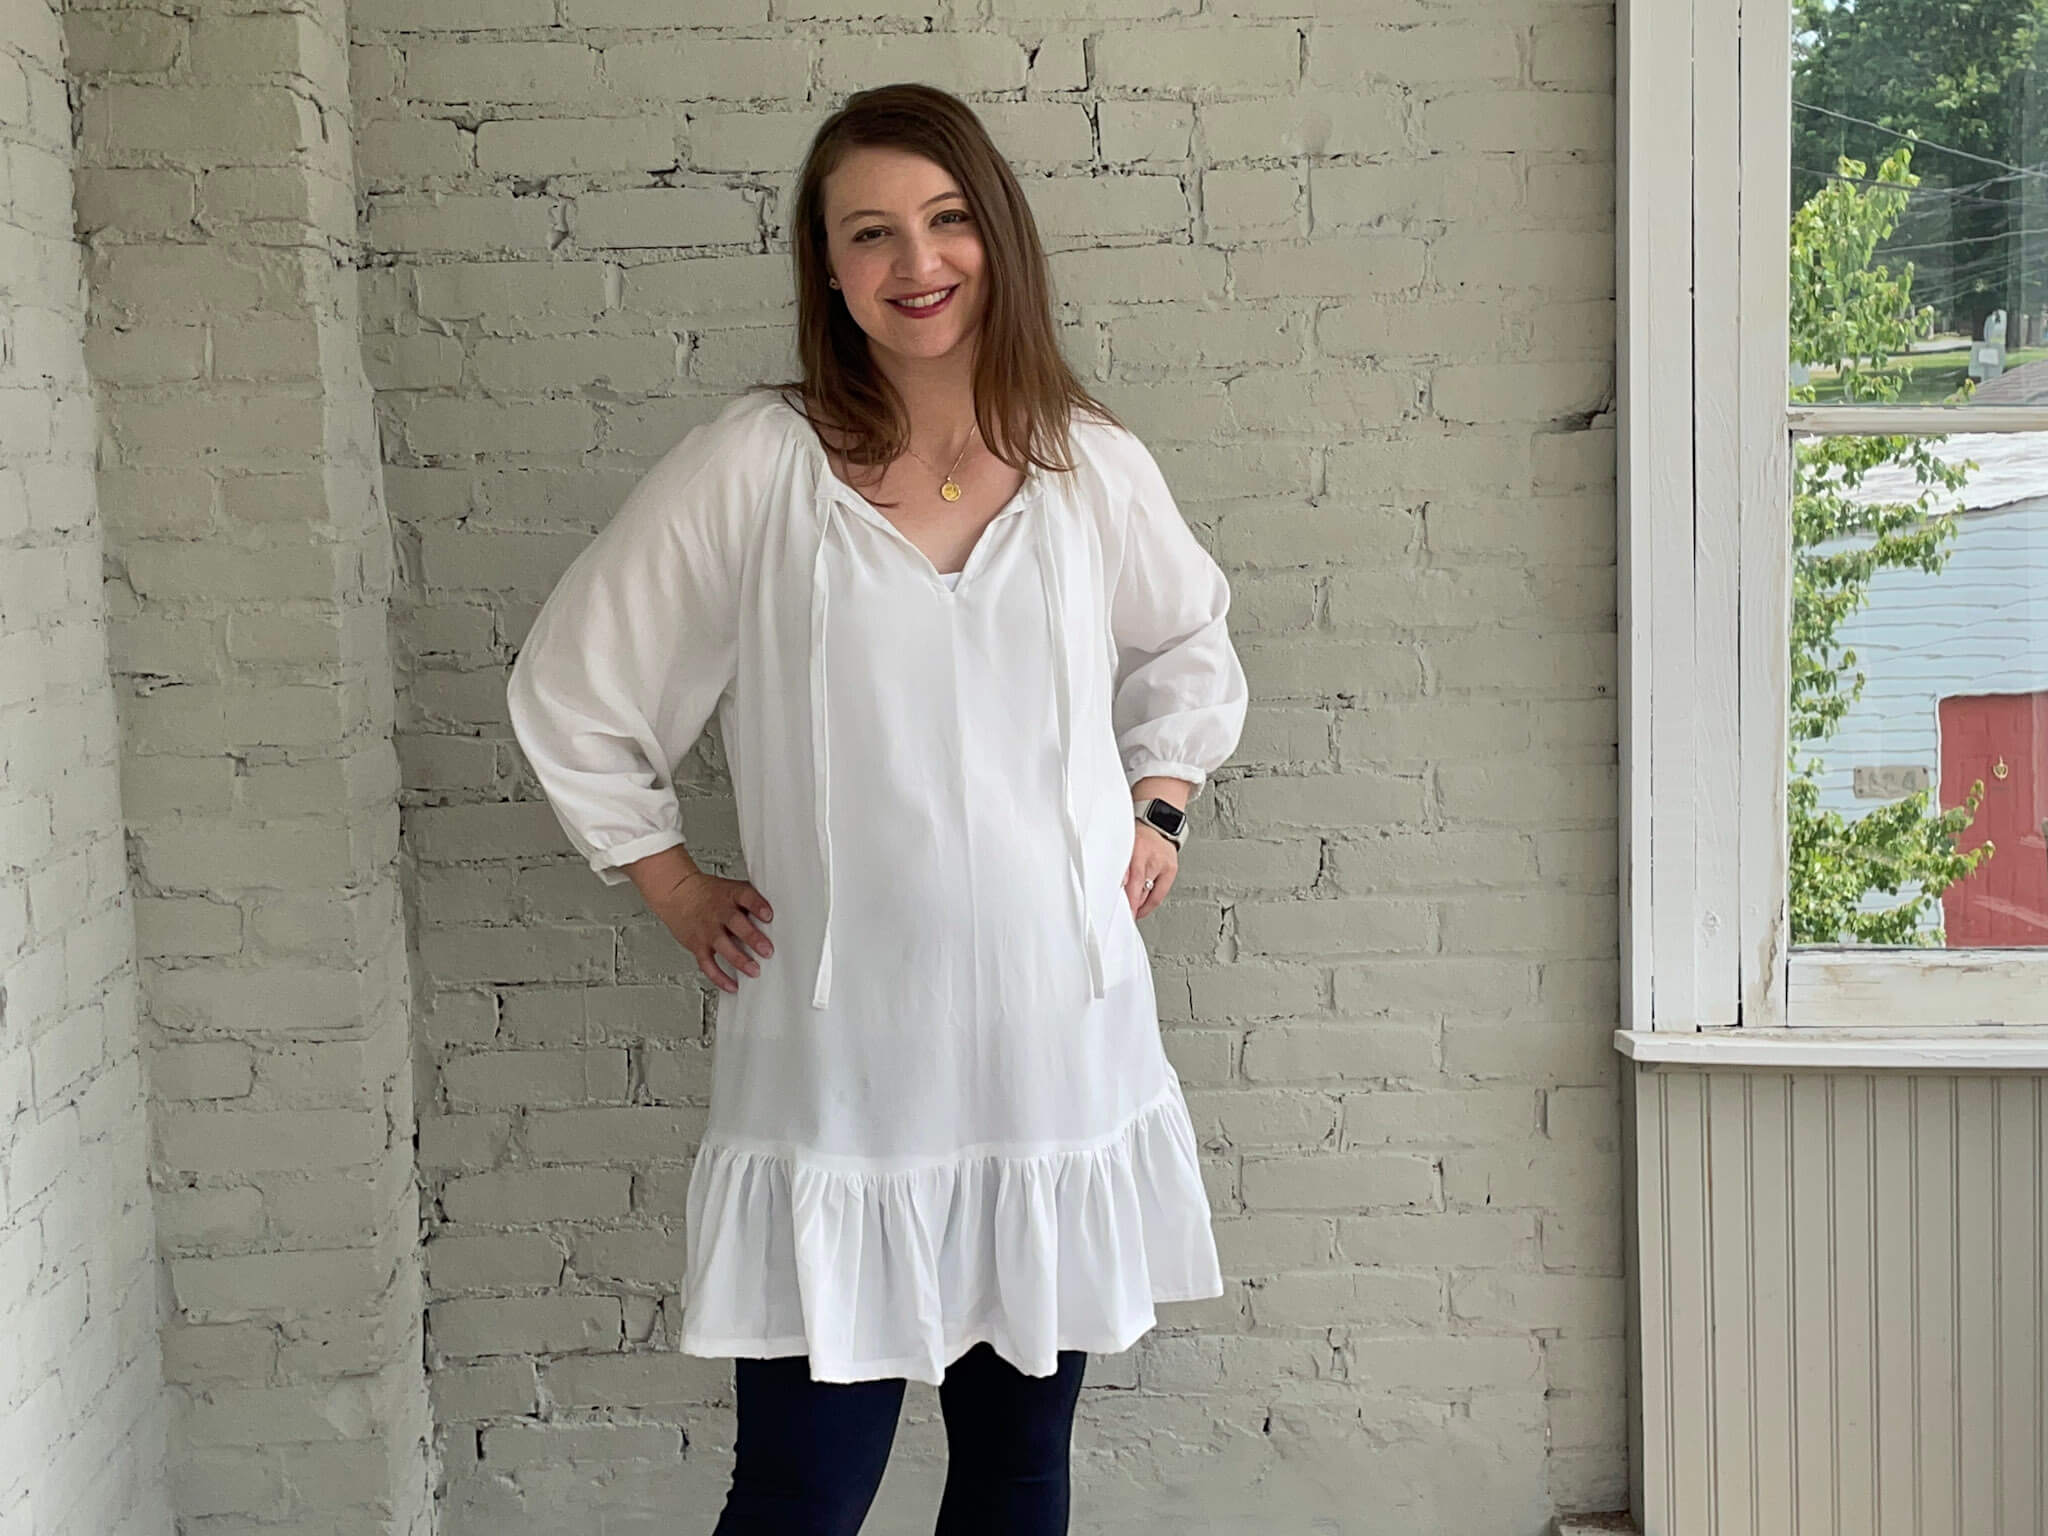
For the pearl white challis, I wanted to try a new pattern so I settled on the True Bias Roscoe Blouse & Dress. It looked roomy and comfortable and the sleeves make it perfect for the transition from Summer to Fall.
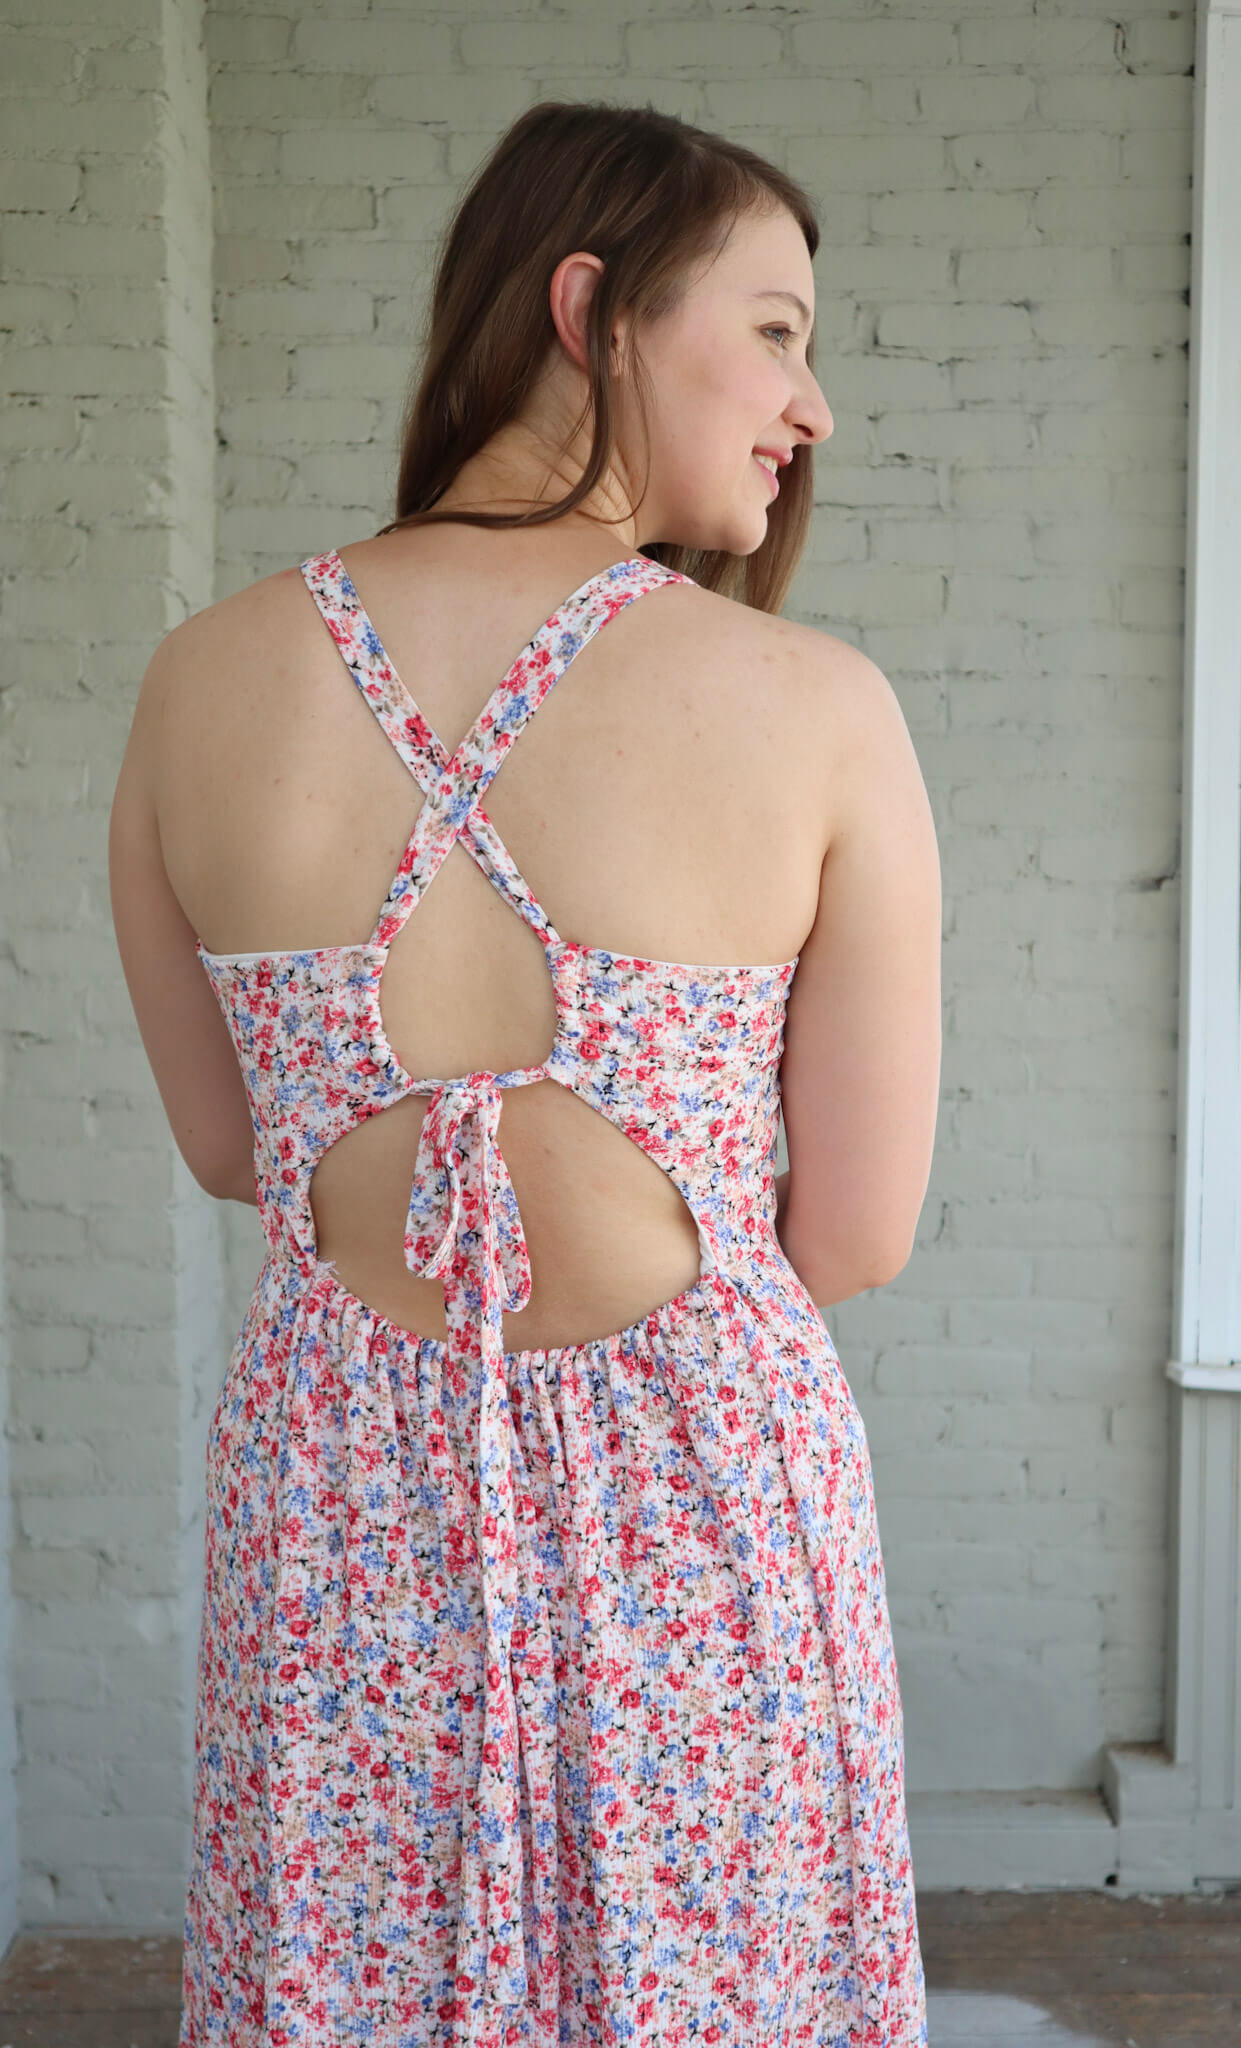
When my Fabric Mart order arrived, I made the Rebecca Page Back Tie Dress right away! The Back Tie Dress has a very flowy skirt with a channel of elastic that runs through the back. It also has a bodice that hits above the natural waist and completely ties in the back making it perfect for my growing bump. I made a Back Tie Dress when the pattern first launched a couple of years ago and every time I wear it I'm constantly amazed at how comfortable the dress is to wear!
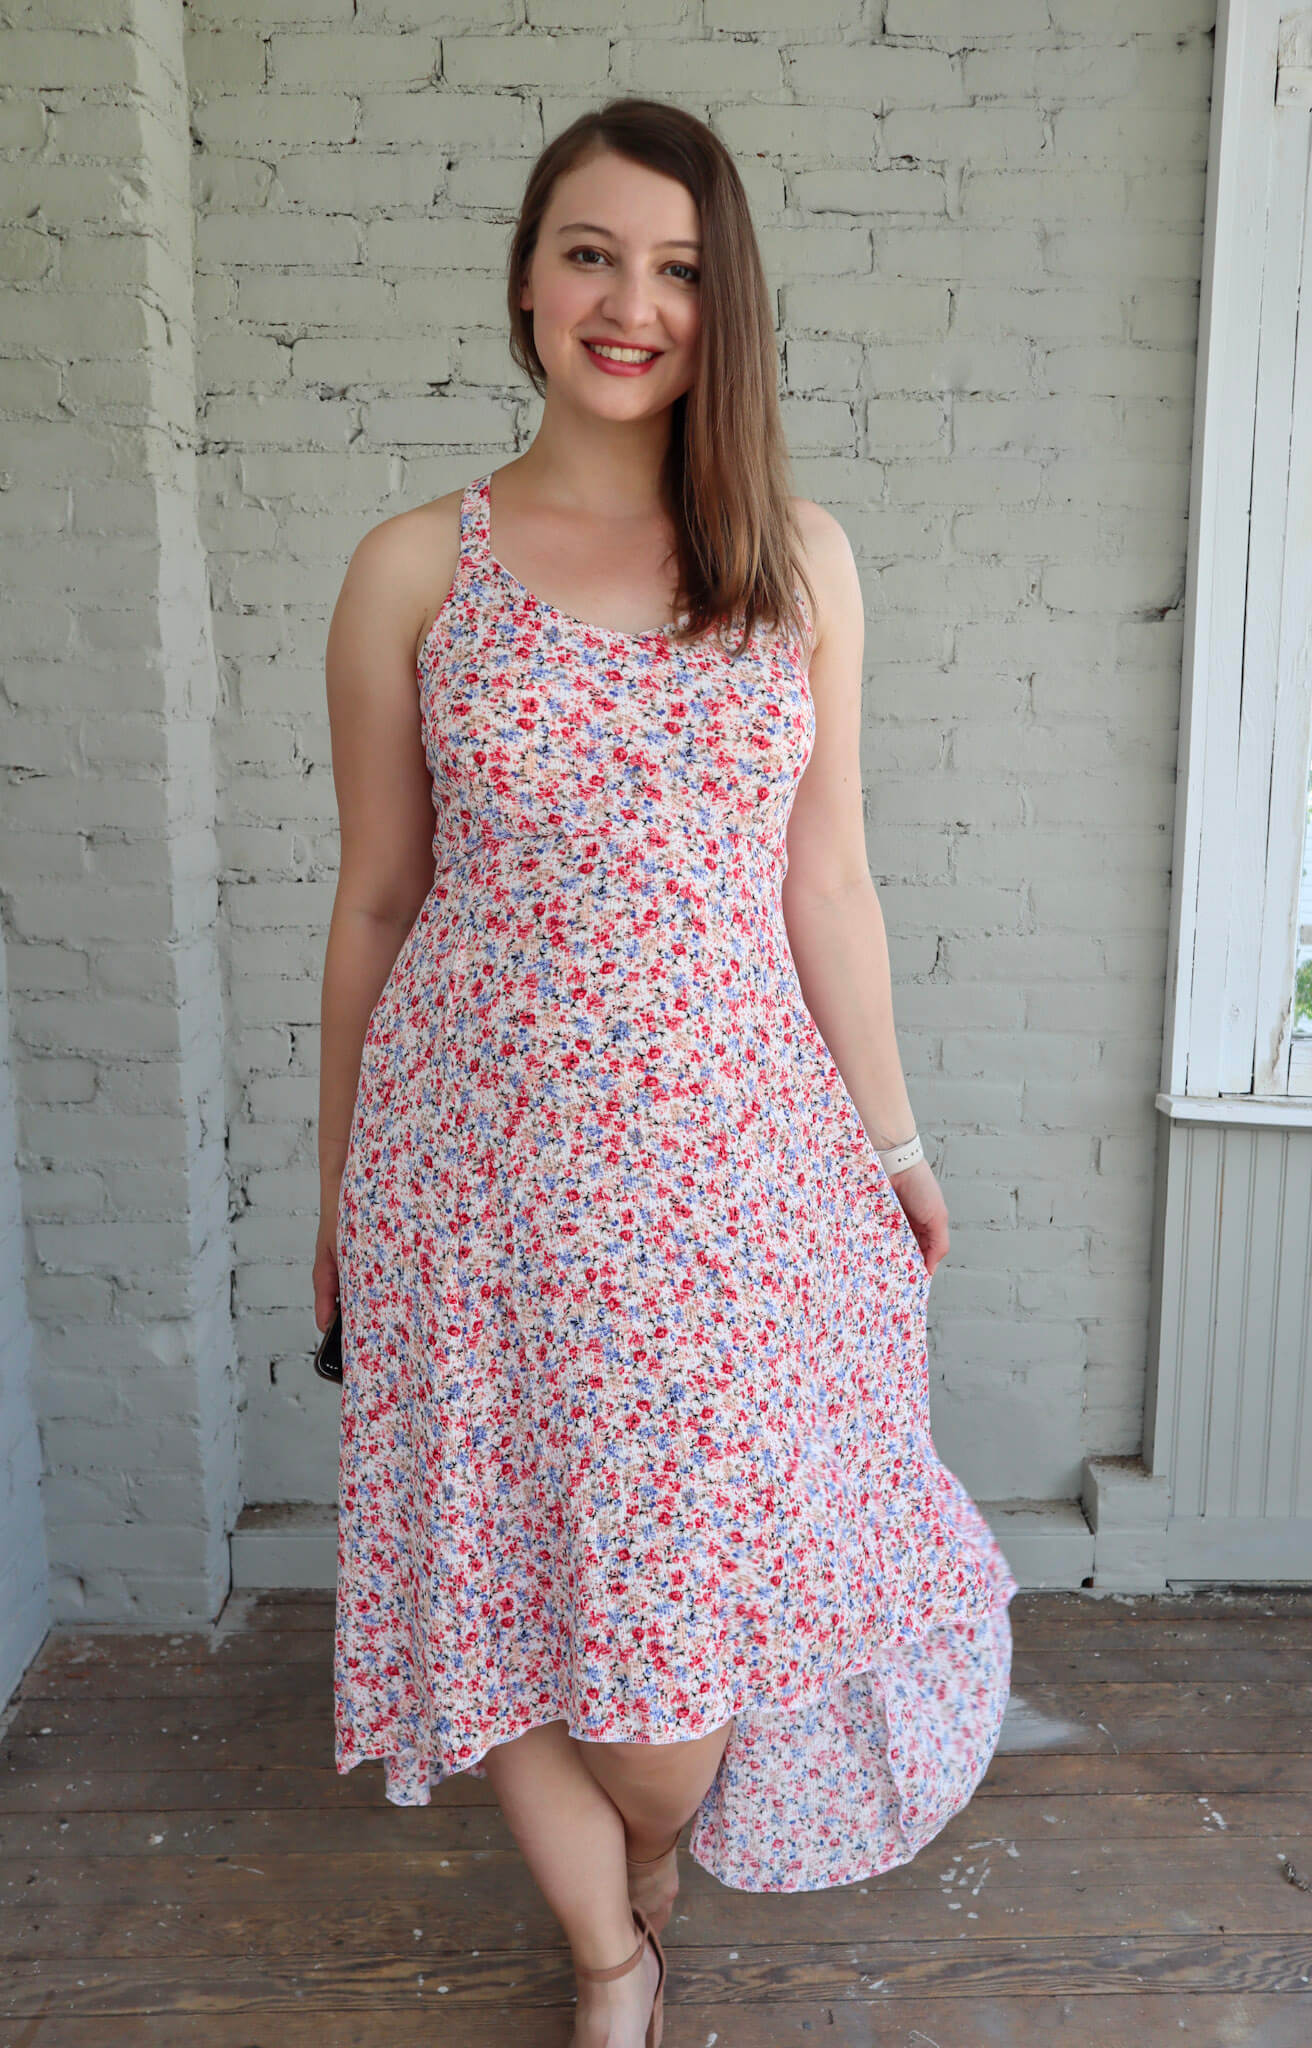
I decided to make the Back Tie Dress in my usual size small because I knew the dress would accommodate my changing body. I added foam bra cups between the bodice main and the bodice lining just to give it added modesty, and to be able to go bra-free! I accidentally cut the skirt pieces at different lengths. The front skirt was a lot shorter than the back skirt pieces which ended up working in my favor as I was able to even them out into a high-low hem.

I love how this dress turned out! I don't normally go for dresses with high-low hems but pair it with the crinkle challis and it was the perfect combination! I love how lightweight the fabric is and how drapey it is, but I also love the added texture that the crinkle challis provides!
After finishing my Back Tie Dress, I started working on my pearl white Roscoe. The pearl white challis was so soft, that I knew it would make such a comfortable blouse. The finished measurements of the Roscoe have a lot of positive ease, so I didn't make any alterations to the pattern. I also really liked the 3/4 length sleeve and the blouse length for fall. The pattern was easy to follow and I had my Roscoe made up rather quickly. When I tried the Roscoe on though, I didn't love the length. It fell in a somewhat awkward spot and so I decided to add a ruffle to the bottom of the blouse.

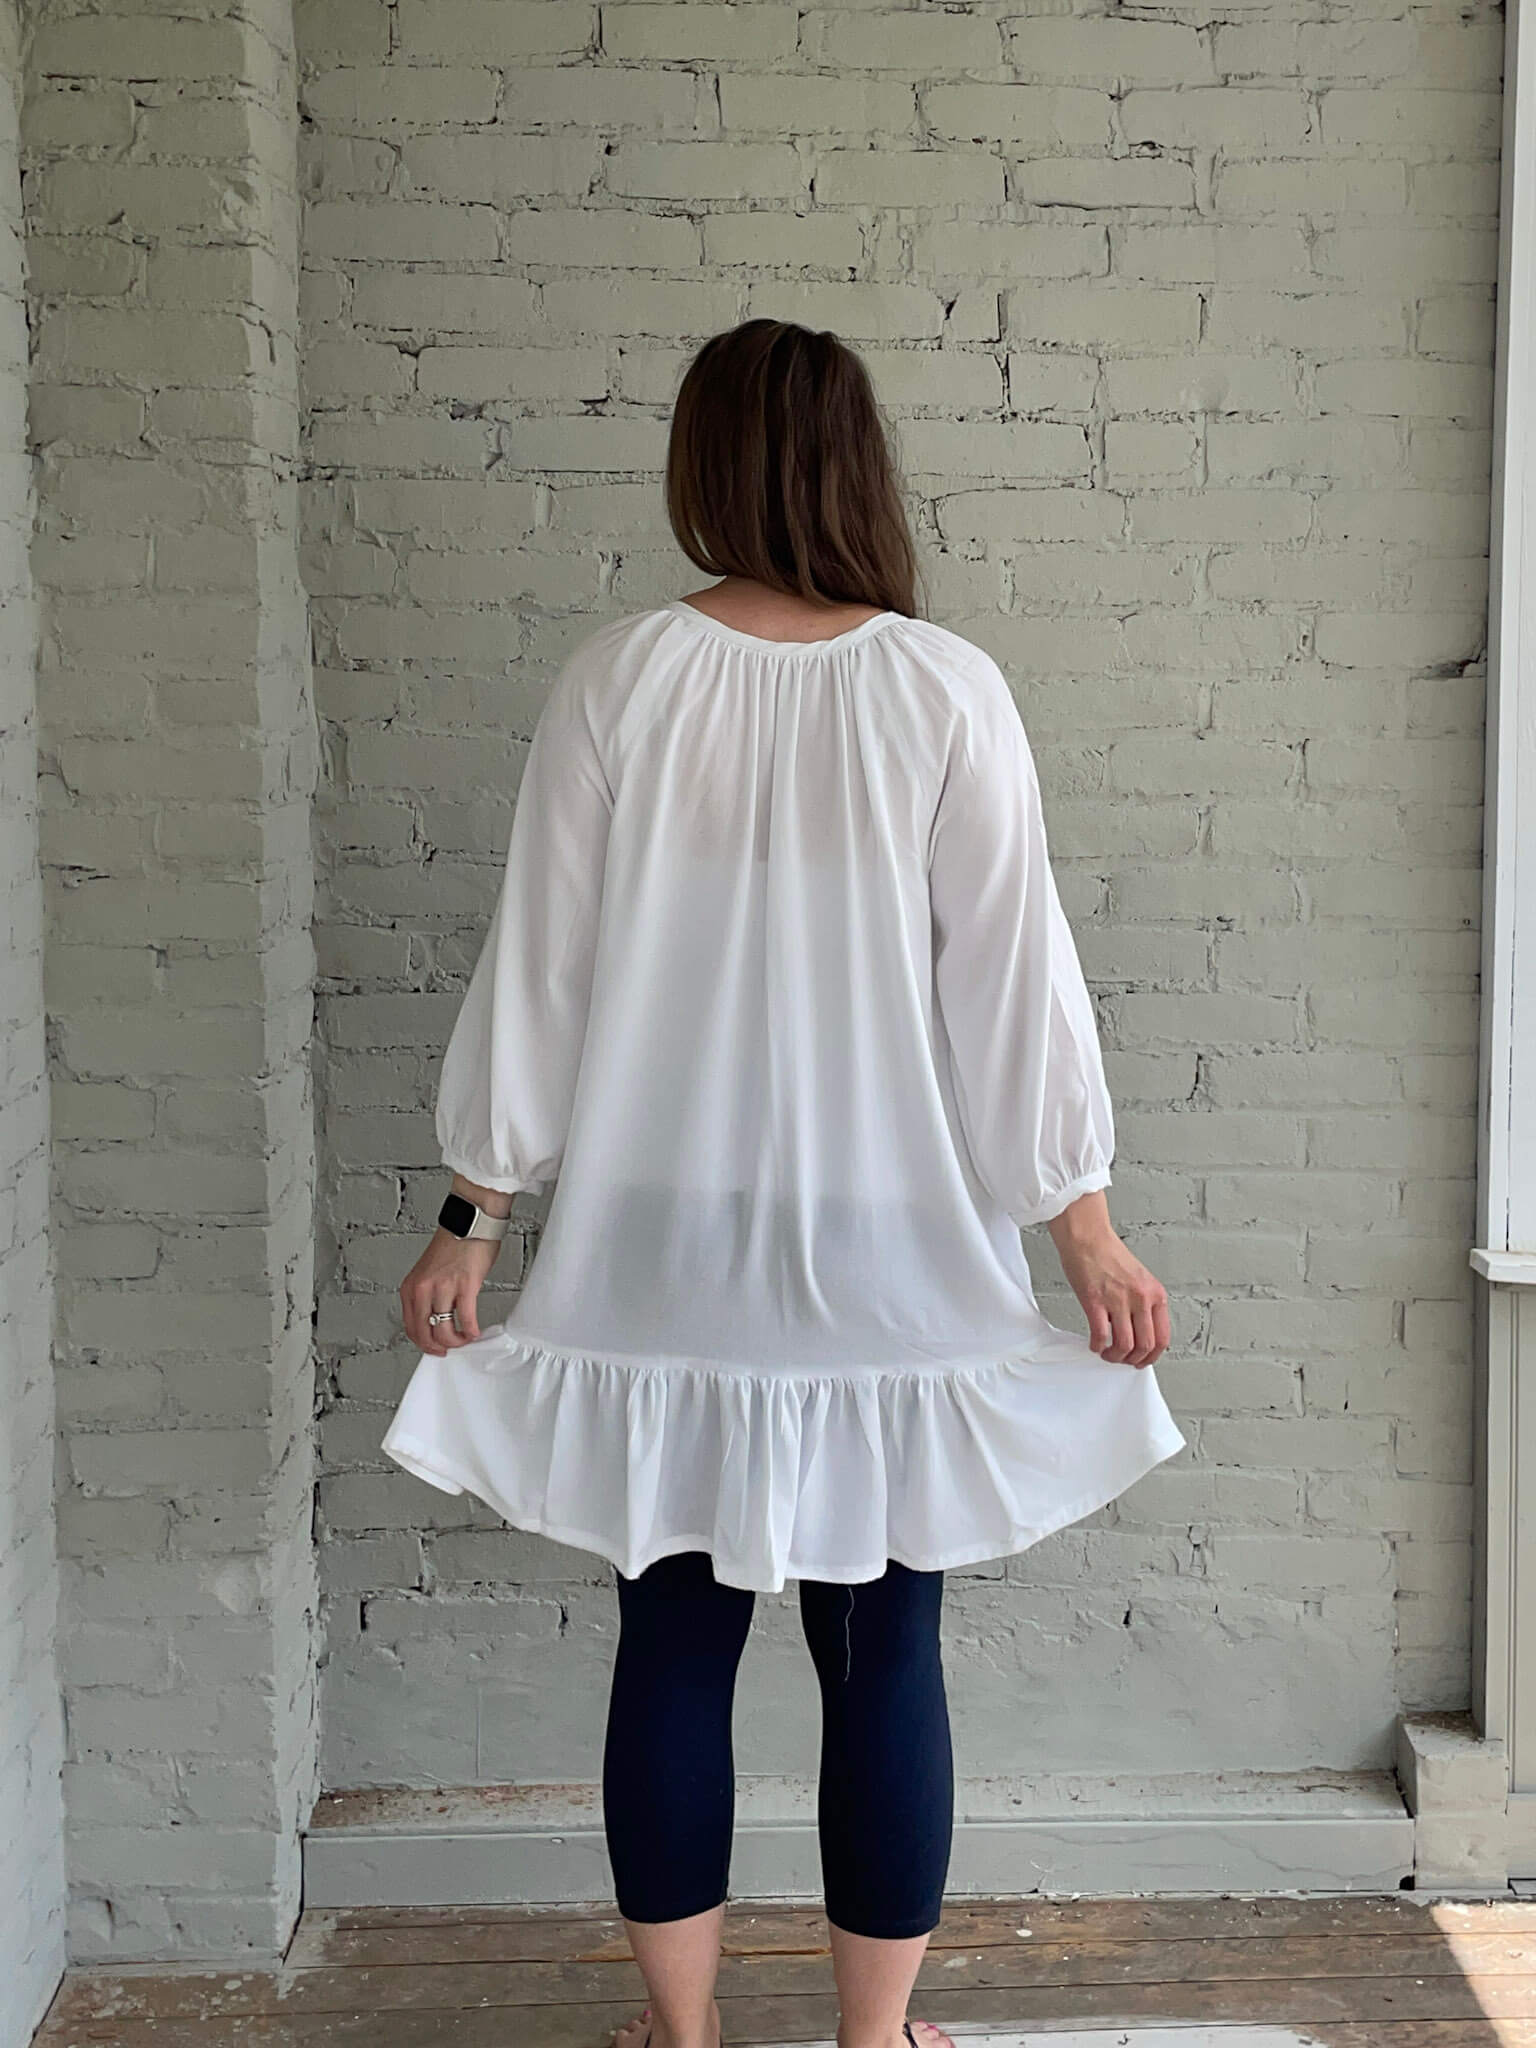
I didn't use the pattern pieces for the ruffle, instead, I cut two rectangular strips of fabric about 6 inches wide by the full width of the fabric to form my ruffle. I sewed the strips together on the short ends to make a continuous loop, gathered the fabric, and attached it to the hem of the blouse.

When I tried on my new longer version of the Roscoe I loved it! The ruffle made the awkward blouse length into a cute tunic length. I plan to wear my Roscoe with a pair of leggings when the cooler weather arrives. In the summer heat, I think the Roscoe will also make the perfect swimsuit cover-up!


Overall, I love both of my Rayon Challis Fabric Mart makes. If you haven't sewn with Rayon Challis, I'd highly recommend you head over to the Fabric Mart website and snatch up some for your stash! You won't be disappointed!


SHAINA | @shaina_sews
Both beautiful garments and congratulations!
ReplyDeleteI love Charlie ad well. Has long been a favorite of mine !And congratulations !
ReplyDeleteCongratulations! The first is always special. You've inspired me to peruse that lovely Challis! I still have the rayon Challis maternity dress with linen collar that I made 35 years ago! Love that fabric.
ReplyDeleteYou look great in both garments! The ruffle at the bottom of the blouse really makes it special!
ReplyDeleteVery attractive, hope you're enjoying them both!
ReplyDeleteCongratulations on the new addition to your family. You look really nice and very cool in your new outfits. I really like the ruffle you added to the shirt and the dress is so cute in that material.
ReplyDeleteCongratulations! Both garments look lovely on you and are great choices for the challis fabric you selected.
ReplyDeleteLove both pieces!
ReplyDelete