

My kids have been in desperate need of new swimsuits this summer, but with a busy season of moving house and spending nearly a month in Australia, it left barely any sewing time! When I spotted a whole collection of Beach Riot swim fabric land at Fabric Mart, I knew it was just the motivation I needed to get new suits made!
Last year my eldest was on swim team and I was floored at the cost of her suit - somewhere in the ballpark of $80! Using less than a yard of fabric and some elastic, swimsuits are incredibly cheap to make yourself!
I ultimately selected three prints and four solids (one being a beige color I intended to use as lining), with input from my children to get their preferred designs. I made an initial sketch in Photoshop to get a visual on what they would look like, and then made a few more changes once the fabric arrived.

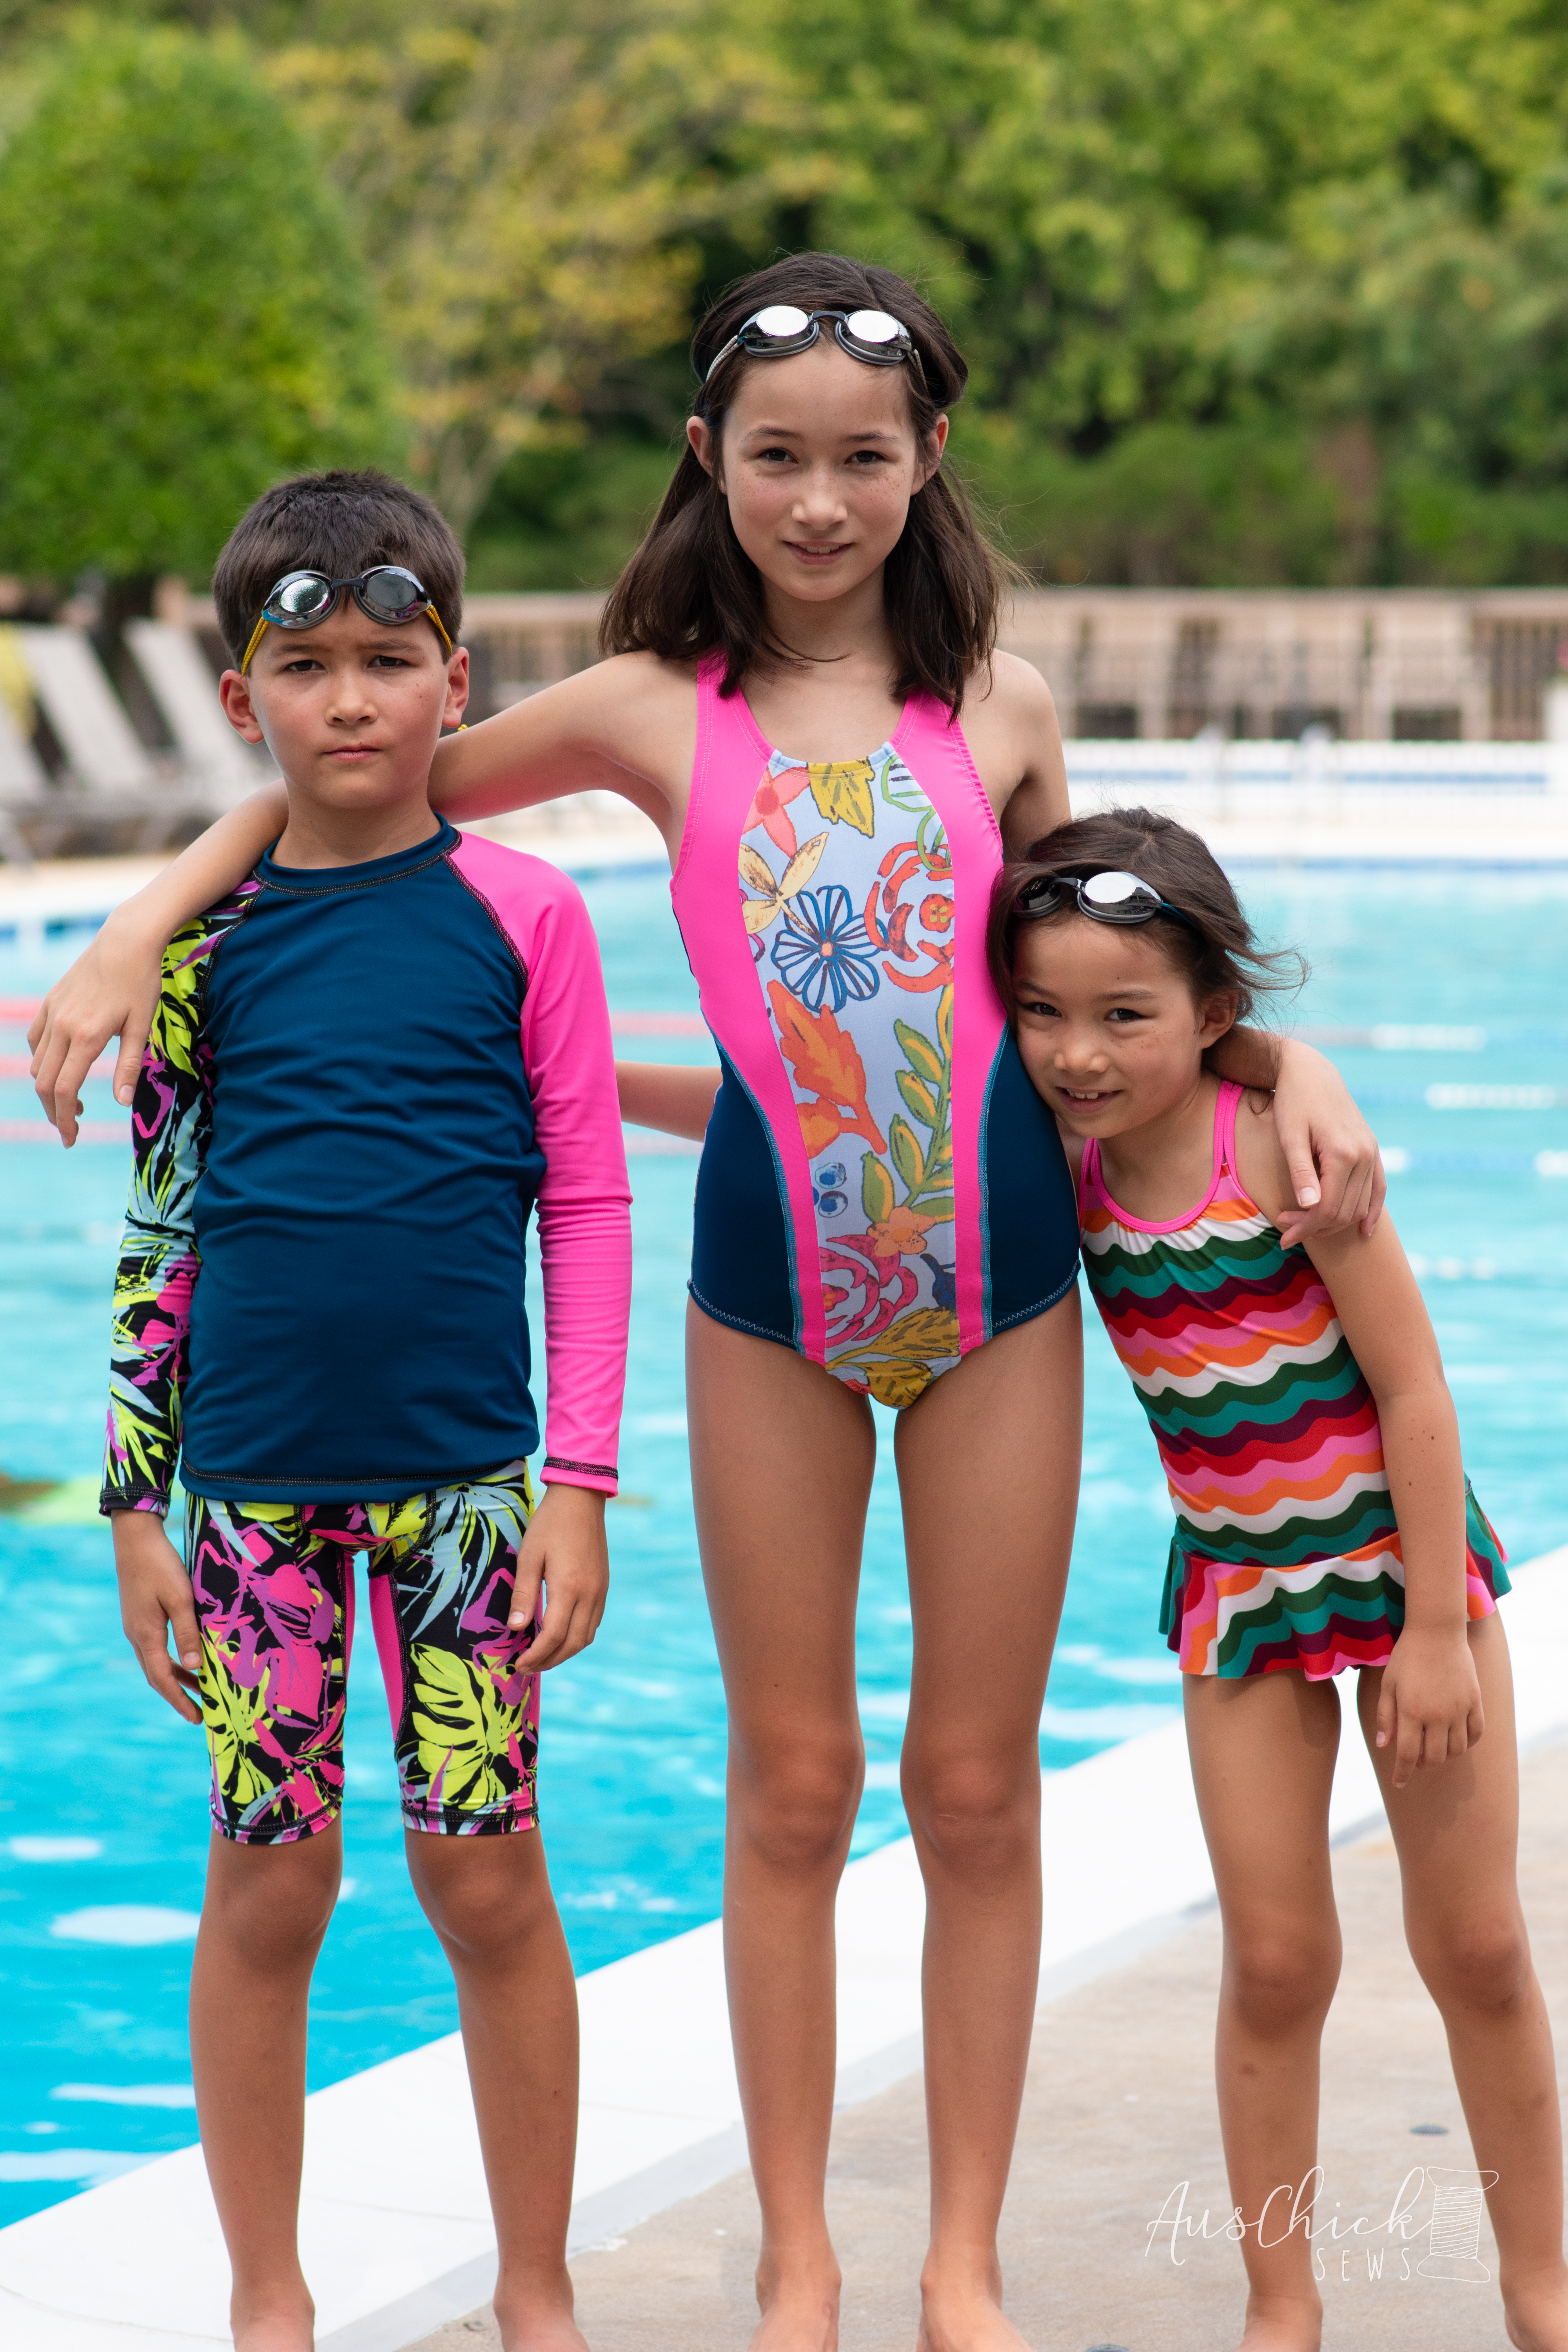
The easiest suit to make was my son's - I used Jalie Gerald underwear and Nico raglan. This was my first time making Gerald and I loved how quickly they came together! The pattern has multiple lengths and a functional fly option. I used the swim length with a solid front. While I finished each seam using a reverse cover stitch with wooly nylon thread in the looper, you can also just use a zig zag on your regular sewing machine.


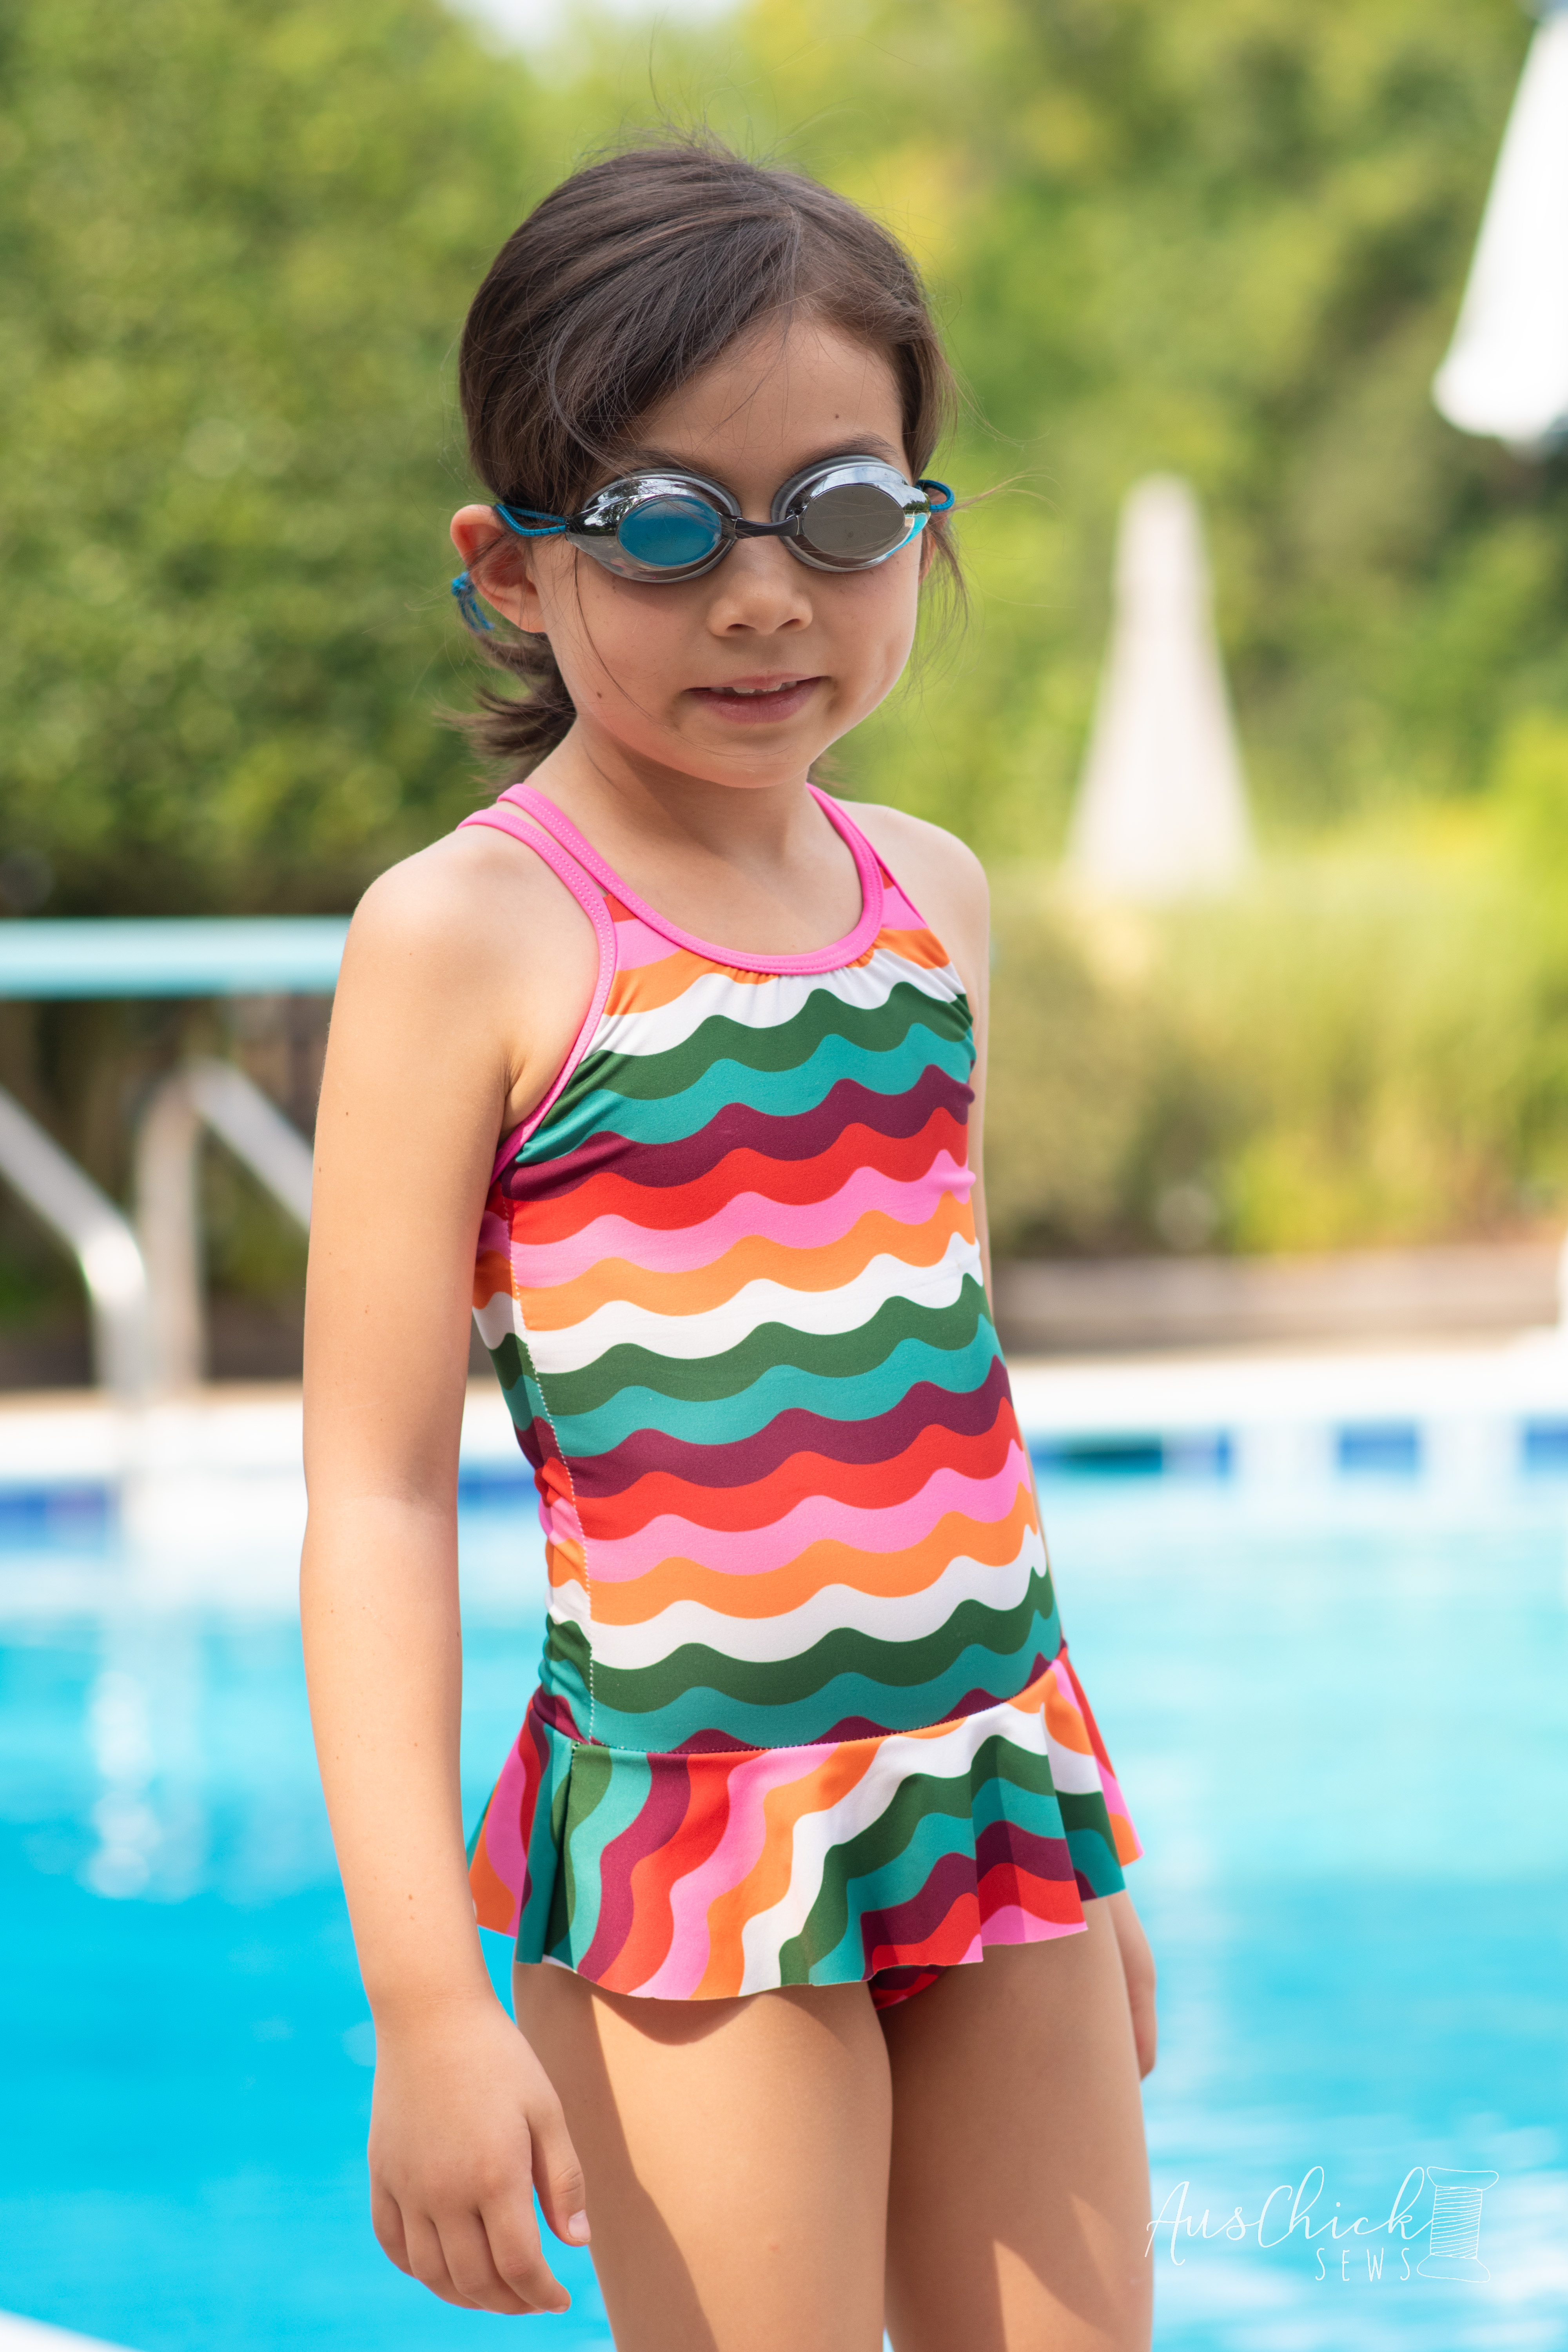
My youngest is wearing Boo! Designs Twin Swim. This also assembles pretty quickly and I love that there are no seams to rub against the skin on the inside. I especially love the binding detail on the back and the great coverage over her butt.


Now that my eldest is getting so tall, I decided to use Jalie Women's Racerback Swimsuit 3134 since it has bigger size range than Boo. This was a more challenging suit to assemble and I was bummed that it didn't come with a solid front lining piece. Next time I make this suit, I will assemble the outer front first, then trace out a full front lining so that I can hide the side seams inside the lining.


I also needed to expand my swim wardrobe, so I whipped up a Jalie Valerie rash guard for me, and coordinating Jalie Claudia bikini. I really loved how both of these came together, and they were also pretty quick to assemble as well! Before making my own suit, I checked Beach Riot's Instagram page to see how they'd use this print in last year's collection. I noticed it was used sparingly, often as an accent, and they'd used it sideways. I thought that was a fun idea and decided to do the same. The nice thing about swim fabric is it's very stretchy in each direction, so you can get away with using it sideways!

I assembled Claudia with my serger, but I should have done the darts with my sewing machine. This would have reduced bulk and minimized visible fold lines from the outside. I love that Claudia comes with instructions for adding pockets for removable swim cups - and this step was surprisingly simple to do as well!

Being Jalie, all patterns come with an extended size range, so my husband could theoretically wear the pattern my son's in, and my youngest could wear the bikini I'm wearing. I love how versatile these patterns can be!
I hope you're inspired to save yourself some money and sew up some swim for you or your family! Once you discover how easy it is to sew a rashguard, you'll be on your way to making your own swimsuits each season!
Unfortunately Fabric Mart Fabrics sell out quickly!
You can find similar items by shopping the following categories SWIMWEAR.
Great job on all the suits! I snagged some of the Beach Riot fabrics as well and I'm working on one for myself as we speak. Love all the great designer choices at FabricMart!
ReplyDeleteGreat job for entire family!
ReplyDeleteI'm going to check out those patterns.