
Good day my fellow Seamstress'. As I continue my transition into fall, I opted to venture out and find a great trench coat pattern. Sewaholic's Robson coat filled my search and after looking into some of the details, I knew it was a win!

My vision for this post was found on Pinterest where I located a skirted trench coat. The original trench coat I used for inspiration was made out of a suiting fabric, but I knew I wanted this coat to be in a fabric that could easily be worn dress up and down.
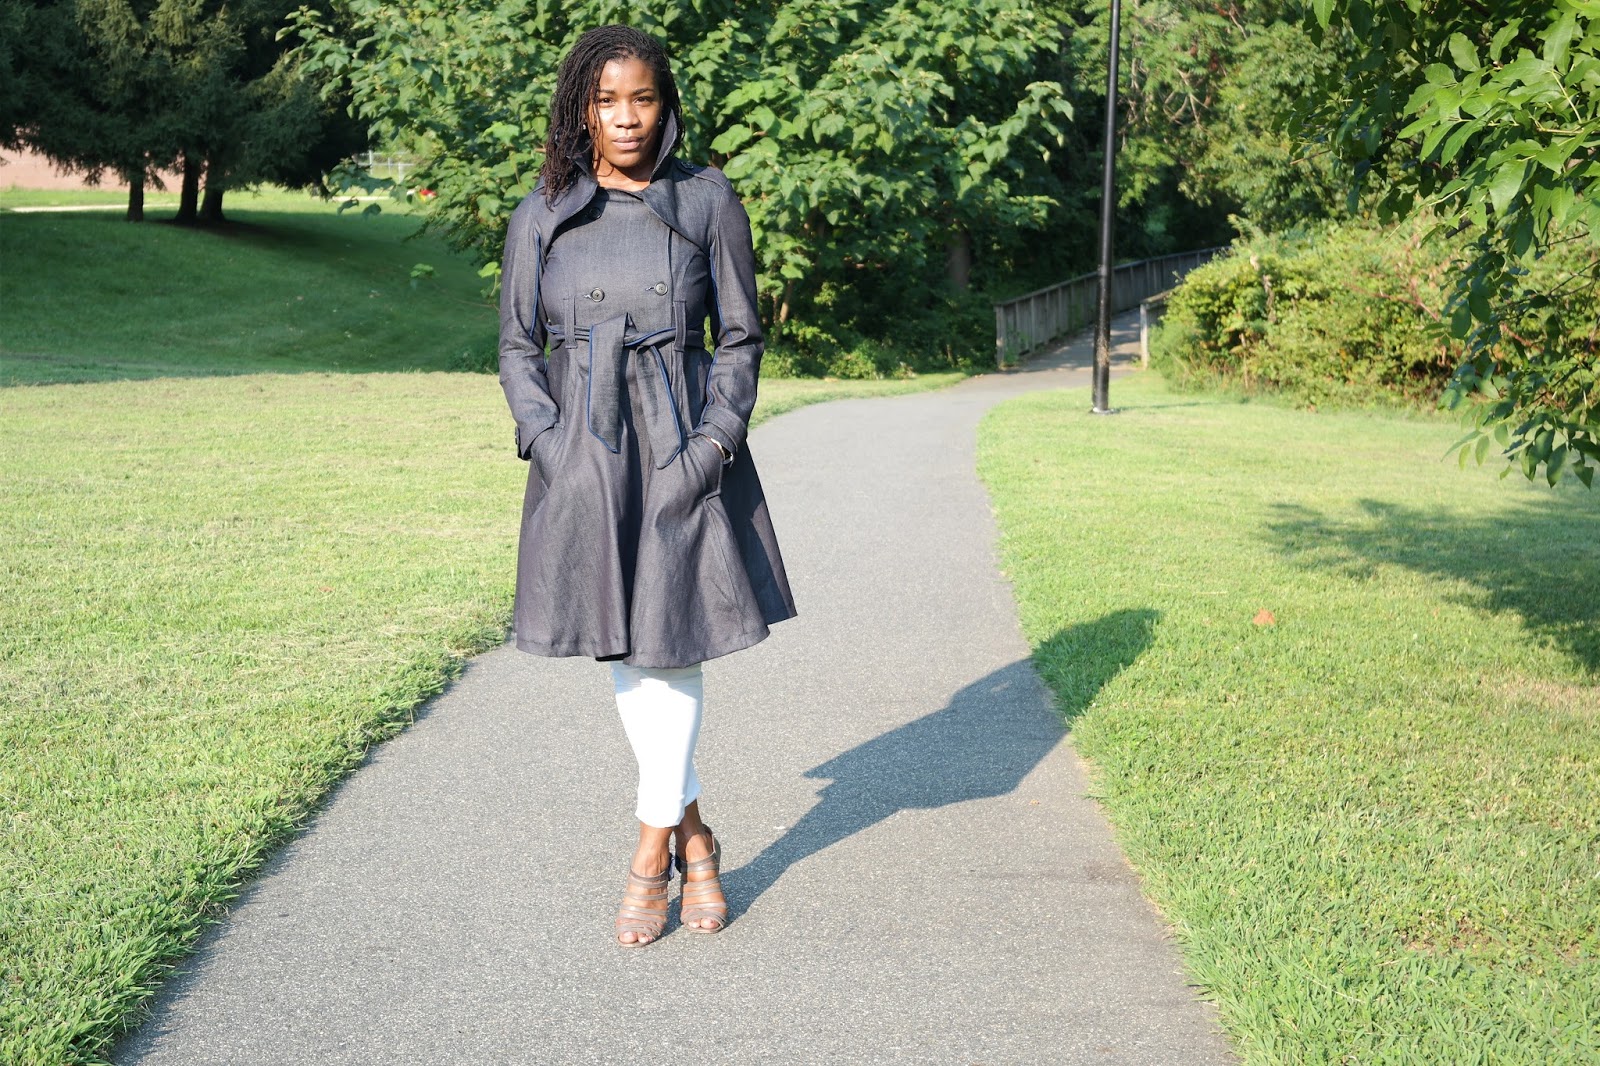
The denim fabric I used came from Fabric Mart, but isn't available anymore. (But you can find more denim HERE). I had to reach out to the wonderful Julie of Fabric Mart Fabrics for her expertise on the correct weight to use. I've never made a trench before and the only one I own was a weight I could not put my finger on. The options were this and a heavy weight. Thanks to Julie, I received the lighter of the two and it was the best option THANKS!!!
This pattern came with a whopping 61 pages whew! I put all the pieces together and got to work immediately. The instructions were easy to follow and the fabric was a dream to sew. I made the following adjustments to accomplish this look.
First, I extended the front, back and side pieces (the fabric is 58 inches wide, 29 folded. The kick out on the front and back extended to the end of my fabric (folded) to give me the most drape possible. The side piece was extended on both sides as well to the full extent of the fabric. These adjustments were made from the lower belt loop line outwards. Because of this adjustments I had pointy seams which needed to be cut down to one inch below the front faced pieces as the pattern was intended.


I plan on sewing this pattern again. The next time, I will add more piping for sure. The accent was a hit with myself as well as others I shared it with. You can never go wrong with piping in a garment like this!
Overall, the pattern was a breeze and I was extremely happy with the bias finishes as well. I think I will incorporate these types of garments and others where lining is not used. I felt I choose very wisely selecting this Sewaholic pattern and look forward to attempting many more in the future!


Side note: There is nothing, and I mean NOTHING ok about taking coat pictures in 95 degree weather LOL! I am sure I shaved a couple days off of my life! But hey, its better to be prepared than not!
I hope you are inspired with the alterations and challenge yourself to creating outside of the patterns in your future projects... Until next time.... MUAH
I must say, at a younger age, I always thought trench coats were my mothers coat. Honestly, I just never knew how to style them correctly ha ha!
My vision for this post was found on Pinterest where I located a skirted trench coat. The original trench coat I used for inspiration was made out of a suiting fabric, but I knew I wanted this coat to be in a fabric that could easily be worn dress up and down.
The denim fabric I used came from Fabric Mart, but isn't available anymore. (But you can find more denim HERE). I had to reach out to the wonderful Julie of Fabric Mart Fabrics for her expertise on the correct weight to use. I've never made a trench before and the only one I own was a weight I could not put my finger on. The options were this and a heavy weight. Thanks to Julie, I received the lighter of the two and it was the best option THANKS!!!
This pattern came with a whopping 61 pages whew! I put all the pieces together and got to work immediately. The instructions were easy to follow and the fabric was a dream to sew. I made the following adjustments to accomplish this look.
First, I extended the front, back and side pieces (the fabric is 58 inches wide, 29 folded. The kick out on the front and back extended to the end of my fabric (folded) to give me the most drape possible. The side piece was extended on both sides as well to the full extent of the fabric. These adjustments were made from the lower belt loop line outwards. Because of this adjustments I had pointy seams which needed to be cut down to one inch below the front faced pieces as the pattern was intended.


I added piping to both of the sleeve seams, as well as the belt for a pop of color. This was the first time I've used piping in this way.


I put all of the buttons (6) on the inside of the front piece and raised the belt loops to exaggerate the semi skirted bottom. All in all, I loved it and am uber proud of myself!
Overall, the pattern was a breeze and I was extremely happy with the bias finishes as well. I think I will incorporate these types of garments and others where lining is not used. I felt I choose very wisely selecting this Sewaholic pattern and look forward to attempting many more in the future!


Side note: There is nothing, and I mean NOTHING ok about taking coat pictures in 95 degree weather LOL! I am sure I shaved a couple days off of my life! But hey, its better to be prepared than not!
I hope you are inspired with the alterations and challenge yourself to creating outside of the patterns in your future projects... Until next time.... MUAH
Jenese
This is a fabulous interpretation of the classic trench coat. Love the added skirt volume!
ReplyDeleteThanks Kim! I love it and can't wait to use the pattern again!
DeleteLove it. Good job!
ReplyDeleteLove your modifications! such a great fit!
ReplyDeleteYou have amazing sewing skills!
ReplyDelete