
Made by a Fabricista's Daughter: Burgundy Bridesmaid Dress


Hello Fabric Mart Fabricista Readers! To begin this post, I would like to introduce myself. My name is Serena and I am an advanced beginner in the sewing arena. I learned everything I know about sewing from my mom, who always provides excellent advice (whether I listen the first time or not). My mom is Ann (here's her blog) and I am guest posting for her this month.

Two of my favorite people had their wedding earlier this month. I was extremely excited and honored to be asked to be in their wedding party as a bridesmaid. They generously allowed a bring your own outfit with minimal criteria for the ladies - wine/burgundy in color, knee length. After looking through some patterns with my mom we found Vogue Misses Princess Seam V Neck Dress which had a flattering fit and flare style, had pockets, and could easily look dressy.

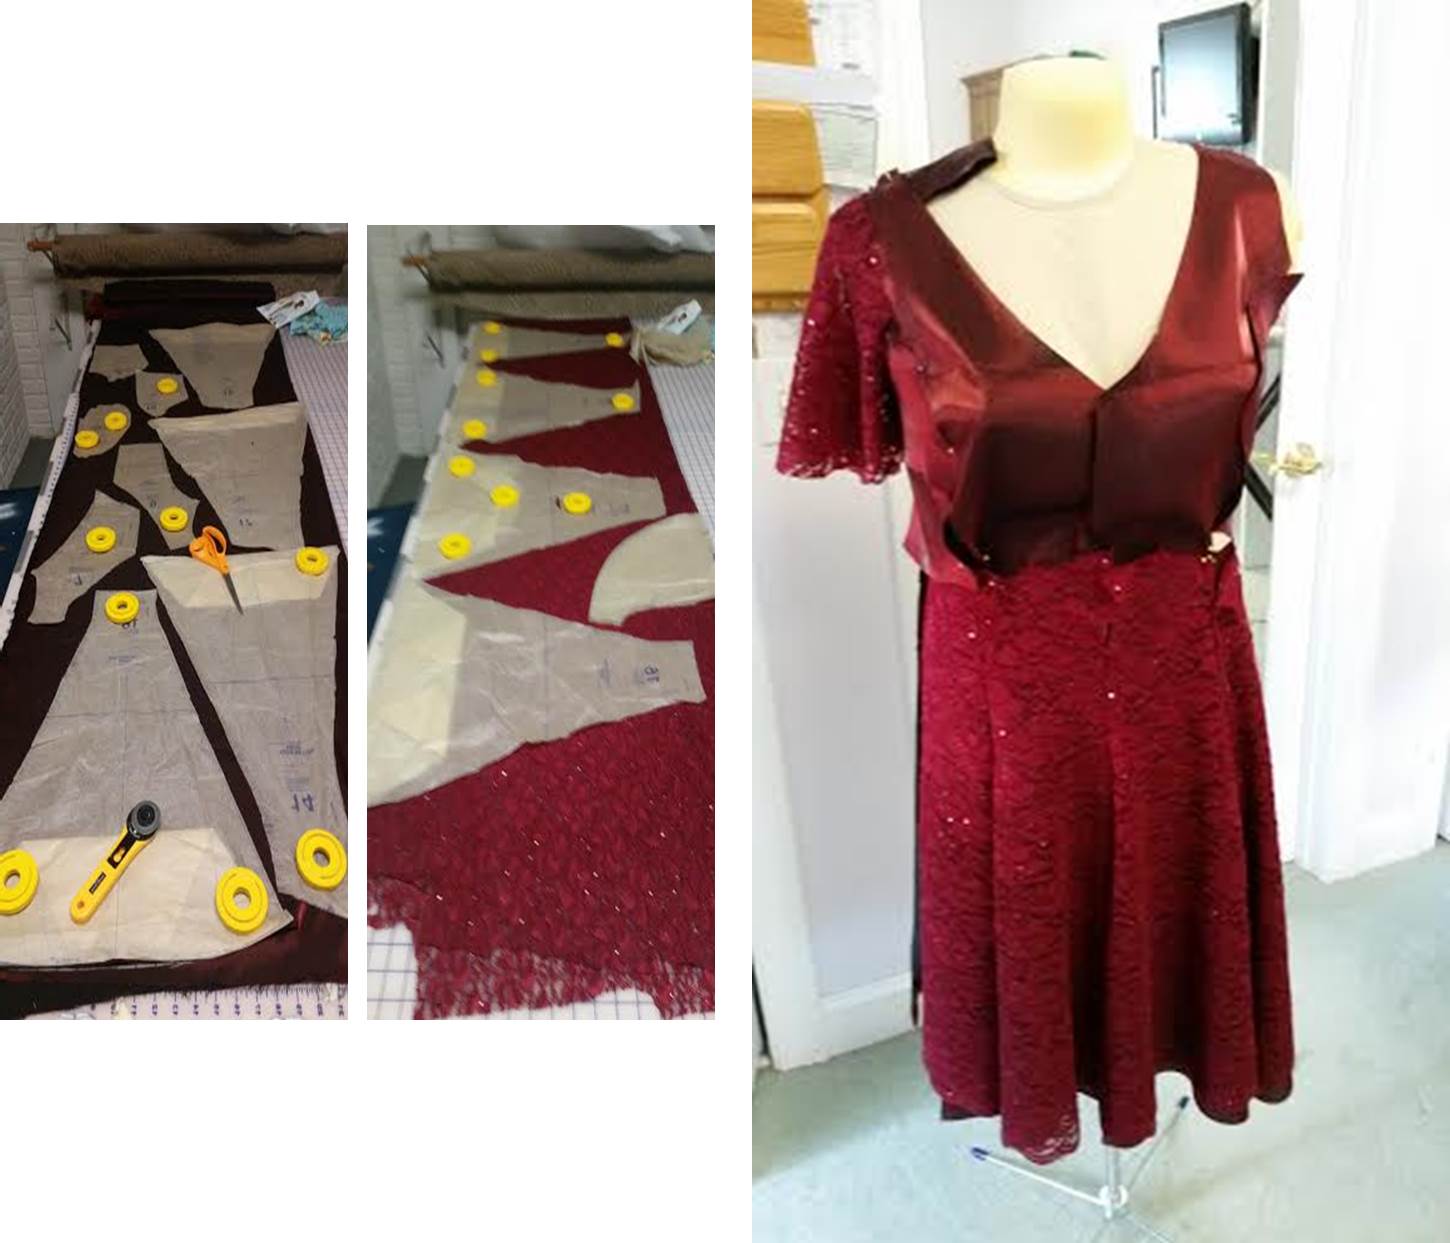
To fit the color criteria we looked to Fabric Mart. We found a beautiful burgundy satin and dark red lace with sequins (no longer available). I've been wanting to try to do a lace overlay for a few months now and this was a great opportunity. After a thinking through a couple of layout options, I decided to only do the overlay on the skirt, make the bodice with only satin, and tie it together with lace for the sleeves.


After ordering the fabric, it was time to make sure the fit was right before cutting the final fabric. I looked to my mom's stash and found a bright floral pique with an amazing texture. She had received this fabric in a mystery bundle from Fabric Mart. After some fitting adjustments on the bodice I was very happy with the muslin. As a general rule I cut the shoulders one to two sizes smaller than the bodice - for this pattern it still resulted in very wide set arms.


Happy with the the plan moving forward - it was time to cut! For the lace I wanted to have the scalloped edge feature on the skirt and adjusted the layout accordingly. Prior to sewing the final dress, I added all the cut pieces to a dressform to make sure it has the look I wanted, decide whether or not to include the sleeves, and get the approval from the bride on the design.


One unique challenge for this dress was putting in the pockets without having them visible through the lace. This was challenging because the lace and the lining needed to be free of each other at the bottom to allow a hem on the lining. In order to do this, I stay stitched the lace and lining together, leaving roughly 5 inches free at the bottom. From there, I added the pocket to be underneath both the lace and lining. I was pleased with the finished look using this technique.


A new technique I learned while making this dress was how to hem a very large skirt! As a procrastinator, I decided to finish the hem the day before the wedding. My gift to the bride and groom was to make their wedding cake (also made the day before the wedding) so the hem got pushed back to midnight. At that point it "looked good enough" and I hand stitched every few inches with the full intention of coming back and fixing it at a later time. The day of the wedding alongside a pair of comfy shoes, I carried a spare pair of sewing scissors, thread, and a needle just in case any pieces got loose in the hem for a quick fix.


After the wedding I came back, undid the stitching, and put the dress on the dressform. Using a stick marked with a height relative to the ground I followed through to pin across the full skirt. This worked really well to get an even hem.


Finally it was time go for a photo shoot! My mom and I went to an old train station (now occupied by a much loved BBQ restaurant). We really liked the contrast of the rustic backdrop compared to the bright and upscale dress. Below are a couple of my favorites!


Additionally, I would like to share a photo of the cakes I made, and a picture of the couple from their big day! The cake is an almond flavored white cake, with an amaretto soaking and a fresh lemon curd. The cake toppers are an homage to their shared love of science mimicking elements from the periodic table, made by the bride. Both are PhD candidates in the sciences at University of Chicago. Here is the couple standing by Lake Michigan in Chicago's Hyde Park. Congratulations Ana and Emre!!!


Inspired by writing this blog post I've decided to start my own blog - That's Sew Serena. Happy summer sewing!

Comments

  1. Lovely dress. You look beautiful in it. And the cakes!

    ReplyDelete
  2. This was truly a very tricky dress to make, and you did a beautiful job with it! I love the cotton pique version as well.

    ReplyDelete
  3. All i can say is awesome!The dress and the cakes was very nice.

    ReplyDelete

Post a Comment

Thanks for leaving a comment! All comments are reviewed before posting to help us eliminate spam. Your comment will be posted within 24 hours.

Popular Posts You Might Like

Made By A Fabricista: Valentine’s Day Cozy Lounge Set

What comes first: the pattern or the fabric? How do you make your sewing plans? Throughout the month of January, my social media feeds were flooded by fabulous sewists sharing sewing resolutions and goals, and designing thoughtful plans for their 2025 makes.  While I am a big planner in my day-to-day life, when it comes to my creative hobby, I am much more spontaneous. I find that fabric design and texture often inspires me most so I typically look for fabulous prints or bold colors and let the fabric tell me what it wants to become. As I turned my attention to my first-ever (!) Fabricista make, I wanted something to get my creative juices flowing. One evening, Fabric Mart shared an Instagram story that highlighted their Dusty Mauve Sweatshirt Fleece . It had a nice stretch, was fleece-backed, and was a muted baby pink that spoke to me. It was soft and feminine, perfect for a cozy day or night by the fire. I immediately knew I wanted to make a cute pair of sweatpants for a fun Vale...

Made by a Fabricista: Fun Fabrics

  I am so happy to still be a part of the Fabricista Blogger Team. I joined in the middle of the pandemic and have really enjoyed myself as a blogger.  Fabric Mart has truly been my go to place for shopping for fabulous fabrics that reflect my style.  I love that I get to shop deadstock fabric that will help give fabrics additional lifespan and fabric is typically limited quantities so you will be part of the few with that fabric.  As someone who is big on individuality this is such a plus for me.   Can we also talk about the great sales that Fabric Mart runs?  I literally stalk the site daily to find new fabrics and catch the featured sales.  During one of my daily visits to the site I came across this gorgeous  corduroy fabric  with a unique animal print.  At the time I wasn’t really sure what I wanted to make with it but I just knew I had to use this for my next featured make.  I was also able to get matching thread, another...

Made By A Fabricista: Sewing + Running

It’s not every day that I get to mix two of my favorite hobbies. Especially when one hobby is sewing and the other is running. You can’t sew and run at the same time, but, you can go running in something that you sewed! With this realization, I embarked on my first hobby-merging adventure.  We’ve had some frigid temperatures in Pennsylvania this winter. Since I’m an outside, stroller-pushing runner, I bundle up my son and myself before I hit the road. The temperature feels 20 degrees warmer for outside runners than the outside air. For the children being pushed in the stroller though, it feels about 20 degrees colder.  With these differences in temperature for each of us, layering is the only thing that ensures that we both stay perfectly warm. My running wardrobe has been lacking a warm top layer. My son’s wardrobe would also benefit from having another warm layer, so I knew pullovers were what I should make.  Inspired by a name-brand ¼ button-down fleece pullover I saw,...