

Do you have fabrics that simply make you happy? For me, it depends on the season and the colors. In the fall and winter, I simply love plaid. To me they speak of giving warmth, are cozy, and the colors are fun. And, if you have seen some of my makes before, I gravitate towards red, black and white. This plaid was the perfect choice. Plus that turquoise blue is awesome!

It takes a little bit of practice to match plaids at critical points such as the center front, center back, shoulders, arms, etc. Here are some tips I have found from trial and error.

Depending on the style of your garment, it is super important the center front matches. I always purchase extra fabric for matching plaids. You just never know when you might have a mishap...

When working with plaids, find out whether your plaid is even or uneven. If you fold back a corner to make a 45 degree angle, you will know. If the pattern matches, it is even, if it looks like mine, it is uneven.

I just love using vintage sewing books for reference on sewing fabrics that aren't on my sewing table daily. This one is great for an explanation on how to sew plaid fabrics. You must match the pattern within the seam lines, not the pattern edges. It will make a difference, trust me. :)

What you can see here is that I cut my plaids in a single layer. I draw pencil lines on the pattern pieces where the designs need to match. In this case, I drew where the bold white lines intersected with a pencil so it is super hard to see in this photo.

You'll want to make sure your seam lines match a critical points such as the shoulder seams, center front and back, down the sleeves, etc. Sometimes I sort of 'cheat' and cut pieces on the bias to add a bit of drama and so that I don't have to have everything match.

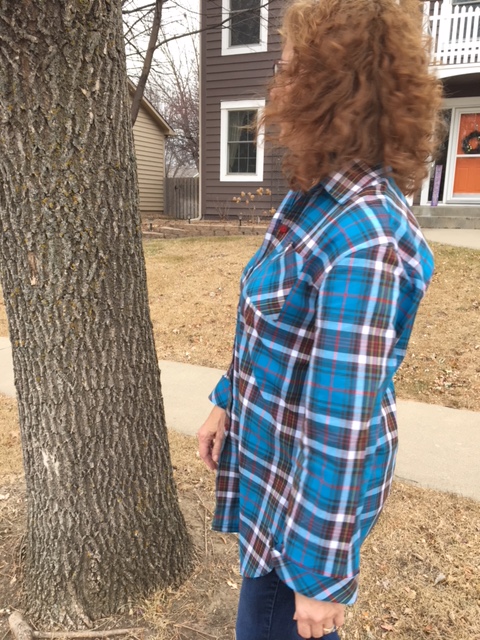
My collar and center of the back yoke match, along with the shoulder seams, side seams, and center front.

Is that little loop a fun detail? I had to add it. I just had to.

My chosen fabric is a cotton shirting and since it is rather lightweight, to give the hem line just a bit of heft to help it hang properly, I cut bias strips to add to the hemline. I turned it to the inside and top-stitched on the outside.

On the inside cuff, I trimmed away the sleeve seam allowance, turned in the cuff allowance and top-stitched to finish off that seam. I like how nice can clean the finish is.

Here is an area where I 'cheated' on matching the plaid. I very simply cut the pocket on the bias. I like the visual interest it gives.
Down the center sleeve, when I first laid out the pattern and decided which seam was dominate, this theme resonated throughout the garment. That dominate part of the pattern became the center of the sleeve as well. See my bias cut cuffs? They go with the bias cut pocket.

Since this has a back yoke and a pleat, it isn't possible to have the pattern match everywhere. I made sure my centers matched and went from there. I did however make sure my side seams matched along with the sleeve pattern.

I decided to highlight the red in the fabric with little red buttons.

I really, really love this top. I had a lot of fun putting it together.

It is always a challenge taking photos outdoors in South Dakota. The wind just blows and blows.
Thanks for reading!
Sue from Ilove2sew!
Love your plaid shirt!
ReplyDeleteThank you!
DeleteGreat job Sue! I love that color combination on you, and your plaid placement is perfect. And thanks for the tip on matching the plaid on the seamline, not the edges!
ReplyDeleteThanks Ann! :)
DeleteWow, congratulations on your happy, well-made garment sewn from a fabric of style and colors that shows you in an outstanding way! I've seen you in your self-sewn garments for years online, admired your work always and this is the one I personally like the best on you! Thanks so much for all the tips ... I look forward to sewing my own plaid garment, greatly appreciate your sharing and anticipate warmly seeing your sewing again! Lynda from Toronto, Canada
ReplyDeleteThank you so much Lynda, you made my day! :)
DeleteThanks for the great tips and reminders for sewing with plaids! I mark lines on the pattern, too, even for matching large prints. This color is especially pretty on you, and I love the idea of the bias-faced hem. Keep on sewing!
ReplyDeleteKathy in Arkansas
Thanks Kat Z! Happy sewing!
DeleteIs it best to sew plaid shirts with patterns that don't have darts or princess seams? I want to make some plaid shirts, but am stumped at how to match the plaid with shaping detail.
ReplyDeleteHi! For the first few plaid garments you make, I would use a simple, straight silhouette, like the one that I used. You can get the plaid to match at princess seams, but it is a lot of work and not something that you want to try if you aren't familiar working with plaids. Good luck!!!
DeleteWhat pattern is this?
ReplyDeleteI used Simplicity 8340.
DeleteWow ! Thank you for giving me a little push to get back into sewing .Thanks for all your tips also .I'll have to give this a try after the holidays . Thanks again Bev
ReplyDelete