

During my first Fabricista post in February 2021, I dedicated a make to the Pantone colors of the year: Illuminating (a yellow) and ultimate gray. I thought it would be fun to continue the tradition and dedicate this February’s make to the 2022 Color of the Year: Very Peri. This marks the first time Pantone has created a color for their Color of the Year series. Blue with violet-red undertones, Very Peri “displays a spritely, joyous attitude and dynamic presence that encourages courageous creativity and imaginative expressions”.

I’ve also been inspired by the recent trend of making quilt coats, so I thought I’d pair the two trends and make my own quilted coat. I’ve always considered myself firmly on team garment sewing, but I thought this was a great opportunity to dabble in quilting. I scoured the Fabric Mart website for ideas and found a really beautiful grape-colored linen which, in my head, was the closest I could get to Very Peri. It’s a yarn-dyed chambray linen and very lightweight, so for the backing, I thought I’d use a heavier weight linen. Pantone creates color palettes for all their colors of the year, and I referenced their Star of the Show palette to pair it with a neutral gray. I went with a midweight gray and off-white printed, rather than dyed, linen. Both of these linens are still available! For the batting, I decided to use a layer of cotton flannel that I have many yards of in the spirit of using what you have.
This time around, I also used Fabric Mart’s thread matching service, which is an absolutely amazing offering. The thread colors matched perfectly! They almost blend too well, but I love how the nearly-invisible thread let’s the texture of the linen do the talking. I highly recommend using their thread-match service, especially if you are picking up fabric with unique colors. They make it so easy.
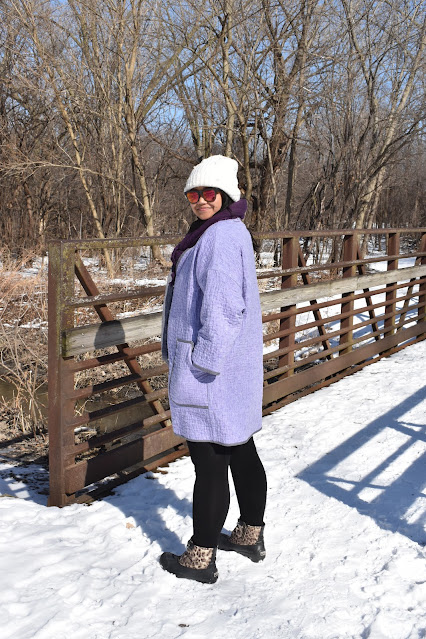
I went with the Grainger Coat from Muna and Broad, after seeing their co-founder Leila make a chic gray version. Muna and Broad is a modern pattern company that designs for plus-sized bodies. Their sizing ranges from 40-64” bust and 41.5-71.5” hip, and if their size range is too small for you, they will grade your pattern up to your size at no additional cost. At a 42” bust and 45” hip, I fall into their size B and made the pattern accordingly. The coat is designed to be oversized, and I think next time I make the pattern, I’ll try out the size A to see how I like it.
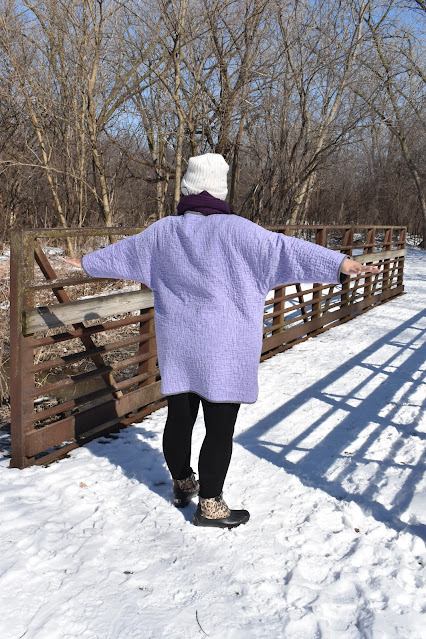
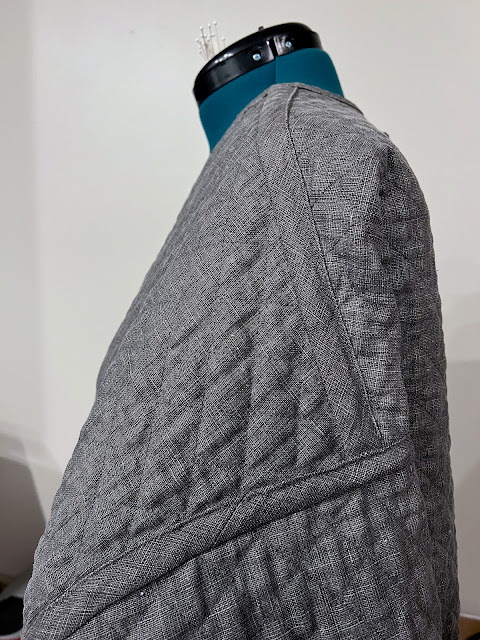
Since I had never quilted any fabric before, I thought I’d try out one-inch squares turned into a diamond shape. Next time, I’ll go with a different pattern or sized squares. I struggled a bit with quilting on my machine because it’s not very large. Even with rolling the fabric, it took considerable effort to manipulate the pieces to get straight and even lines. The linen itself was really easy to cut and sew, and I used spray glue for basting. I also decided to quilt the pockets with straight on squares for a little contrast.

Even though I hit all of my chalked out lines, I felt like the quilting looked off, which I could accept for a first try. On a whim, after I finished quilting, but before I cut out the other pattern pieces, I threw the quilted fabric in the wash and dried it on hot and the crinkling of the linen instantly made it one of my favorite pieces to date.
The pattern provides instructions for you if you are self-quilting fabric (as opposed to buying pre-quilted), and tells you to cut out pieces 1” larger than the pattern pieces before you quilt. I was less than precise when I cut out my pieces to quilt, but I know my margins were more than 1” and, in some places, at least 2”. However, when I threw the pieces into the dryer and achieved the crinkled look, my fabric had shrunk to just about or slightly smaller than the pattern pieces. Oops! To accommodate this, I shortened the jacket 1” and I was good to go.
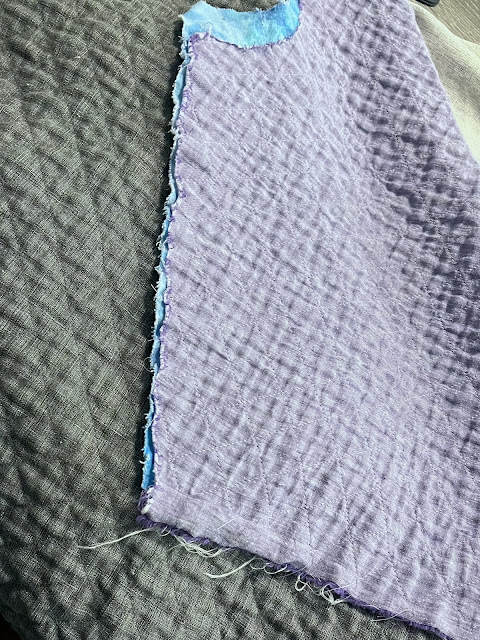
I used the sturdier gray linen to create bias binding.
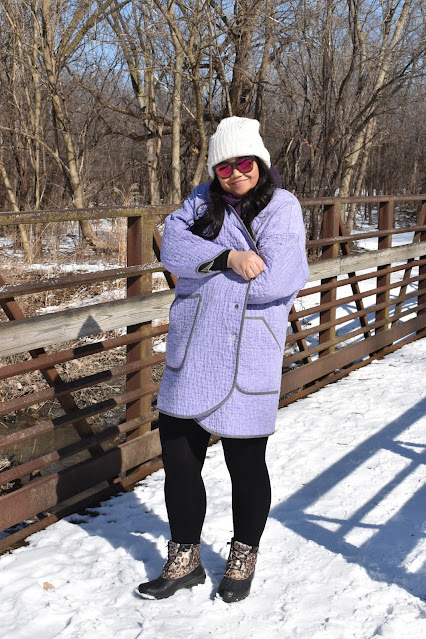
I used half-inch double fold binding to bind the edges of the coat and pockets for contrast, and one inch single fold to bind all of the seams in order to create…
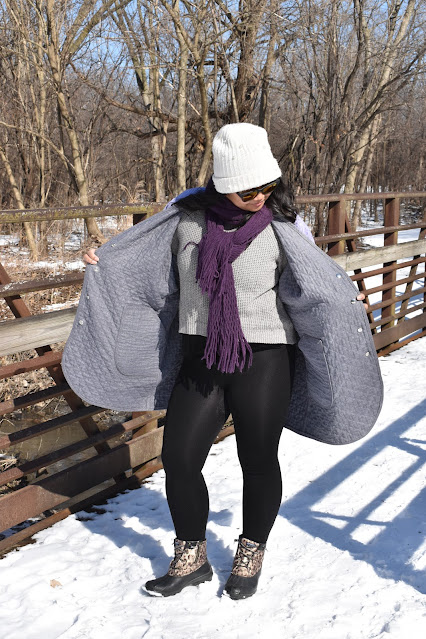
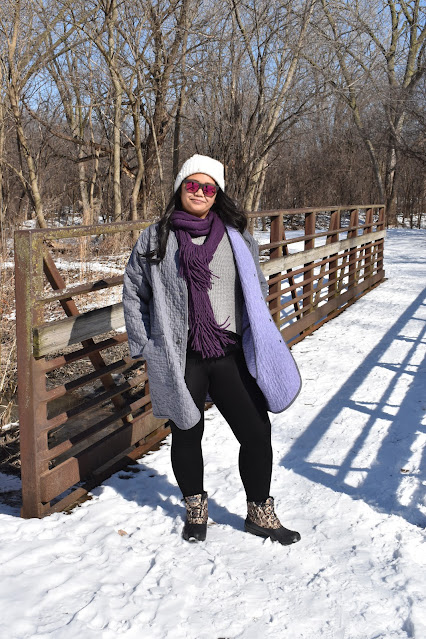
Tada! A completely reversible coat! There weren’t specific instructions on how to create a reversible coat, so I just winged it with what I thought would work well.
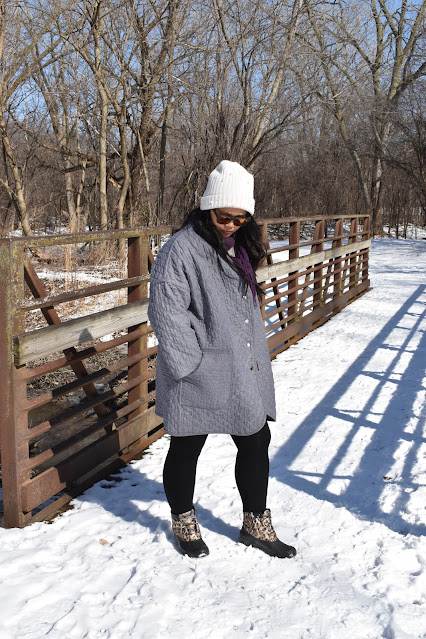
Initially, I imagined this would be a nice lightweight coat for spring, but on the day we took these photos, it was about 35 degrees and I was perfectly comfortable. Because its oversized, I imagine being able to wear this with several well chosen layers for colder weather, and well into spring on its own.
This is already shaping up to be my most well-prized Fabricista look to date! Have you ever made a quilt coat? Share any lessons you learned while making yours in the comments below! I’d love to hear how it went for you.
Unfortunately Fabric Mart Fabrics sell out quickly!
You can find similar fabrics in the following category LINEN.
Wow! Beautiful work! It looks fantastic 😊!!!
ReplyDeleteNicely done!
ReplyDeleteLooks go cozy and cute! I am also hoping to make a quilt coat, hopefully out of a gray and dust rose linen, for a very similar look. Thanks for adding the line about the bias tape! I want to make sure I have enough, but that it’s not too chunky. Enjoy your coat in the fall!
ReplyDelete