Made By A Fabricista: A Wool Pinafore for Winter

Hello exciting wintry weather! Brrr, though. For my December post, I wanted to sew something more unusual for me, something outside my wide leg pants and big boxy sweaters, and this pinafore combination is exactly that. I really like the layering aspect and how easily one could switch up the look based on the top worn underneath, and how this pinafore pattern could easily work for all seasons based on fabric choice and possibly adding leggings.

The new Love Notions Pianoforte Jumper in this incredibly charming polka dot wool blend suiting is just right. I wanted wool for warmth, and the sweet print just sent me. Of course a pinafore looks SO darling in dots. The Pianoforte is a slightly-cocoon shaped dress with princess seams and some large and handy front inset pockets. There is a zip-front option, but I went with the pullover plain front. I love the vintagey, sort of old-timey vibes of this style, and categorize this one under dopamine dressing. 


Because the wool is on the heavier side, I chose a gorgeous and drapey cotton twill shirting in solid black for the bodice facings as well as the pocket lining. Here’s a glimpse of the inner guts of my pinafore so you can see them in action. 


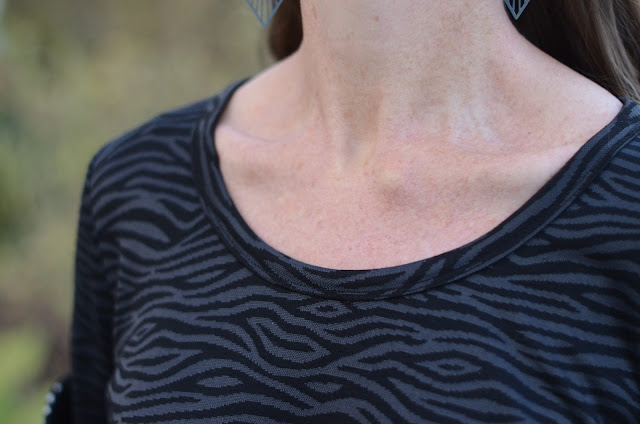
For the layered shirt underneath, I loved the idea of a different print. Go bold or go home, right? Mixing in this subtle animal design that also features black felt like a fun choice that wasn’t over the top, but was still a little more unexpected. 


My first top is a Twig & Tale Scenic Top with the Long Sleeves option. This pattern is intended for woven fabric, but I thought the Scenic would be a great slimmer tee option for layering because this fabric has almost no vertical stretch and I didn’t have luck coming up with a more fitted knit pattern that didn’t require that very stretch. So here we are with rare bust darts on a knit, and this fit is great! I sewed a size C and made no size adjustments. 

I created my own neckband binding piece 2” wide and about 90% of the length, which is longer  than I typically cut. This jacquard double knit has a pretty intense stretch recovery so I didn’t want it to be too short and create drag lines. I sewed the right side of the band piece to the wrong side of the neckline and flipped it over to the right side and folded it under just like I would a woven binding, and then topstitched the edge. Lovely! 

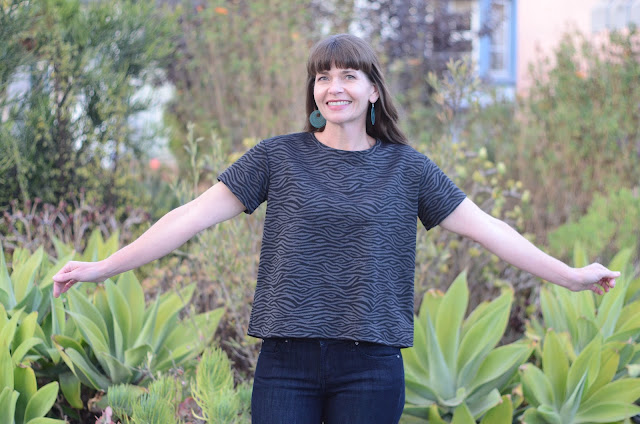
You know me, of course I’m going to make a bonus top if at all possible! This t-shirt is a Chalk & Notch Pixie Tee, and I sewed a size 2. 


I removed two inches from the View A bodice length since I skipped the tie finish. I was just aiming for a boxy tee that would style easily with jeans or wide pants. I look forward to wearing this tee come spring! I think a muted animal print neutral is perfect for keeping things interesting no matter what it’s worn with. 


Happy sewing!

KATIE  @kak513

Comments

  1. Love the jumper look. Resembles fashions I used to wear with tights, dress shoes, and boots. So easy and simple.

    ReplyDelete
  2. Love the pinafore.

    ReplyDelete

Post a Comment

Thanks for leaving a comment! All comments are reviewed before posting to help us eliminate spam. Your comment will be posted within 24 hours.

Popular Posts You Might Like

Made By A Fabricista: Celebrating warm weather with Spring sewing!

Hi sewing friends! I don’t know about you but boy, was winter cold and dreary this year! The weather here in the Philadelphia area has been slowly improving, but Spring sure did take her sweet old time to arrive. So by April, I was definitely in the headspace of needing to sew up things that were either bright and cheery or meant for the warmer weather I am very much craving right now. I recently purchased a few SewBexx Patterns so I took them on a test run to create some Spring makes. First on my list was to make a top using this absolutely gorgeous ITY fabric I picked up last year. I had two yards which was enough for a long sleeve shirt. I chose the Olivia top, which is oversized with a drop shoulder, has multiple lengths and a split hem. I think the pattern is intended for heavier fabrics but I was envisioning how lovely this top would look with the drape of ITY knit fabric, and it did not disappoint. It came together for me quickly and was a straight forward sew…and I love the br...

Made By A Fabricista | Chasing Time: My White Rabbit-Inspired Look for Atlanta Frocktails

For this year’s Atlanta Frocktails, I found myself captivated by a character who’s been quietly tugging at my imagination for years—the White Rabbit from Alice in Wonderland. There’s something so relatable about his frantic energy, always checking the time, always running late. While he’s worried about being on time, I’m usually calculating how late I can be and still technically arrive on time. Spoiler: I’m often wrong. It’s a cycle of procrastination and anxiety that I know all too well. So when I imagined my look for Frocktails, I thought—why not honor the White Rabbit? After all, time has been chasing me too. But this look isn’t just about Wonderland whimsy. It’s also deeply inspired by this year’s Met Gala theme, Tailored for You, which includes a focus on Black Dandyism—a celebration of Black elegance, intellect, and expressive style. I’ve been obsessed with this theme since it was announced. As a Black creative, I find it powerful and moving to see style used as a way to reclaim...

Made By A Fabricista: Getting into the Spirit of Summer

I'm not gonna lie y'all, I had a completely different project I wanted to do, but that's gonna take more time, and I wanted something cute, comfy and fun to wear for my birthday on the 19th. When I saw this goldenrod & off white linen jacquard , I thought it looked a bit like the design on a Koroks body, especially Makar from The Legend of Zelda: Wind Waker! I started with the bodice from the free Elderberry dress pattern from Mood, but deviated for the skirt, it felt a little plain of a design, and I had scraps of a Korok fabric that I knew would be a nice accent with some cut out pockets. I've made these pockets once before, deciding the cut out was based on aligning with the seam on the bodice for how far in, and as for how low depended on where I wanted the pouch of the pocket to start. From there I cut the visible part of the pocket, making sure to match the curve of the waist and following the line of the side seams of the skirt, as well as cutting a facing to...