

This week's blog is by Julie, the moderator of the Fabricistas blog.

I love combining different fabrics when I make t-shirts. And many of the ideas I had for this event were to combine lace and knit for a boho chic look.
For this post, I'm going to share with you how to turn a basic t-shirt pattern into a high-low hem and loose fitting lace back.

I used Pamela's Patterns Perfect T-shirt. I know it fits me well when made as is and I've pattern hacked it a number of times with success. Pull out the front and back bodice pieces and let's get started!

Front Bodice
1) Starting with the front bodice piece, trace the top portion on to pattern paper. Stop tracing just after the dart. (If you have one on your pattern.) If you don't, then trace about 2-3" from the top of the underarm seam.

2) At the base of the front piece, make a mark 1/2" from the edge of the pattern. Using a ruler, grade in from the 1/2" mark on the bottom edge, to the mark near the dart where you stopped tracing. This will make the shirt have a little less shape, creating a looser, more casual look on the front. I didn't want the hemline to be curved up, so I straightened it on the side seams.


Back Bodice
3) Making the top back pattern piece - Figure out where you would like the seam on your back. After you have that figured out, draw a line across the back bodice piece. This line should be about 2" below the underarm. This pattern piece will replicate the back bodice piece exactly, except that it will be shorter.


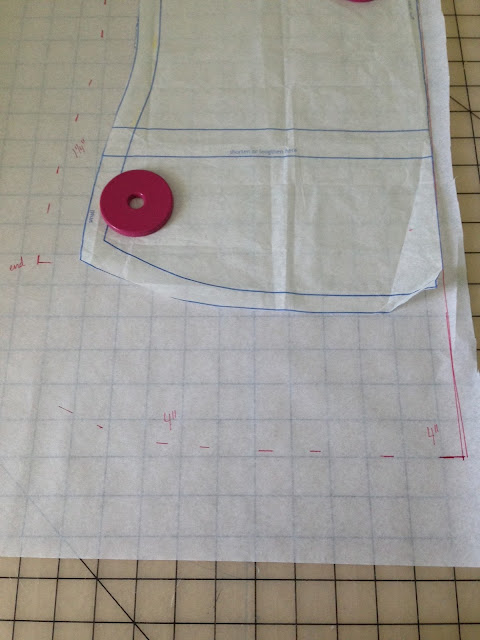
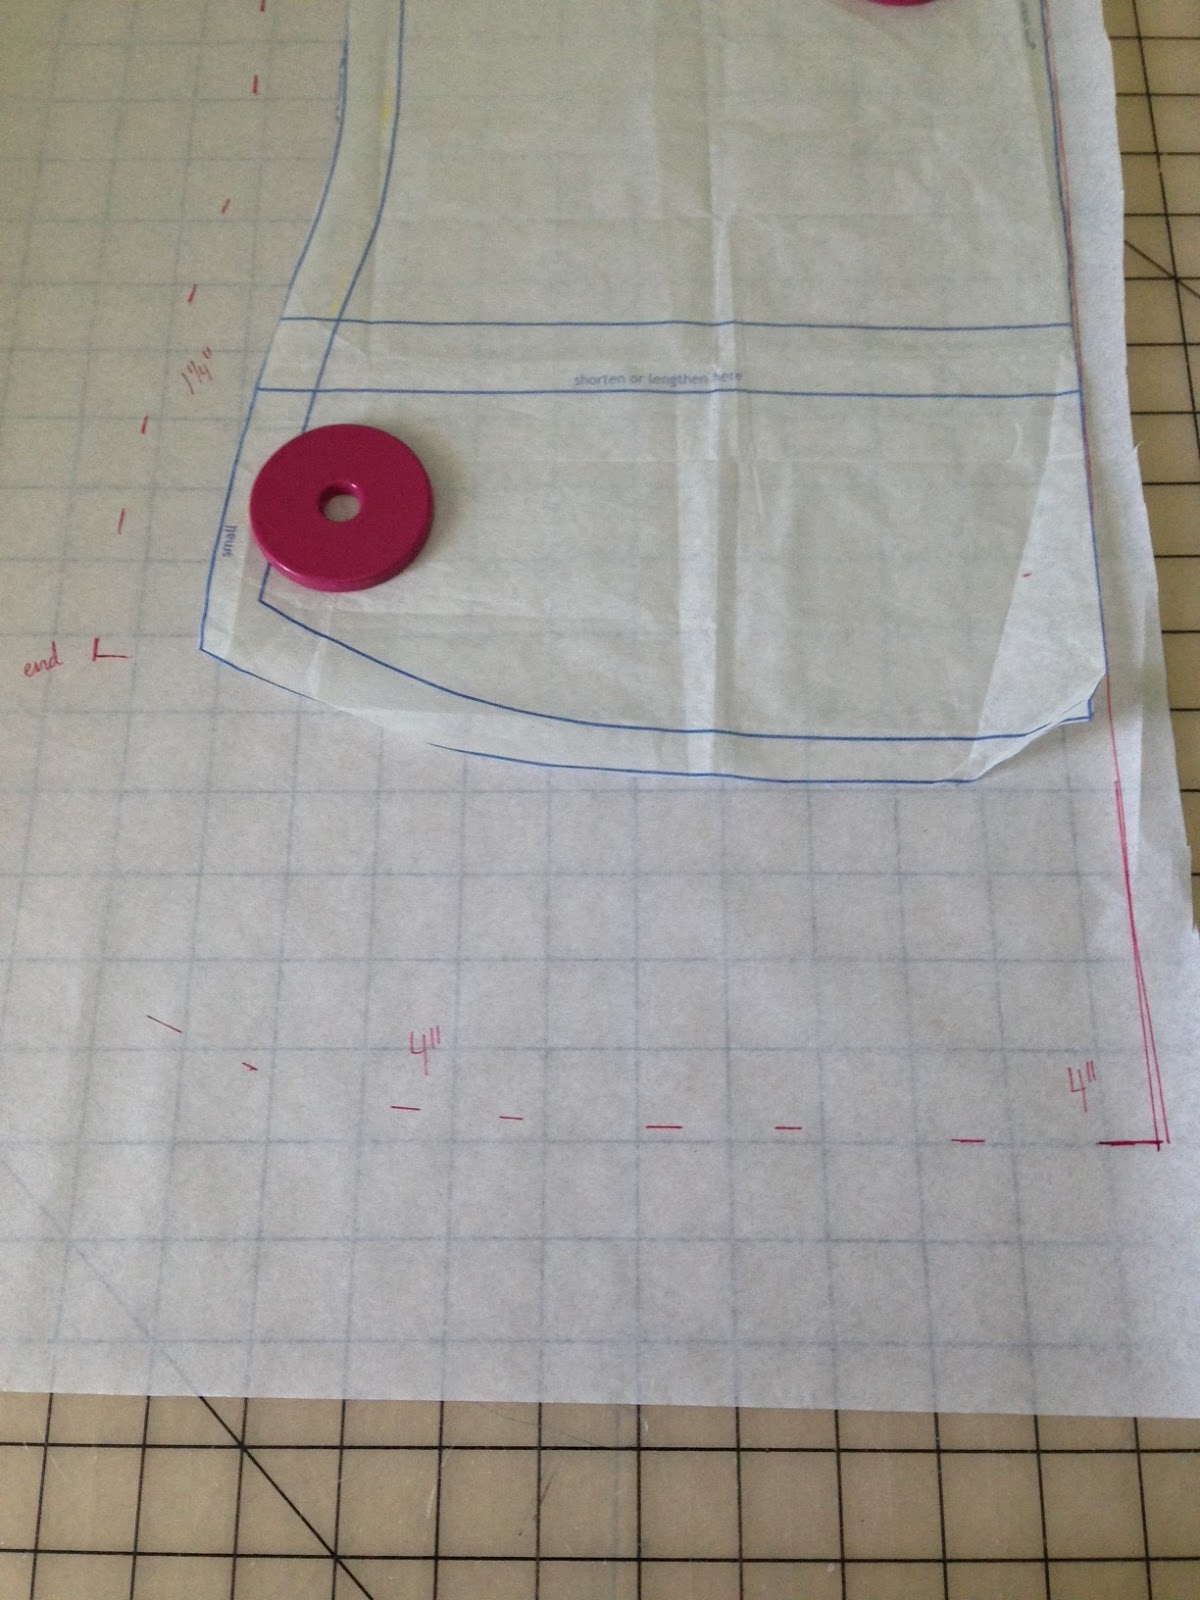
4) Making the bottom back pattern piece - Lay your pattern piece on blank pattern paper. Trace seam line onto the pattern paper. (The seam line is the line you made on the pattern paper that separates the knit top piece to the lace bottom piece.) Measure 1 1/4" from the side seam, all the way down to the hemline. This will create the loose lace back piece. Mark the end as shown in the photo. (This will help when you make the curve from the hemline to the side seam.)

5) Measure 4" from the hemline. This will make the back piece longer in the back for the high-low look.
6) Using a french curve, find a curve that you like and connect the hemline marks to the side seam marks.


When I made my back piece, I wanted there to be a fold in the back, like you see in the back of buttondown shirts. Since I was creating my own pattern, I needed to mark that fold on my pattern piece.
7) Lay the top back and bottom back pieces together. Your bottom piece should be 1 1/4" wider that the top piece.


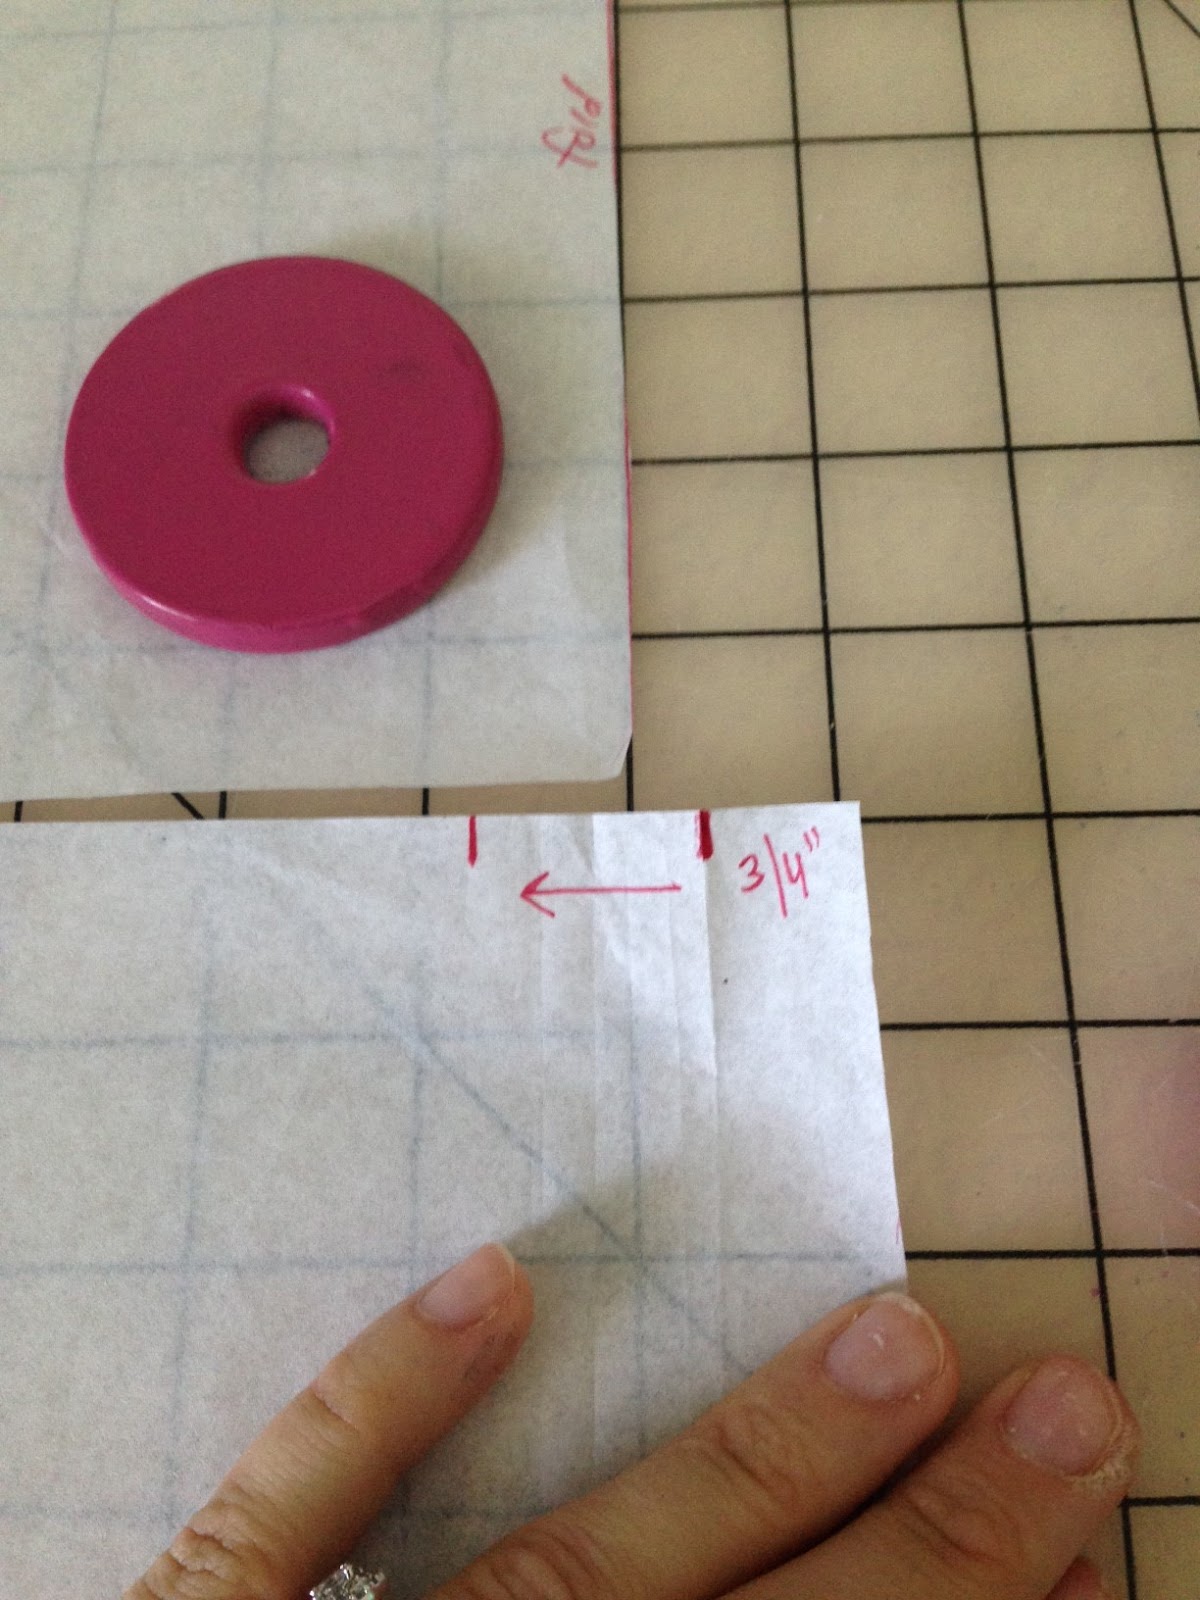
8) Make a mark 3/4" from the fold line. Fold the pattern piece so the side seams match and the pattern is laying flat on your cutting board. Make a mark where the fold was made. You will then transfer these marks to the fabric. (If you don't want to do this, you could also baste the seam on the bottom back bodice and pull the thread to gather and match the top back bodice piece.)


You've now finished the pattern making process!
Sewing Tips:
- Sewing this shirt together is really easy! Sew the top back and bottom back pieces together before sewing the rest of the shirt together per the directions. You may also need to fuse some woven stay tape to the knit portion of the back seam. It will stabilize the lace and knit seam so it doesn't stretch when sewing.

- Try the top on before you sew the hem. I ended up cutting off a little bit to make it the length I desired. You may also need to make a smoother transition from the front bodice to the back bodice.
- Try a different kind of neckline! Pamela's Patterns Perfect T-shirt comes with 3 different necklines. She also has a pattern of New Necklines and Sleeves which can be used with this pattern. I selected the v-neck, but did something a little different for the neck -- I took strips of black knit and sewed them to the neckline with the right side of neckline strips to the wrong sides of shirt. Knits do not fray so it's a quick and easy finish to a fun, casual top. When they are washed, the raw edges roll in on themselves giving it an even more interesting look.


- Other fabric options: I personally really like mixing lace with knits. But if you're not into lace, I could see this made with chiffon solids or prints. You could also use a contrasting knit fabric for some colorblocking. How would you combine fabrics for an interesting t-shirt?


Don't forget you can sew along with us at home. Share you t-shirt pattern hacks (new ideas you have and ideas that we have shared with you) on Facebook and Instagram using #FMSummerofTshirts. At the end of the summer, we will compile all the people that used the hashtag and you will be entered into a random drawing for $75 gift certificate to Fabric Mart!
If you've been following the Summer of T-shirts Event since the beginning, you know that I started this event after being inspired by the vast amount of t-shirt styles out in stores and in pattern lines. Something so simple, like a t-shirt, can be transformed into so much more.

I love combining different fabrics when I make t-shirts. And many of the ideas I had for this event were to combine lace and knit for a boho chic look.
For this post, I'm going to share with you how to turn a basic t-shirt pattern into a high-low hem and loose fitting lace back.

I used Pamela's Patterns Perfect T-shirt. I know it fits me well when made as is and I've pattern hacked it a number of times with success. Pull out the front and back bodice pieces and let's get started!

Front Bodice
1) Starting with the front bodice piece, trace the top portion on to pattern paper. Stop tracing just after the dart. (If you have one on your pattern.) If you don't, then trace about 2-3" from the top of the underarm seam.

2) At the base of the front piece, make a mark 1/2" from the edge of the pattern. Using a ruler, grade in from the 1/2" mark on the bottom edge, to the mark near the dart where you stopped tracing. This will make the shirt have a little less shape, creating a looser, more casual look on the front. I didn't want the hemline to be curved up, so I straightened it on the side seams.


Back Bodice
3) Making the top back pattern piece - Figure out where you would like the seam on your back. After you have that figured out, draw a line across the back bodice piece. This line should be about 2" below the underarm. This pattern piece will replicate the back bodice piece exactly, except that it will be shorter.


4) Making the bottom back pattern piece - Lay your pattern piece on blank pattern paper. Trace seam line onto the pattern paper. (The seam line is the line you made on the pattern paper that separates the knit top piece to the lace bottom piece.) Measure 1 1/4" from the side seam, all the way down to the hemline. This will create the loose lace back piece. Mark the end as shown in the photo. (This will help when you make the curve from the hemline to the side seam.)

5) Measure 4" from the hemline. This will make the back piece longer in the back for the high-low look.
6) Using a french curve, find a curve that you like and connect the hemline marks to the side seam marks.

Pattern Comparison:

When I made my back piece, I wanted there to be a fold in the back, like you see in the back of buttondown shirts. Since I was creating my own pattern, I needed to mark that fold on my pattern piece.
7) Lay the top back and bottom back pieces together. Your bottom piece should be 1 1/4" wider that the top piece.

Match up the side seams to see how much you have to work with.


 |
| Close-up of the back fold. |
Sewing Tips:
- Sewing this shirt together is really easy! Sew the top back and bottom back pieces together before sewing the rest of the shirt together per the directions. You may also need to fuse some woven stay tape to the knit portion of the back seam. It will stabilize the lace and knit seam so it doesn't stretch when sewing.

- Try the top on before you sew the hem. I ended up cutting off a little bit to make it the length I desired. You may also need to make a smoother transition from the front bodice to the back bodice.
- Try a different kind of neckline! Pamela's Patterns Perfect T-shirt comes with 3 different necklines. She also has a pattern of New Necklines and Sleeves which can be used with this pattern. I selected the v-neck, but did something a little different for the neck -- I took strips of black knit and sewed them to the neckline with the right side of neckline strips to the wrong sides of shirt. Knits do not fray so it's a quick and easy finish to a fun, casual top. When they are washed, the raw edges roll in on themselves giving it an even more interesting look.


- Other fabric options: I personally really like mixing lace with knits. But if you're not into lace, I could see this made with chiffon solids or prints. You could also use a contrasting knit fabric for some colorblocking. How would you combine fabrics for an interesting t-shirt?


As you can see, I am wearing a cami underneath. You could be daring a wear it bare! (I'm not that daring and do not care to share it with the world! It would also be fun to wear a different color cami to help highlight the lace even more.
Don't forget you can sew along with us at home. Share you t-shirt pattern hacks (new ideas you have and ideas that we have shared with you) on Facebook and Instagram using #FMSummerofTshirts. At the end of the summer, we will compile all the people that used the hashtag and you will be entered into a random drawing for $75 gift certificate to Fabric Mart!
What a very fun t-shirt created ... FIESTA ;)
ReplyDelete